Quick Links
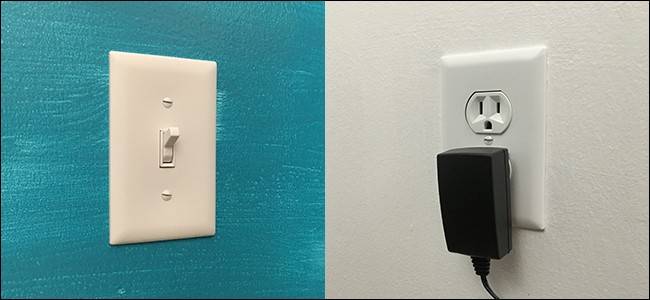
In some houses, light switches on the wall might control individual outlets, where you can plug in lamps and other lights. They're really convenient, but if you ever need to replace that outlet, there are some important things you'll need to keep in mind. It's not the same as replacing any other outlet.
Warning: This is a project for a confident DIYer. There’s no shame in getting someone else to do the actual wiring for you if you lack the skill or knowledge to do so. If you read the beginning of this article and immediately visualized how to do it based on past experience wiring switches and outlets, you’re probably good. If you opened the article not sure how exactly we were going to pull this trick off, it’s time to call in that wiring-savvy friend or electrician. Also note that it may be against the law, code, or regulations to do this without a permit, or it might void your insurance or warranty. Check your local regulations before continuing.
What You'll Need

Before you dive deep into replacing an outlet, you’ll need a few tools to do the job.
The absolute must-have tools include a flat-head screwdriver, a Phillips-head screwdriver, and some needle-nose pliers. Some optional---but very handy---tools include some combination pliers (for twisting wire together if needed), a wire stripper tool (in case you need to cut wire or strip off wire housings), and a voltage tester to make sure the wiring isn't still live.
You also need a new outlet. You don’t need to get super fancy here, and any basic outlet will do the trick---just make sure it's UL-certified by looking for this logo on the outlet when you go to buy one. This one from Leviton is a great option and it's also tamper-resistant, making it great for households with kids.
Step One: Turn Off the Power at the Breaker Box

Before you actually start taking things apart and messing with wires, you need to shut off the power to the outlet by turning off the appropriate breaker at the breaker box.
Most of the time, you’ll only need to turn off one breaker, but sometimes houses have unique wiring setups where some outlets are connected to two breakers (like my house). This actually isn’t too rare, as outlet junction boxes sometimes serve as junction boxes for other circuits passing through.
Your circuit breaker should have a diagram of what breakers control which areas of your house, but to be sure that you turned off the correct breaker, a good trick to use is to plug in a stereo and crank the music so that you can hear it from the breaker box. Flip off the breaker and if the music stopped, then you hit the right one. Again, there may be a second breaker you’ll need to flip, so it’s a good idea to test the wiring inside the outlet box before you start messing with it, as described below.
Step Two: Remove the Existing Outlet
Start by taking your flat-head screwdriver and removing the small screw in between the two receptacles.

From there, you can remove the faceplate.

Next, before you begin removing the actual outlet, take your voltage tester and stick it into the junction box to see if any of the wires are still live. If so, then you’ll need to shut off another breaker in order to kill power completely to that outlet.

Next, take your Phillips-head screwdriver and remove the two screws that hold the outlet onto the junction box.

Once removed, take your fingers and pull the outlet out of the junction box to expose more of the wires.

Take a look at how the outlet is wired up. You’ll notice that there are two black wires connected to the outlet on one side and two white wires on the other side, as well as a bare copper wire connected to a green screw. The black wires are the power (or “hot”) wires, the white wires are the neutral (or “return”) wires, and the bare copper wire is the ground wire. Electricity flows through the hot wire, entering the outlet and then into whatever is plugged into it, and then returns through the neutral wire. However, the extra black and white wires are for continuing the circuit to other areas of the house, so the outlet is also acting as a junction of sorts.
Before you disconnect the wires from the outlet, make sure that you know which wire was connected to which screw. Either remember this in your head or mark the wires with electrical tape. Next, take your Phillips-head screwdriver and unscrew the terminal screws for all of the wires---including the ground wire---and remove them from the outlet.

You can then put the old outlet off to the side and you’ll be left with five wires: two black wires, two white wires, and one ground wire. If the outlet you’re replacing is at the end of the circuit, it wouldn’t have the extra pair of black and white wires, since it doesn’t need to continue the circuit, so you’ll only have one black wire, one white wire, and one ground wire in that case.

Step Three: Break Off the Connecting Bridge Piece on the New Outlet
Grab your new outlet and locate the connecting piece that bridges the top brass-colored screw with the bottom brass-colored screw.

You'll need to break this piece off so that the two screws are independent of each other. If not, then the light switch will simply turn off the whole outlet, as well as the entire circuit following that outlet. Removing this piece means that only one of the receptacles will be powered by the light switch, leaving the other receptacle always on for other devices.
The exception here is if the outlet that's controlled by the light switch is only connected to that light switch and there aren't any other wires. If that's the case, you'll only have one black wire, one white wire, and a ground wire connected to the outlet.
To break off the connecting bridge piece, simply grab your needle-nose pliers, grab onto the connecting piece and bend it back and forth with a gentle pulling force. Eventually it'll weaken and break off. That's all there is to it!

Step Four: Install the New Outlet
Take the outlet and start by connecting the ground wire to the green screw. You can do this by curling the wire around the screw itself and tightening it. You'll do this for all of the wires. Sometimes outlets have small holes on the back that you can stick the end of the wire into and tighten the screw down, but this isn't always the case. The latter method is easier, but it’s not quite as solid of a connection as the former. Still, it should hold up just fine.

After you connect the ground, move on to connecting the two white wires to the silver screws. It doesn't really matter which white wire goes to which silver screw, since both are going to be connected together anyway.

However, it does matter which black wires connect to which brass screws, which is why you should've marked them in previous steps. This will make sure that if the top receptacle was the switched receptacle, then it will remain the same on the new outlet. It's not a huge deal if you mix them up, as it will simply switch to the bottom receptacle being the switched one---you can always switch them back.

Next, you’ll need to stuff the wires and outlet back into the junction box. Don’t be afraid to get rough with the wires and bend them back into the box as far as they’ll go, as well as pushing the outlet into the junction box with a bit of force.

With the outlet in place, use the two included screws to affix the outlet to the junction box.

Next, mount the faceplate over the outlet and secure it with the small flathead screw.
Turn the power back on and make sure that the outlet works properly by plugging in a lamp and checking to see that the light switch turns the lamp on and off. If not, try the other receptacle, as it's likely you switched around the black wires. Either way, one receptacle will be controlled by the light switch and the other receptacle will always be powered on no matter what.