Quick Links
If your house has Wi-Fi dead zones and weak spots, it may be time to ditch the old-school router setup and go with a mesh newtork like the Eero Home Wi-Fi System. Eero's multiple router setup can provide strong Wi-Fi signals to every part of your house, and is easy to set up--no complex extenders, secondary networks, or other confusing steps. Here's how to get Eero up and running and banish weak Wi-Fi signals for good.
What Is Eero?

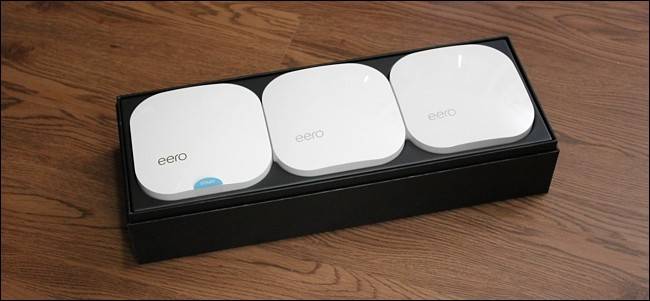
Eero calls itself a "Wi-Fi system", but it's actually nothing more than just a few routers that link together in order to blanket your house with the best Wi-Fi signal possible in every nook and cranny. You can buy them in packs of one, two, or three units, mixing and matching so you have as many as you need to cover your house---no matter how big it is.
Granted, you can do this with regular routers and Wi-Fi extenders (and for cheaper), but it comes with a host of caveats. Often, the setup process is much more complicated and requires you to dive deep into the router's settings to change things around. And, depending on your extender, you may end up with a secondary Wi-Fi network that you have to connect to when in certain parts of the house, which is a hassle.
With Eero, everything is dead simple: you just spread the units around your house, plug them into the wall, and follow a few simple steps in their app. The whole thing should take less than 15 minutes, and you'll have strong signal throughout your home.
NOTE: Setting up Eero is the same as setting up a brand new router, rather than amplifying your current Wi-Fi network. If you're using a modem/router combo, you'll want to turn off the combo unit's Wi-Fi network so they don't interfere (and so you can use the same Wi-Fi name you used before, if you want to). Alternatively, you can contact your internet provider and request a standalone modem instead of a combo unit--or, better yet, buy your own and save some money. Ideally, you should do all this before you begin setting up the Eero system.
Step One: Download the Eero App

Before you begin, you'll need to download and install the Eero app to your smartphone. It's only available on iOS and Android currently, and it's required to set everything up. Sadly, there is no desktop app at the moment.
Step Two: Create an Eero Account
Open up the app and tap on "Set up Eero".

On the next screen, you'll create an Eero account by entering in your name, phone number, and email address. Hit "Next" when you're done.

You'll then receive a verification code that will be texted to your phone number. Enter this code in and hit "Next".

You're now ready to start setting up Eero. Tap on "Start" at the bottom of the screen.

Step Three: Install the First Eero Unit
First, unplug your modem and current router. (If you have a modem/router combo, we'll just refer to it as your "modem" for the purposes of this tutorial.) The Eero app guides you through the installation, so feel free to follow along in the app as well.

Next, take the first Eero unit out of the box (marked with "Start"), along with the ethernet cable and power cable from the box as well.

Take the ethernet cable and plug one end into one of the ethernet ports on the Eero device and plug the other end into a free ethernet port on your modem.

Next, plug your modem back into the wall, and plug in the Eero unit into a free outlet.

Wait for the small LED light on the Eero unit to blink blue and then hit "Next" in the app on the "Starting up your Eero" screen.

The app will search for the Eero and, when found, will display a green checkmark. Hit "Next".

Select the room that the Eero is in. You have a large selection of options, including living room, bedroom, kitchen, and so on, but you can also choose "Custom" at the bottom and enter in your own room name.

The Eero will finish setting up and will display another green checkmark in the app. Tap "Next".

Step Four: Create the New Wi-Fi Network
The next step is to create your Wi-Fi network. As we mentioned earlier, you're creating an entirely new network here, so if you're using a modem/router combo, you'll want to turn off the combo unit's Wi-Fi network so they don't interfere (and so you can use the same Wi-Fi name you used before, if you want to).
Once you've done that, give your new Wi-Fi network a name and password. Hit "Next" when done.

Give a few moments to set it up and hit "Next" when the success screen appears.

Step Five: Install Any Additional Eero Units
After that, you'll be asked if you want to set up another Eero unit in your house. If you bought more than one, tap on "Add another Eero".

This time around is even simpler than before. All you need to do is plug the second Eero unit into an outlet. Eero suggests placing it within 40 feet of the first unit, but I placed mine all the way downstairs and it works great. Your mileage may vary, though. The app will warn you about this, so scroll through it and then hit "Next".

The setup process within the app is the same as the first Eero unit, where it will search for it and then you'll select a room that it's in. After that, you're all set, and you'll get to the screen where you can set up another Eero unit if you have one. Simply repeat the above steps to set up any further Eero units.
Once you finish setting up all your Eero units and you get to the screen where it asks you if you want to set up more, just tap on "No, I'm all set".

Tap "All done!" on the next screen.

Step Six: Update Eero if Necessary
You'll then be taken to the main status screen, where a software update will most likely be available. So tap on "Update now" at the top.

Tap on "Yes, update now" at the bottom. The update process will take 10 to 15 minutes and the network will go down during that time.

Once the update is complete, you can begin using Eero and connect to the new Wi-Fi network that it created. You will likely have to re-connect all your laptops, phones, tablets, and other devices to the new network.
The Eero app acts as the main control interface for your Wi-Fi network now. It's very similar to your router's old settings page: you can see what's connected to the network, allow guest access, and even set parental time limits on certain users.

Of course, a lot of the advanced features of a traditional router are missing, but most casual users won't need anything more than the basics that Eero provides.
If you have other devices that connect to ethernet, like smarthome hubs or a network drive, you can connect those to the ethernet ports on the back of any Eero unit. You can also use these ethernet ports to connect your Eeros units together over ethernet if your house is wired for it, making the wireless signal even better.
Right away, though, you should notice a huge difference in your Wi-Fi signal and speed once you switch to your Eero network. In my house, I used to have multiple spots where my signal was really weak and speeds were crawling. With Eero's mesh network set up, I'm now getting close to the max speeds that my internet provider gives me.