Windows 10 added an option to uninstall apps with a right-click in the Start menu. If you ever find yourself selecting that option accidentally--or if you share your computer and want to prevent others from uninstalling apps by mistake--here's how to turn that feature off.
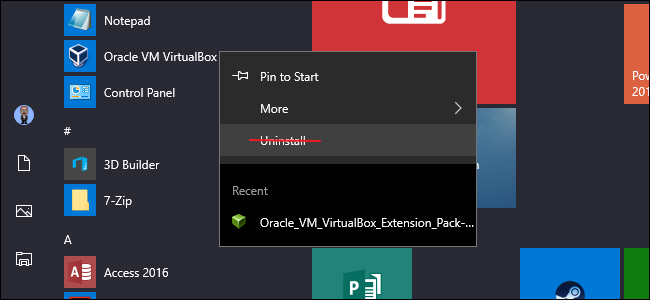
The Windows 10 Start menu changed a lot from previous versions, and there are all kinds of new tricks for customizing it. You've probably noticed that Windows now lets you right-click an app on the Start menu and select "Uninstall" to remove it from your system. When you uninstall a built-in or other Universal app this way, it uninstalls immediately. When you uninstall a desktop app this way, it gives you a little bit of a buffer by sending you to straight to the Control Panel app where you can uninstall it the old-fashioned way. If you'd rather just not have that "Uninstall" option available from the Start menu at all, you can get rid of it with Registry Editor.
Remove the Uninstall Option by Editing the Registry
To remove the ability to uninstall apps by right-clicking them on the Start menu, you'll need to make a quick change to the Windows Registry.
Standard warning: Registry Editor is a powerful tool and misusing it can render your system unstable or even inoperable. This is a pretty simple hack and as long as you stick to the instructions, you shouldn’t have any problems. That said, if you’ve never worked with it before, consider reading about how to use the Registry Editor before you get started. And definitely back up the Registry (and your computer!) before making changes.
Open the Registry Editor by hitting Start and typing “regedit.” Press Enter to open Registry Editor and then give it permission to make changes to your PC.

In the Registry Editor, use the left sidebar to navigate to the following key:
HKEY_CURRENT_USER\SOFTWARE\Policies\Microsoft\Windows

First, you'll need to create a new subkey inside the Windows key. Right-click the Windows key and choose New > Key. Name the new key "Explorer."

Next, you're going to create a value inside your new Explorer key. Right-click Explorer and choose New > DWORD (32-bit) Value. Name your new value "NoUninstallFromStart."

Double-click the new NoUninstallFromStart value to open it's properties window. Change the value from 0 to 1 in the "Value Data" box and then click "OK."

Restart your computer after making the change (or just sign out and back in). The "Uninstall" option should no longer be available on the context menu for apps on the Start menu.

If you ever want to reverse the change, just head back into the Registry and change the NoUninstallFromStart value back to 0. You don't need to delete the value or the Explorer key you created. You can leave them in place to make it easier to change the setting again in the future.
Download Our One-Click Hacks

If you don’t feel like diving into the Registry yourself, we’ve created some registry hacks you can use. Inside, you'll find two Registry hacks named "Remove Uninstall Option From Start Menu Apps" and "Restore Uninstall Option to Start Menu Apps (Default)." Double-click the hack you want to use and click through the prompts. When you’ve applied the hack you want, the changes will take place immediately. No need to restart Windows.
These hacks are really just the individual Explorer subkey, stripped down to the NoUninstallFromStart value we talked about in the previous section, and then exported to a .REG file. Running either of the hacks sets that value to the appropriate number, and also creates the Explorer key and NoUninstallFromStart value if it doesn't exist. And if you enjoy fiddling with the Registry, it’s worth taking the time to learn how to make your own Registry hacks.