Quick Links
The lawnmower is one of those tools that many people don't really think much about except for when they need to use it. However, if you want it lasting for a long time without much fuss, there are a few quick things you'll want to do every spring.
The good news is that lawnmowers can be pretty forgiving. If you've neglected yours for several years, it's probably still running okay, although maybe not as good as it could be. And it's likely things will go south fairly soon. To keep your lawnmower in tip-top shape and have it last nearly forever, just follow these quick maintenance tips, which should take you no more than an hour of your time once a year.
Warning: Maintenance includes changing the oil, spark plug, and air filter, as well as removing the cutting blade and sharpening it. While this stuff is a lot easier than it is on a car, if you don't feel comfortable doing these things yourself, by all means take it to someone who does, or find a capable friend who can help you.
What You'll Need

You'll want some basic tools to get the job done, as well as a handful of optional tools that can make the job a lot easier. Note that we're focusing on gas mowers here---if you have an electric mower, you'll probably only need the blade sharpening stuff (and you can skip to step five).
You will need:
- Your lawnmower's manual (if you don't have it, see if you can find it online, or prepare to Google a lot of stuff)
- An Oil drain pan and a sealed container to dump it in (like a milk jug)
- Small machine oil (refer to the manual as to what kind---usually SAE 30)
- An Oil filter (Some lawnmowers don't use one---refer to the manual)
- A Spark plug socket (Your lawnmower's spark plug size may be different, but the standard is 5/8")
- A Ratchet wrench for spark plug socket (likely a 1/4" or 3/8" drive, depending on the socket)
- A Wrench or socket to remove cutting blade (you can use the spark plug socket if it's the same size)
- A Blade sharpening file
- A Bench vise (you'll want something to hold the blade down while you sharpen it)
- A New spark plug (refer to the manual)
- A New air filter (again, manual)
- A Blade removal tool (optional, but makes it easier to remove the blade)
- A Torque wrench (optional, but a good idea to avoid over-tightening bolts)
- A Funnel (optional, but decreases the risk of creating an oil mess)
- A Nitrile gloves (optional, but they keep your hands clean)
That may seem like a lot, but don't worry, it's all worth it.
Step One: Mow the Lawn

Before you drain the oil, you'll want to warm up the engine. There are a few reasons for this.
First, warm oil is less viscous than cold oil, so it's easier to get as much oil drained out as possible. Secondly, warming up the engine before doing an oil change will mix up all of the impurities and dirt that has settled to the bottom when the lawnmower is left sitting. This ensures that all of the impurities and dirt will drain along with the oil, instead of remaining at the bottom in the mower.
You could just leave your lawnmower running for a few minutes, but that just wastes gas. Instead, you might as well mow your lawn like normal to get the engine up to temp.
Step Two: Disconnect the Spark Plug
Before you do any work on your lawnmower, disconnect the spark plug. This will prevent the lawnmower from accidentally starting up while you're working on it.
To disconnect the spark plug, first locate the connection, which looks like a rubber hose with a 90-degree connector, and it's usually located at the front.

From there, just grab onto the connector and give it a firm pull, wiggling it back and forth if it's extra stubborn. Keep in mind that spark plugs and the connector get really hot after the mower has been running for a while, so wear a thick glove to prevent getting injured.

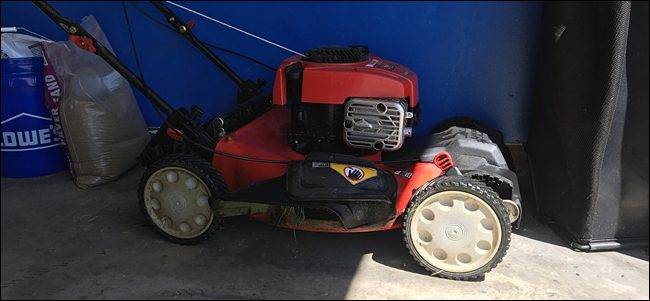
Step Three: Empty the Gas Tank (or Seal the Gas Cap)
Draining the oil requires tipping the lawnmower on its side. Since the gas tank cap is usually not water tight, fuel can easily leak out when you do this. There are a couple of things you can do to prevent leaking.

One way is to empty the gas tank completely, by either running the lawnmower dry or tipping it on its side to drain out the gas. This is probably a good idea to do in the first place, since you're likely using gasoline that contains 10% ethanol. I won't go into a lot of detail about it, but ethanol can wreak havoc on engine parts over time, so it's best to use ethanol-free gasoline if you can find a gas station that sells it.
In any case, the best way to prevent fuel from leaking out of the lawnmower is to place a plastic bag between the gas cap and the tank (pictured above), creating a much better seal. Be sure to use a freezer bag if possible, as the really cheap thin sandwich bags will easily tear.
Step Four: Drain the Oil
Remove the oil cap, which will also have the dipstick connected to it. Wipe it down and set it off to the side.

Place your oil drain pan next to your lawnmower and tip the mower on its side with the oil drain passage closest to the ground. The oil will start draining out and should take less than a minute.

Your mower may have an oil filter, so if that's the case, you should remove it and replace it with a new one while all of the oil is drained out. My mower doesn't use an oil filter, so I'm good to go.
Once all the oil is drained, pour it into a container that you can seal up and take it to a place that can recycle it. Most auto parts stores can do this for free or for a small fee.
Step Five: Remove the Cutting Blade & Sharpen It
With the mower still is on its side, now is a great time to remove the cutting blade and sharpen it. If you look at the bottom of the mower, the blade is attached with a single bolt.

To remove the blade, you'll need a wrench or socket that fits the bolt. What size you need depends on the mower, but the bolt on my mower is 5/8".

If you have a blade removal tool, that can make things a bit easier. It's really nothing more than a clamp that latches onto the side of the mower and prevents the blade from spinning while you loosen it. The bolt will likely be pretty tight, so you may need to apply a lot of force to get it loosened.

Once the bolt is removed, you can take the blade off and clamp it into a bench vise to hold it in place as you sharpen it.

With one of the sharp sides pointed up, take your sharpening file and angle it so that it's lined up with the blade's bevel. Then apply pressure and run it up and down perpendicular to the blade. By doing this, you're essentially shaving off metal little by little so that the edge gets sharp. Flip the blade over to sharpen the other side.

The general rule of thumb is to sharpen the blade so that it's about as sharp as a butter knife, but it never hurts to make it as sharp as you can---just don't spend a whole lot of time on it. It should only take you 5-10 minutes.
With the blade removed from the mower, now is also a good time to clean up the bottom of the mower deck. This step is optional, but if the bottom of your mower deck looks like a rain forest, it's probably a good idea to scrape it clean and get most of it off.

Once you're done with that, re-install the cutting blade, making sure that the cutting edges are facing the right direction. Usually there's something imprinted on the blade that will show you which way it should be installed.
Use a torque wrench to tighten the cutting blade bolt (the torque value will be listed on the manual). If you don't have a torque wrench, use a regular wrench and tighten it down so that it's plenty snug, but don't tighten it with all of your might, as there's a chance you'll strip the threads or break the bolt.
Step Six: Pour In New Oil
Once you have the blade installed, tip your lawnmower back into the upright position. It's now time to put in new oil.

You can usually buy oil in pre-measured amounts, but it's usually cheaper to just buy a large container of oil that will last you a few fill ups. If you end up going that route, it's important that you pour in the correct amount of oil---not too little and not too much.
Most oil containers will have measuring indicators on the side, letting you know how much oil is left, so use that as a guide if you can. Furthermore, your mower's manual should say how much oil needs to be poured in.

A last resort is using the oil cap's dipstick to see how much oil is in the crankcase. The dipstick will have two marks, and the oil level should be between those two marks. Pour a little oil in and check it with the dipstick. Repeat that until the level reaches the dipstick marks. It's monotonous, but it's also crucial to do, since too much oil or too little oil can cause engine trouble.
Step Seven: Replace the Air Filter
The air filter is one of the most important parts of a lawnmower (or anything with an engine), as the gasoline needs to mix with oxygen in order to create combustion. And believe it or not, engines gulp up way more air than gasoline, usually at a 15:1 ratio. With that said, it's important to replace the air filter regularly, sometimes even more frequently than just once a year, especially if you live in dusty conditions.
To replace the air filter, it's usually hidden behind a plastic compartment that's snapped shut or held on with a screw.

Take off the lid and you'll see the air filter. It's usually only held in place by friction, so simply pull it out and place the new air filter in its place.

Put the plastic cover back on and you're back in business.
Step Eight: Replace the Spark Plug
The spark plug is the one tiny part of the engine that---if not working properly---can result in the engine not starting at all. So it's important that you replace it every year.
To remove the spark plug, you'll need a special socket, which comes with a rubber layer on the inside to prevent breaking the spark plug's porcelain body as you loosen and tighten it. Most spark plugs take a 5/8" socket, but refer to your manual just to be sure.

Attach the socket to a ratchet wrench and place it over the spark plug. You may have to wiggle it on and apply some pressure to get the socket all the way onto the spark plug.

Next, just loosen the spark plug and unthread it until it pops off.

Take your new spark plug and begin screwing it in by hand. Tighten it down as much as you can by hand.

Then take your socket and ratchet and tighten it down about a 1/4 turn. You want it snug, but not overly tight at all or else you risk stripping the threads and you'd be completely screwed.
Step Nine: Give It a Quick Wash and Celebrate
Once you're all done with the maintenance, give the outside of the mower a quick hose down and then celebrate your hard work!

Doing these simple maintenance tasks can prolong the life of your mower and make it last for decades. Granted, push mowers usually aren't that expensive, but when you end up replacing it every few years, that cost adds up quickly.
A Word on Winter Storage
We covered this briefly in our winter home preparation guide, but it's important to mention here. A properly-stored lawnmower during the winter is just as crucial as performing the proper maintenance, if not more so.

It's important that you drain the gasoline out of your lawnmower before you put it away for the winter. Gas goes stale and breaks down, which can gum up the carburetor and require an engine rebuild come spring time.
Alternatively, you can keep gas in the tank if you want and just add fuel stabilizer, as well as switch to ethanol-free gas as mentioned above, but if you're really paranoid, it's best to completely drain the gas from the mower.