Ubuntu has an easy way to keep your system clock synchronized with the internet time servers, but sadly it’s not enabled by default. Here’s the quick steps required to enable it for your system. Note: We’ve previously written about how to do this in an older version of Ubuntu, but that method doesn’t work anymore.
Sync the Clock with Internet Time Servers
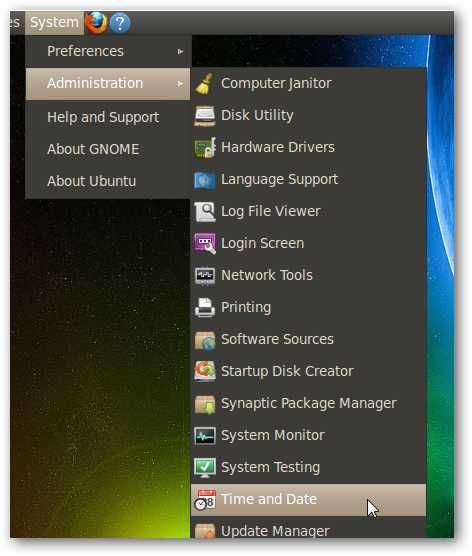
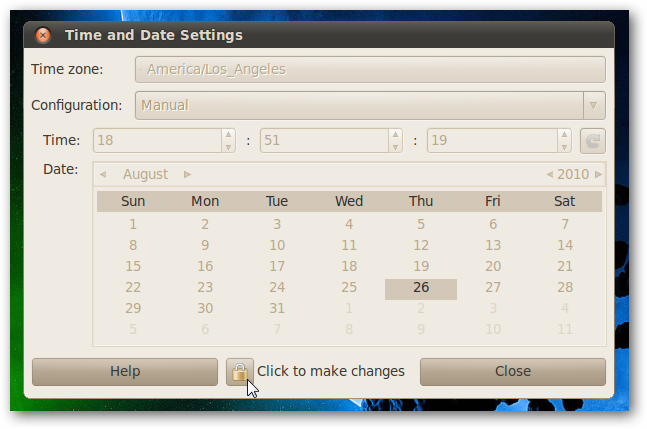
You’ll need to start off with Administration –> Time and Date. Then use the Click to make changes button to enable the window.
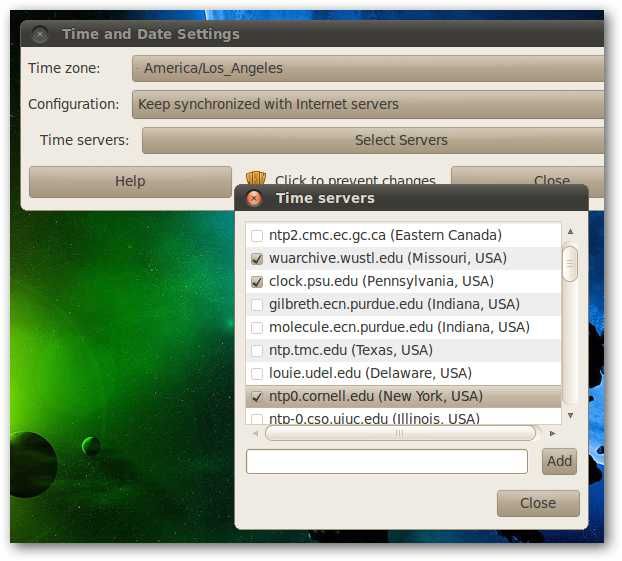
Then change Configuration from Manual to Keep synchronized with Internet servers.
At this point you’ll probably be prompted to install NTP support, and asked for your password again, which is annoying.
At this point the window will change, and you can select the time servers you want to use—make sure that you set your Time zone properly here.
That’s all there is to it! You now have internet time up and running on your Ubuntu box.


