Quick Links
There are two ways to protect a PDF file: an owner password and a user password. We’ll explain the purpose of each and show you how to apply them to your PDF files.
The Owner, or Permissions, password allows you to apply permissions to a PDF file. For example, if you don’t want to allow a PDF file to be printed, or pages to be extracted, you can choose what you want to allow and not allow and apply an owner password to the PDF file. The Owner password may also be called the Master password. It's what allows you to change those permissions.
The User, or Open, password allows you to require the user to enter a password to even view the PDF. If they don't enter the right password, the PDF file will not open.
There are several online services for protecting PDF files, such as PDFProtect, but if you want to add a password to a sensitive document, you probably aren’t comfortable uploading it to a service you don’t know. So, we’ll focus on the best offline option in this guide.
We’ve covered how to create a password protected PDF file in Microsoft Word, but that only adds a user password. There is no option to add an owner password. We did some research, and found the best option for protecting your PDF files offline is the free office suite LibreOffice. We’ll show you how to protect a Microsoft Word or LibreOffice Writer document with a password and how to create a password protected PDF file from a document.
NOTE: We use a Word file in our example, but you can do the same thing with LibreOffice Writer documents (.odt files). You can also open PDF files in LibreOffice. They open in LibreOffice Draw, even if you're in Writer, Calc, or Impress, but the procedure for password protecting them in Draw is the same as in the other LibreOffice programs and is described in the "How to Convert a Document to a Password Protected PDF File" section below. You would be converting an unprotected PDF file to a password protected one.
How to Add Open and Permissions Passwords to a Document
Before you begin, download LibreOffice and install it, or you can download the portable version if you would rather not install LibreOffice. Open LibreOffice Writer and then open a Word file. Click the down arrow on the “Save” button on the toolbar and select “Save As” from the drop-down menu.

On the Save As dialog box, navigate to where you want to save the protected document. For our example, we’re going to replace the original document. If you want to save the protected document as a new file, enter a different name for the file in the “File name” box. To password protect the document, check the “Save with password” box. Then, click “Save”.

If you’re replacing the original file, the Confirm Save As dialog box displays. Click “Yes” to replace the file.

On the Set Password dialog box, you can specify two types of passwords, just like the user and owner passwords for PDF files. To require the user to enter a password to view the document (like the user password), type a password in the “Enter password to open” box and the “Confirm password” box under “File Encryption Password”. If you also want to protect the document against editing (like the owner password), click “Options” in the middle of the dialog box and type a password in the “Enter password to allow editing” box and the “Confirm password” box under File Sharing Password.

NOTE: The File Sharing Password only works for LibreOffice Writer documents, not Word documents. If you want to use the File Sharing Password, save your document as a .odt file, which is the first option in the “Save as type” drop-down list on the Save As dialog box pictured above.
Entering a password to allow editing automatically causes the document to open in read-only mode. If you want to open the file in read-only mode by default without a password, check the “Open file read-only” box and leave the password boxes under File Sharing Password empty.
Click “OK”.
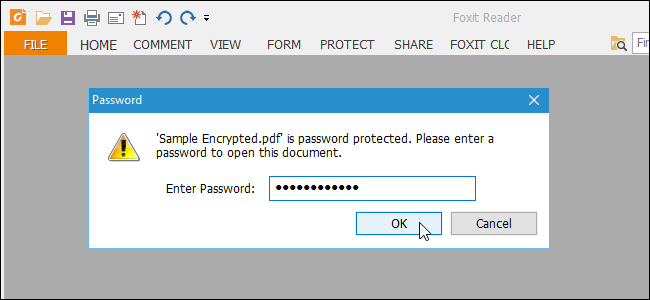
If you applied an open password to the document, the next time you open the file, you will be asked to enter the open password.

If your file is a LibreOffice Writer document (.odt) and you assigned a File Sharing Password to it, the document will be opened in read-only mode. To edit the document, click the “Edit Document” button in the yellow bar.

You will be asked to enter the file sharing password to be able to modify the file.

How to Convert a Document to a Password Protected PDF File
You can also convert a Word document or a LibreOffice document to a password protected PDF file and apply user and owner passwords to it. To do this, open the document and then select “Export as PDF” from the File menu.

On the PDF Options dialog box, click the “Security” tab.

Under File Encryption and Permission, there is initially “No open password set” (user password) and “No permission password set” (owner password). To set these passwords, click “Set Passwords”.

On the Set Passwords dialog box, under Set open password, enter the user password twice that will be required to view the PDF file. Under Set permission password, enter the owner password that will prevent the PDF file from being printed, edited, or having content extracted from it. Click “OK”.
NOTE: You don’t have to use both passwords, but we recommend that you do for greater security. A PDF file with only one of the two passwords applied (either one) is not as secure as one with both passwords applied. Planet PDF explains why two passwords are better than one when securing PDF files.

You are returned to the PDF Options dialog box and the status of the password(s) you set displays below the Set Passwords button. If you chose to set a permission (owner) password, the options on the right side of the dialog box become active. If you don’t want anyone to print the document or make any kind of changes to the document, select “Not permitted” under Printing and Changes. If you just want to limit the type of printing and changes that can be done, select another option under Printing and Changes. If you don’t want anyone copying content from your PDF file, make sure the “Enable copying of content” box is unchecked. For accessibility purposes, it’s a good idea to leave the “Enable text access for accessibility tools” box checked. Click “Export”.

On the “Export” dialog box, navigate to the folder in which you want to save the password protected PDF file. Enter a name for the file in the “File name” box and click “Save”.

If you assigned an open (user) password to the PDF file, you will be asked for that password the next time you open it.

You will see “(SECURED)” to the right of the file name in the title bar, indicating it is an encrypted PDF file.

If you applied a permission (owner) password to the PDF file, and chose to not permit printing, you’ll notice the “Print” option is grayed out when you click the “File” tab.

The procedures for adding open and permissions passwords to a document and the for converting a document to a password protected PDF file are the same in LibreOffice Calc, Impress, and Draw as well.