If you have a large Steam library, then you may be running out of space, or maybe you have it located on an old, slower spinning hard drive. Whatever the case, you can painlessly move your Steam collection to a new location.
It's easy to acquire a large burgeoning game collection via Steam, especially if you participate in the various sales that Valve has every year. We're all probably guilty to some extent of going a little overboard during the Steam Summer Sale in particular.
What this means is that you end up with a lot of games, and while you can always delete old games to make room for new ones, that typically means having to redownload those older games or restore them from a backup if you ever want to play them again.
In other cases, it's often better to locate your games collection to a speedy SSD for faster, nearly instant load times. Having your games on an SSD can really improve your overall gaming experience.
So, what do you do if you want to upgrade? The choices are simple when it comes to either moving your collection a larger and/or faster drive, but how do you do that so you don't have to redownload everything?
Moving Your Steam Library on Windows
Moving your Steam library is really quite simple and can be accomplished in a few short steps on either Windows or OS X.
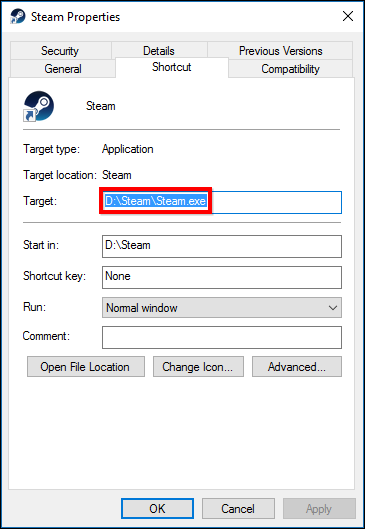
To begin, on Windows first go to where your Steam library is located. If you aren't sure, you can find it by checking where the Steam client's shortcut is pointed by right-clicking on the Steam shortcut and selecting Properties.
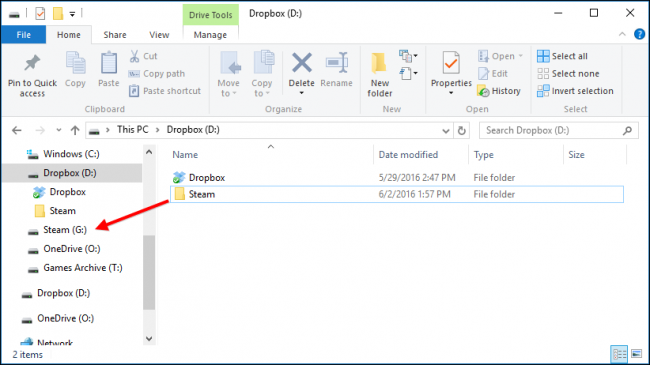
In this case, our Steam library is on our D: drive, but let's say we want to move it to our G: drive, which is an SSD we've installed especially for games. Before you do anything, make sure to shut down Steam. Then, all you do is drag the entire Steam folder to the new location.
Once that is done (it might take awhile if you have a lot of games), it's time to rerun Steam. You could just re-run the Steam.exe from its new location, but we recommend reinstalling it, which will update all your shorcuts.
Head to steampowered.com and download the installer (unless you have it lying about on your hard drive somewhere).
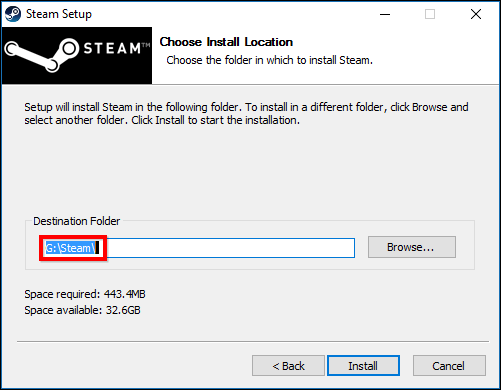
Once you start the installer, simply point it to your new destination and all your shortcuts will be updated in the process.
That's it! The next time you run Steam, all your games will be there and you can start playing anything you want right away, no need to redownload or restore anything from a backup.
Moving Your Steam Library on a Mac
If you're using a Mac, the process is different, but no more difficult. Again, shut down Steam first before you begin.
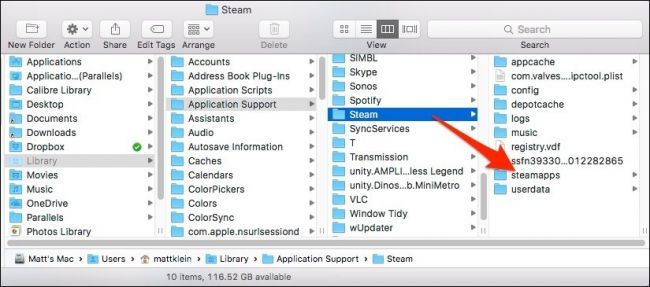
Steam's game files are located in
~/Library/Application Support/Steam/SteamApps/
by default. This is the folder we'll want to move to our new drive.
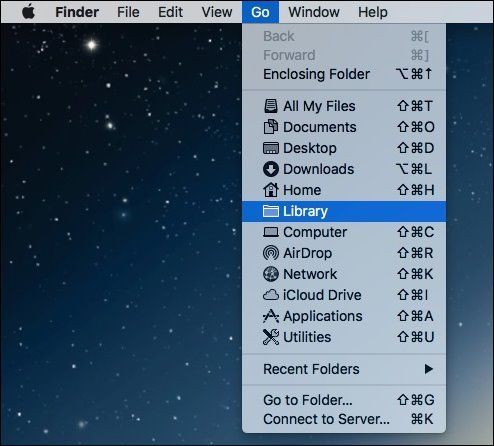
Note, you can get to the Library folder by clicking on the Go menu while holding the "Option" key. Also, do not move the entire Steam folder--just move the SteamApps folder.
Here you see the Steam folder we're talking about. You can move this to any other location you want such as a bigger, more speedy SSD.
Now, open up the trusty Terminal and type the following command:
cd ~/Library/Application\ Support/Steam
Now that you've changed to the Steam library in the Application Support folder, you need to make a symbolic link to wherever you moved the new SteamApps folder. Again, use Terminal do this by running this command, replacing /New/SteamLibraryLocation/ with the path to the SteamApps folder's new location:
ln -s /path/to/new/SteamApps SteamApps
Make sure you point to the new location in the first part of the command and the old location is in the second part. Once you're done, you can fire up the Steam client once again and games will now load from the new location.
Now you can move your Steam library whenever you need to upgrade your old drive. Once you discover what it's like to have all that new speed and space, you may wonder why you didn't do it sooner.


