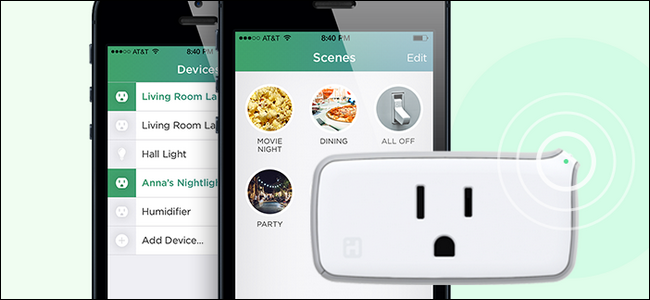
What do you do if you want to add a device to your HomeKit smart home, but the device doesn't support HomeKit? You set up a middleman with the iHome iSP5, an inexpensive HomeKit-enabled smart outlet.
HomeKit is Apple's smarthome platform, and if you want to control all your appliances and devices with the majesty of your voice through Siri, you need to add them all to your HomeKit home. If you have newer HomeKit friendly stuff, like the second generation Philips Hue hub, then you're all set.
But what about items that aren't HomeKit compatible? What if you want to control a simple box fan in the window, a table lamp, an old coffee pot, or any number of the many, many, electrical devices we all own that aren't smart anything, let alone HomeKit compatible? What if you have an older smarthome device that isn't HomeKit compatible but you want to use it with your HomeKit system?
There's an easy fix for that situation: a HomeKit compatible smart outlet. Rather than replace the electrical device with a HomeKit compatible one, you can simply insert a smart plug in between the wall outlet and the power cord of the device to act as a HomeKit middleman. In other words: it lets you control nearly any appliance in your house using Siri.
This solution does have one immediately obvious shortcoming: it's binary. While a device designed to be a smarthome product, like a networked music player, might have a plethora of settings and configuration options available to it, the only thing a smart outlet can do is control the flow of electricity to the device. In that regard it could turn a radio on and off, but it certainly can't change the station or switch between the radio and the CD inputs.
That doesn't mean we should call the smart outlet dumb, however, as despite the limitation of simply turning devices on and off, smart outlets offer tons of additional functionality. You can control the device with your voice, set triggers based on time of day, and integrate the device into home control scenes.
Sound like the solution to your smarthome quandary? Let's look at what you need and how to set it up.
What You Need

HomeKit is still relatively new, and there are only a handful of HomeKit-enabled outlets on the market. Rather than send you out to sift through the emerging market and attempt to avoid early adoption pitfalls, we'll just steer you right to the single model we recommend above all the others: the iHome iSP5.
It's the most economical HomeKit smart plug on the market--other outlets cost $40-80, but the iHome model is $34, and often on sale for less. Not only does it support HomeKit, but it can also communicate via the iHome system, which has two big benefits.
First, it means Android users in your home can also control the iHome plug via the iHome Android app. Second, it means you don't need an Apple TV (for remote HomeKit access) to control the plug when you're away from home (as you can send a signal to it via the iHome app). In addition to all that, it's also rated for up to an 1800W electrical load so you can use it to control everything from a low-watt lamp to high-watt device like a space heater or window AC unit.
Finally, the iHome iSP5 also supports integration with the Amazon Echo, the Wink hub, and the Nest thermostat. Unlike many smarthome products that only work with one platform, even if you completely abandon HomeKit and set up a totally different smarthome system, you can bring the iHome plug along with you.
Setting Up The iHome iSP5
Setting up the iHome iSP5 is really straightforward, as long as you keep in mind that you're essentially setting it up twice (once for the iHome system and once for the HomeKit system). If you don't keep that in mind, the setup process can be a bit confusing because it feels like you're repeating everything.
Simply plug the iSP5 into an outlet and then press and hold the button (located on the little wing-like-nub that sticks up from the upper right of the device) for 12 seconds until the indicator light blinks green and red. This resets the device to the factory settings and ensures there isn't a lingering configuration from the quality testing at the factory. After plugging it in and resetting it, download the free iHome Control app from the App Store and launch it.
You'll be prompted to create an iHome account.

If you only want to access your iHome outlet from within your home, or you have the new Apple TV with HomeKit support that allows for remote access, you can skip this step. We'd still recommend signing up for an account, however, as it provides backup access to the plug independently of HomeKit and allows for non-iOS users in your home to control the plug.
Whether you sign up or skip the step, the application will prompt you to reset your plug. Joke's on them, we're one step ahead! Click "Next" and ignore the prompt to reset the device. The app will begin searching for devices. Don't worry if it seems to be doing nothing--during the search process there's no indicator and it says that no devices are found but then, suddenly, your device will appear. Give it at least 30-60 seconds.
Select the found device and click "Continue".

Next, you'll be prompted to connect it to your Wi-Fi network. Select the Wi-Fi network you wish to use--if your iOS device has logged into this network before it will automatically provide the login credentials, otherwise fill them out.

Once connected to the Wi-Fi network, you'll be prompted to scan the HomeKit accessory code for the device. The accessory code is located on both the plug and the cover of the product manual (seen below).

Once the device is connected to your HomeKit system you'll be prompted to name it. Select a name that reflects what the plug controls as this name will be how Siri identifies the device. For example if you were going to use the plug to control a disco light, you would want to name it "Party Light" or "Disco Ball" and not "Living Room Plug".

After naming the device you'll be prompted to assign it to a room. Again, use names that sound natural when spoken as whatever you name the room will become part of the identification process Siri uses to locate it.

Finally, the iHome app will prompt you to identify the type of device it is--a light, a fan, or "other" for any other electrical device. This step isn't particularly critical, but it does help improve how Siri understands your requests. If, for example, Siri knows that the plug controls a lamp in your bedroom, then she will respond to the command "turn the bedroom lights off".

After that final step, you'll see your plug in the list of devices, like so.

Test the plug by tapping the the plug icon. Even if you don't anything plugged into it, the little H indicator light in the corner of the plug will blink on and you'll here a little click sound as the internal switch activates.
Controlling the Plug
As we just demonstrated, you can control the plug by opening the iHome device and tapping on the entry to toggle the power on and off. You can also physically turn the plug on and off by pressing the button on the plug (the same one you used to reset it). But let's be real here: you want the futuristic experience where you control your home with your voice or automate it.
To control the plug with your voice, you can summon Siri and issue a command like "Siri, turn the lights on" (if you told Siri the plug was for a lamp) or "Turn the bedroom on", or by addressing the device by name like "Siri, turn the movie lamp on" if the plug is connected to an eye-saving bias light behind your beautiful HDTV.

In addition to controlling the plug via voice, however, you can incorporate the plug into your HomeKit scenes, groupings, and so on. The iHome app does offer the ability to group the plug, create scenes, and set up simple timer-based triggers, but there's one big shortcoming: it only works with other iHome devices. While that might be fine if you just want to set the plug to turn a lamp on at night while you're on vacation, or some such thing, it doesn't help integrate the plug smoothly into your greater HomeKit system.
Fortunately, though, the setup process we completed in the previous section gave the plug a name and room based identifier that is recognized across the HomeKit system. You know what that means? It means any application that can control the HomeKit system can tap into your plug.
We've showed you how to combine different HomeKit products into rooms, zones, and scenes with the excellent Home app, and upon opening that app right after setting up the iHome plug, the plug was there and read to incorporate into whatever scenes or triggers we wanted to create.

This is far more flexible than using the iHome app, as it means the iHome plug can exist along side all our other HomeKit devices (and without the hassle of using two separate apps to configure everything).
With very little expense and a few minutes configuring everything, you can easily turn any dumb appliance or device into a smart HomeKit enabled one.