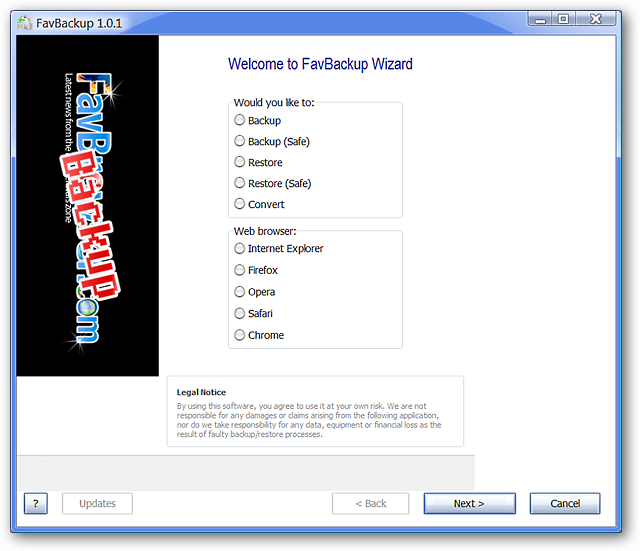
Prefer to have a single program that can backup your profile and settings for multiple types of browsers instead of using many different programs? Now you can simplify the backup and restore process with FavBackup. Supported Browsers: Internet Explorer (6 - 8), Mozilla Firefox (2 - 3.5), Opera (9), Safari (3 - 4), Google Chrome (1 - 3) Installation & Setup There is no installation required for FavBackup, simply place the exe file in a folder/location of your choice and create a shortcut for it. For our example, we placed the exe file in a folder named “FavBackup” in Program Files. Note: You will need to create a folder to place the backup files in (they are saved as multiple separate files). To begin backing up a browser, simply click the shortcut that you created to begin the process... Backing Up a Browser Profile Here is the first of the three windows that you will go through while backing up a browser’s profile. Choose the type of “Backup” option that best suits your needs and select the browser that you would like to do the backup for. Notice that there is also a “Convert” option available. Click “Next”. Note: For our example, we chose to backup Google Chrome on Vista SP2 and created a folder on the Desktop named “Chrome” to place the backup files in. In the second window, select or deselect the items that you would like to have backed up and browse for the Backup Folder that you have created. Click "Next". Note: All items are selected by default.

In the third window, all of the items that were selected in the second window will display a Green Checkmark beside them if backup of that item was successful. Click "Finish".

And a quick look inside our Chrome Folder shows all of the items that were backed up.

A Quick Look at the Backup Windows for the Other Browsers Here you can see the items that can be backed up for Mozilla Firefox…

For Opera Browser…

Apple Safari…

And Internet Explorer.

Restoring a Browser Profile As with the backup process, there are three windows that you will go through while restoring a browser’s profile. Choose the type of “Restore” option that best suits your needs and select the browser that you would like to restore to. Click “Next”. Note: To keep things interesting for our example, we took the profile backup of Google Chrome on Vista SP2 and restored it to a plain unmodified install of Google Chrome on Windows 7.

In the second window, select or deselect the items that you would like to have restored and locate your backup files. Click "Next". Note: As in the backup process, all items are selected by default.

In the third window, all of the items that were selected in the second window will display a Green Checkmark beside them if that item was successfully restored. Click "Finish". That is all there is to it!

And here is our Windows 7 installation of Google Chrome after the profile restoration. Everything restored perfectly including all six extensions that our Vista SP2 install of Google Chrome has. Excellent!

Note: The Restore Windows for the other browsers are identical to their Backup Window versions (pictured above). Conclusion FavBackup is an extremely easy to use profile backup software that gets the job done without any hassle. It was a joy to use in our example and is definitely a recommended “must install” piece of software. Known Issues *Note: Quoted directly from the FavBackup Homepage.