Quick Links
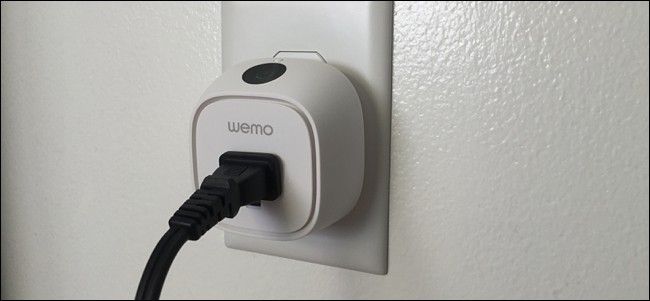
Belkin has a diverse lineup of WeMo products, but its latest addition is the WeMo Insight Switch. It not only allows you to turn appliances on and off from your smartphone, but it also monitors power usage and provides estimates on how much you're spending by having that space heater plugged in. Here's how to make the most of that information.
First off, if you haven't yet set up your WeMo Insight Switch, we have a handy guide that takes you through the process. Setting up the WeMo Insight Switch is exactly the same as setting up the regular WeMo Switch. The only difference--besides the size--is that the WeMo Insight Switch can monitor the power usage from anything that's plugged into it. That's what we're going to talk about in this article.
How to View the Insight's Power Usage Stats
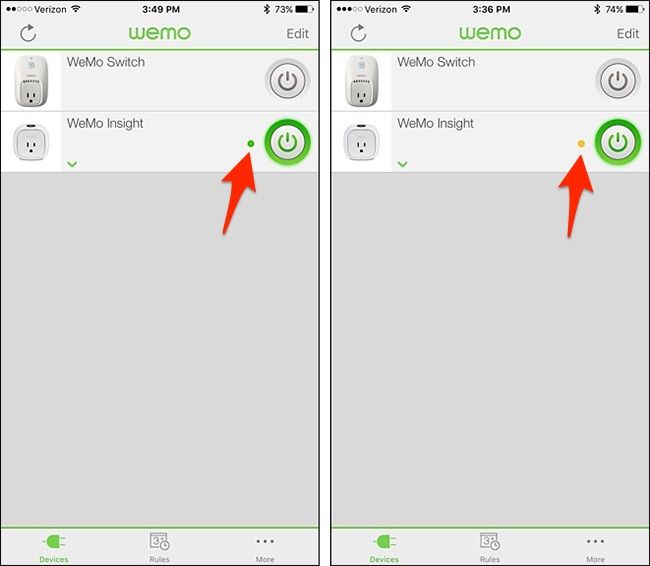
In the WeMo app, you can turn on and off the Insight Switch just like any of Belkin's WeMo products, but you may notice the addition of a small virtual LED light next to the power button. Sometimes it will be yellow, and other times it will be green.
This light indicates whether there's power flowing through the switch or not. When it's green, there's power flowing through it, and when it's yellow, that means its idle, but the outlet is still on.
So, for example, if you have a space heater that turns on and off automatically throughout the day, the WeMo Insight Switch will show a yellow light when the space heater is in standby, and a green light when the space heater is on and actively heating the room. The Insight Switch itself remains completely on the whole time.
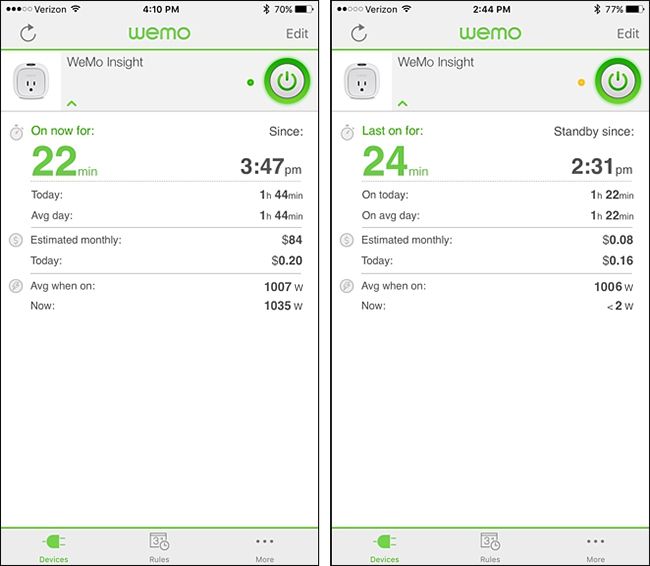
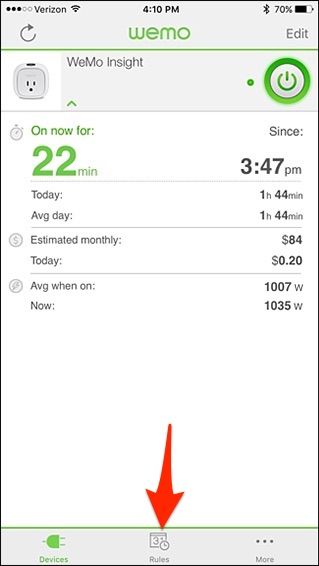
Tapping on the Insight Switch within the WeMo app will bring up details about the power usage from whatever is plugged into it.
When the appliance you have plugged in is on, it'll say how long it's been on for, highlighted in green, and the time on the right-hand side is when the appliance turned on. When the appliance is off, it will instead show how long it's been since the appliance was on, and what time that last occurred off to the right.
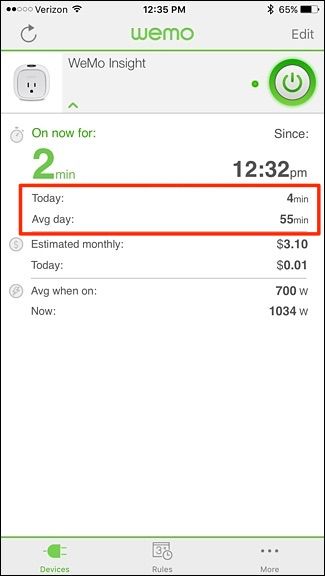
Below that, you have "Today:" and "Avg day:" fields. "Today:" gives you a total time of how long the appliance has been on for that day, and then "Avg day:" gives you the average time that the appliance has been powered on per day. Obviously, this becomes more accurate the longer you use the Insight Switch, so you'll have a better idea of this figure once you have something plugged in and being used for several weeks.
Below those fields are "Estimated monthly:" and another "Today" field. The "Estimated monthly:" field won't be terribly accurate during the first couple days of use, but after a couple weeks.
However, at the end of any given day, you can take the number in the "Today:" field right below that and multiply it by 30 or 31 days to get a sense of what that appliance is costing you on a monthly basis. We're not sure why the switch just doesn't use that kind of math to estimate the monthly cost, but we at least know that it takes the wattage into account when it estimates the monthly cost, because we noticed that the estimated monthly cost went down to $21 after the wattage dropped from 1,000 to around 300 when I first started using the switch.
In any case, seeing that my space heater used about $0.21 worth of power during the day, it's likely that it would cost roughly $6.50 to heat my home office during a given month, which doesn't seem like a lot, but that probably accounts for around 6-8% of our electric bill.
Below the estimated costs, there's the last section detailing wattage usage. You have "Avg when on:", which gives you the average wattage that your appliance is using whenever it's on (it takes about a day for this to appear so that it can calculate an average), and then you have "Now:", which gives you the real-time wattage use of the appliance you have plugged in.
How to Change Your "Cost per kWh" for More Accurate Estimates
Everyone's electric bill is different, and depending on where you live, the price per kWh (kilowatt hour) may be higher or lower. You can change this factor on your WeMo Insight Switch within the app so that you get more accurate cost estimates.
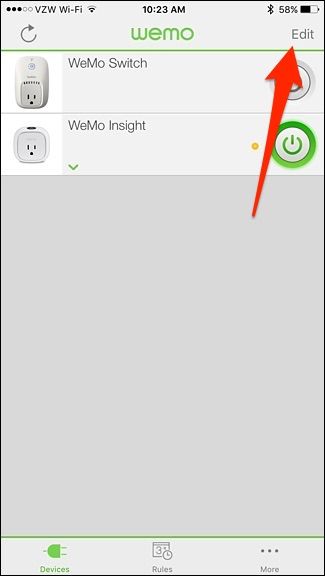
To do this, start by tapping on "Edit" in the top-right corner of the app's main screen.
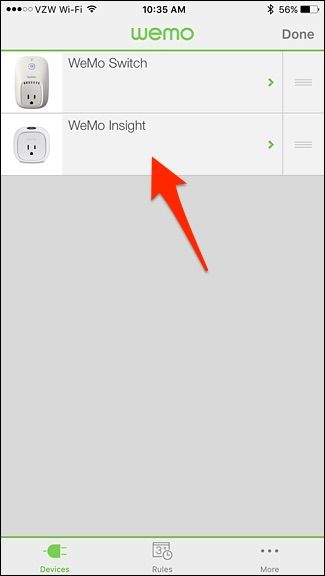
Then tap on your WeMo Insight Switch.
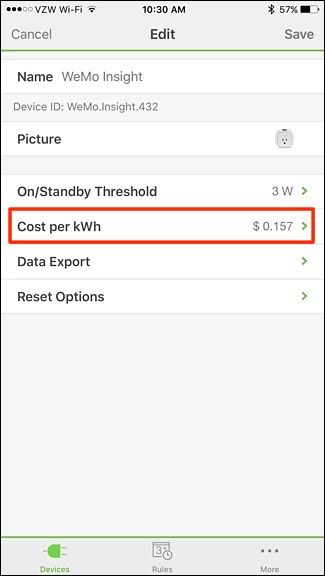
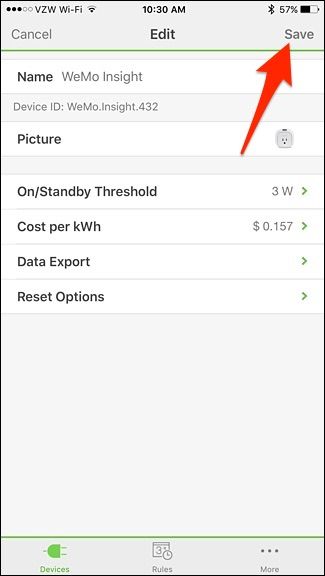
Tap on "Cost per kWh".
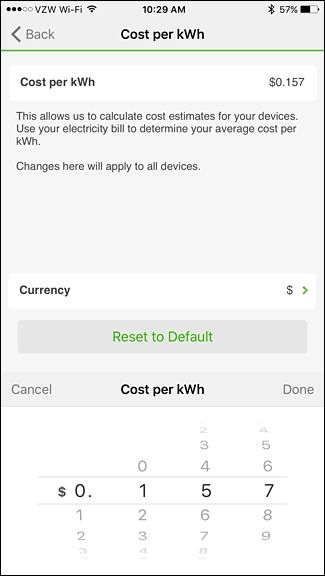
Tap on "Cost per kWh" again and use the data entry field below to put it how much your electric company charges per kWh.
If you don't know this figure, you can look at your last electric bill and it should show you how many kWhs you consumed during the month. Take the bill's amount and multiply it by 100 (e.g. $75 x 100 = 7,500 cents). Then, take that new number and divide it by your kWh usage for that month. This is your "cost per kWh".
After you enter in the new number, tap on "Done" and then tap on the arrow button in the top-left corner to go back. From there, tap on "Save".
The more information you can give the WeMo app, the more accurate your power estimates will be.
How to Get Power Usage Alerts for Your Insight Switch
Aside from being able to see how much power your appliances are using, you can also set up alerts that you can receive on your phone letting you know if the Insight Switch detects a power flow. That way, if you accidentally left your space heater on, you can get a notification about it and turn off the switch remotely before you waste even more electricity.
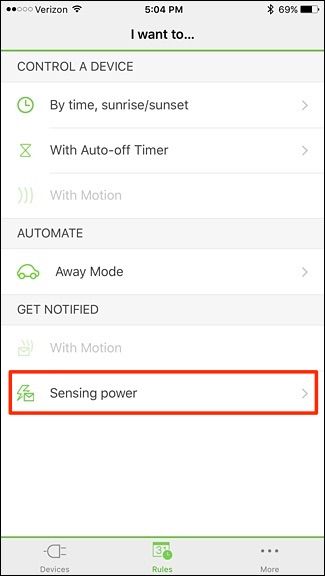
Start by selecting the "Rules" tab at the bottom.
Tap on "Sensing power".
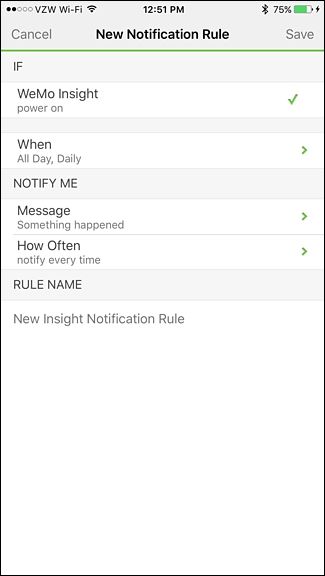
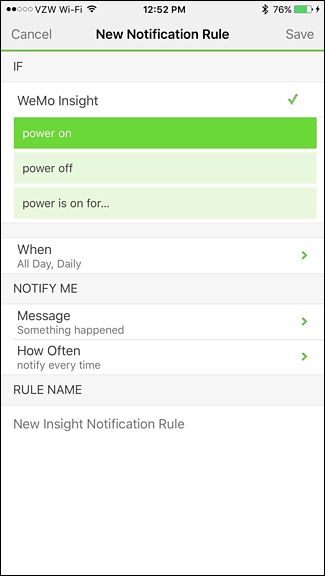
From here, you can customize what notifications you want whenever the switch detects power. To start, tap on "WeMo Insight" at the top.
Select one of the three options, which will determine what exactly you receive a notification about. For example, "power on" will send you a notification when the Insight Switch detects power from the appliance that's plugged in.
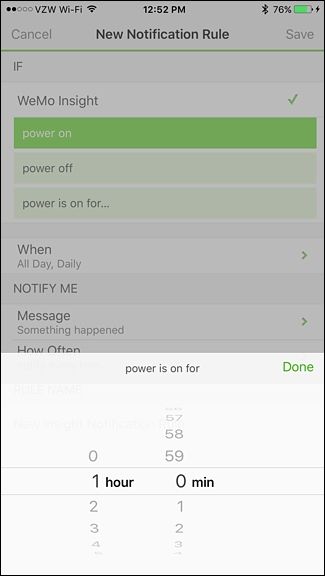
You can also select "power is on for..." and set a time limit for an appliance to be on before you receive a notification.
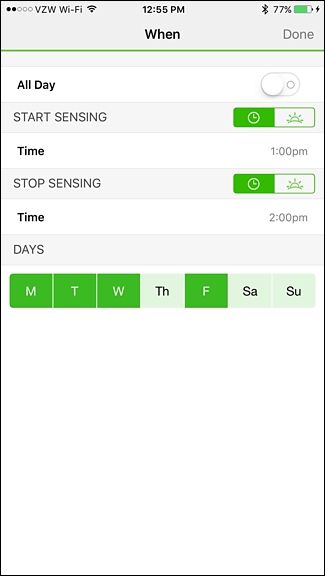
Tapping on "When" will let you choose when you want these notifications enabled. You can select a certain time window during the day, as well as select certain days out of the week.
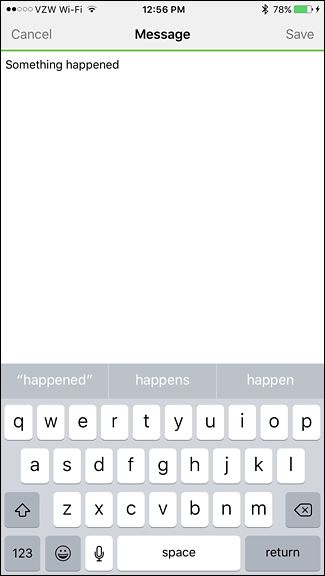
Under the section "Notify Me", tap on "Message". This is where you can enter in a custom message that will be included with your notification. Tap on "Save" in the top-right corner when you're done.
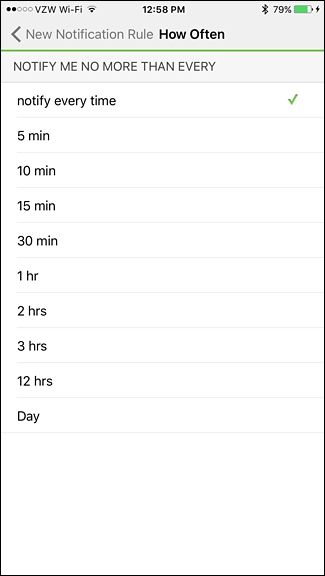
Next, tap on "How Often". From here, you can set how annoying you want to receive notifications. You can select "notify every time" or you can pick an interval from the list. So if you choose 15 minutes, you won't get notified anymore than every 15 minutes.
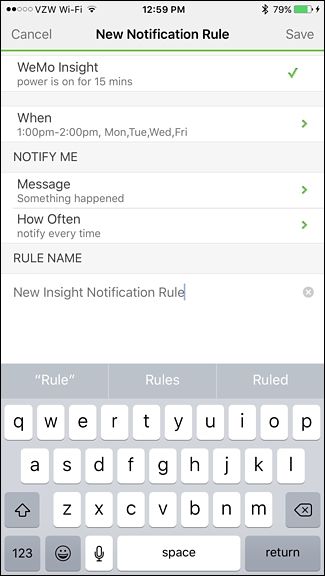
Next, under "Rule Name", give the notification setup a custom name if you want.
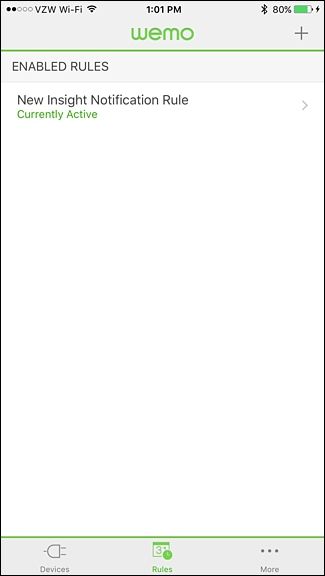
After that, tap on "Save" in the top-right corner to complete your new notification setup. Once done, it will show up in the list under "Enabled Rules".
From then on, you should get notifications at the times you specified, ensuring you don't pay more than you need to for devices left on.

