Quick Links
Remote controls are so 1950. If you have a Kodi media center and an Amazon Echo, you can play all your favorite movies and shows with a well-placed voice command...if you're willing to do a little setup.
The Amazon Echo is, in our opinion, one of the coolest parts of a smart home. Controlling your lights, blinds, and TV with your phone is cool, but controlling them with your voice is truly the future. I was skeptical, but quickly became impressed---and hungry for more.
Being able to turn my TV on is cool, but what I really wanted was to be able to control my media center. I wanted to be able to say "Play the next episode of Friends" and have it search my library, see what I watched last, and start playing the subsequent episode. And after a bit of searching, I found that one enterprising programmer named Joe Ipson had already done just that.
This takes a little bit of setup, and it looks very intimidating at first. You'll need to create a web server, push some code from GitHub, and do a little work from the command line, but you don't need to be a programmer to get this up and running. Ipson has done almost all the heavy lifting, and you just need to copy his code, edit a few parts, and upload it to the right place. If you follow this guide to the letter, you should be up and running in no time.
NOTE: We're using Amazon Web Services for this tutorial, since it's the most reliable. If you're a new AWS user, Ipson says you should be able to run the skill for free for about a year, after which you'll be charged less than 20¢ per month. If you want something truly free, you could set it up using Heroku instead, replacing steps two, three, and four of this guide with the Heroku instructions in Ipson's documentation. It is, however a little less reliable, and some requests may time out when you use it. We recommend AWS if you want the best experience possible---it's well worth the meager 20¢ per month.
Step One: Prepare Your Kodi Web Server
In order for this to work, Kodi will need to have a server accessible from the web. Thankfully, this is built into Kodi, though you may need to forward some ports on your router and perform some other tasks before it works smoothly.
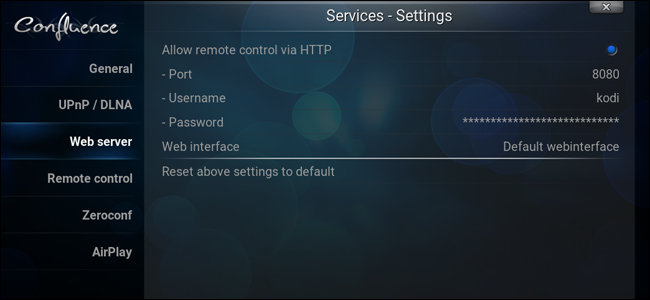
Open Kodi on your media center and head to System > Services > Web Server. Enable the web server if it isn't enabled already, and give it a username and password. Be sure to use a password you don't use for any other service.
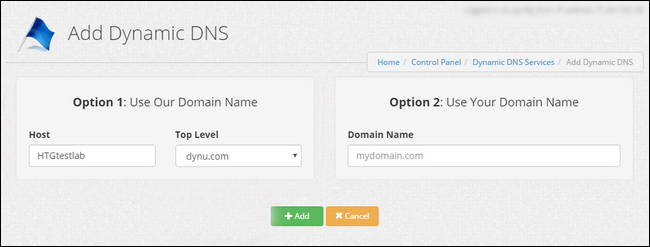
You will also need the public IP address for your home. However, since this can change, we highly recommend signing up for a dynamic domain name using a service like Dynu. Follow our guide here before continuing if you don't already have one.
Lastly, you'll need to set up port forwarding for your Kodi box. This will differ from router to router, but you can check out our guide here for more information. Just forward any external port to the local IP address of your Kodi box (in my case, 192.168.1.12) and local port (8080 by default).
NOTE: while Kodi's local port is 8080 by default, you can change it to whatever you want---or you can forward it to a different external port to make sure there are no complications (since other apps may ask for port 8080). I'm using 8080 in this tutorial, but if you use something different, just replace all instances of port 8080 with the external port you choose here.
If all goes well, you should be able to access Kodi's web interface by opening a web browser and typing in:
my.dynamic-domain.com:8080
where my.dynamic-domain.com is the URL of your dynamic domain, and 8080 is the port you set in Kodi. If that doesn't work, make sure that Kodi, your dynamic domain, and your port forwarding were all set up properly.
Step Two: Set Up Your Amazon Web Services Account
Next, you'll need to set up an account with Amazon Web Services (AWS). Head to this page and click "Create an AWS Account". Log in with your Amazon credentials when prompted. If you don't have an AWS account already, you'll be asked to enter your contact info to create one. Be sure to check "Personal Account" along the top.
Go through the rest of the steps in the wizard. You will also have to enter your credit card info, but don't worry---like we said, you shouldn't be charged very much, if at all (especially for the first 12 months).
After verifying your identity with your phone number, and selecting your support plan (we recommend Basic, which is free), click the "Complete Sign Up" button in the right corner of the screen. Amazon will then log you in.
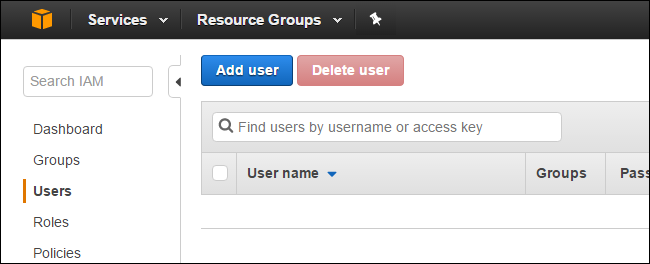
Now head to the Identity and Access Management page (log back in to AWS if necessary) and click the "Users" tab on the left-hand side. Click the "Add User" button.
Create a new user with whatever username you want. Check the "Programmatic Access" box and click "Next: Permissions".
Next, you'll be prompted to set permissions. Click "Attach Existing Policies Directly", then search for "AdministratorAccess". Check the AdministratorAccess option and click "Next: Review".
Make sure your user looks like the image below, then click "Create User".
Do not close the next page! You'll need to grab the Access Key ID and Secret Access Key here (you'll need to click "Show" to show your secret key). Copy them to a text file for safe keeping, because you won't be able to get the secret key again after you leave this page.
Once you have those written down, you can close that window safely.
Step Three: Install Python 2.7 and Set Up Your Variables
In order to push Ipson's code to AWS, you'll need Python 2.7 installed on your computer. We'll be using Windows in this tutorial, but you should be able to do this on macOS and Linux as well.
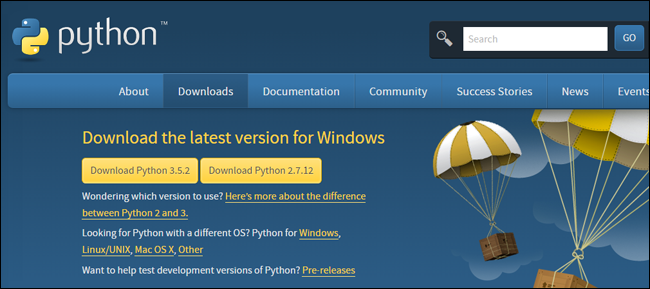
To install Python on Windows, head to Python's download page and download Python 2.7. Run the installer like you would any other Windows program. Use the default selections, as we'll need some of the tools that come with Python's installer.
Then, click here to download Ipson's code. Unzip the kodi-alexa-master folder within the ZIP file somewhere on your hard drive.
Once installed, it's time to dig into the command line. Press Windows+X on your keyboard and choose "Command Prompt". (Mac and Linux users will want to open their respective Terminal apps). From there, run the following two commands, one after the other:
C:\Python27\Scripts\pip.exe install awscli
C:\Python27\Scripts\aws configure
This will install the AWS command line tools and launch the configuration tool.
Paste your Acces Key ID and Secret Access Key when prompted. When asked for your Default Region Name, type us-east-1 (if you're in the US) or eu-west-1 (if you're in Europe). You can leave your Default Output Format empty (just press Enter).
Next, run the following command:
C:\Python27\Scripts\pip.exe install virtualenv
You'll need this installed for later.
Now CD into your kodi-alexa-master folder with the following command:
CD C:\Users\Whitson\Documents\Code\kodi-alexa-master
Obviously, replace the file path with the path to wherever you saved your kodi-alexa-master folder.
Keep the window open for now, we'll need to come back to it in a moment.
First, in order for Ipson's code to work with your Kodi and AWS setup, you'll need to define a few variables in a configuration file. Download this template, rename it to kodi.config , and save it in your kodi-alexa-master folder. Open it in a code-friendly text editor like Notepad++, and edit the following four four variables:
address =

            port =

            username =

            password =
The address variable will be the dynamic address you set up in step one (e.g. my.dynamic-domain.com ), port will be the port you used in step one (likely 8080, unless you changed it), and username and password will be the credentials from step one.
If you have multiple Kodi boxes in your house, you can also use this config file to control them separately with Alexa. We won't go through that in this guide, but you can find instructions in Ipson's documentation here.
When you're done, save the file and head back to your Command Prompt window.
Step Four: Push Your Code to AWS
With those variables in place, your code is ready for deployment. Back in your Command Prompt, run these two commands:
C:\Python27\Scripts\virtualenv venv
venv\Scripts\activate.bat
This will create a new "virtual environment" and activate it.
From the venv prompt that appears, run the following commands:
pip install -r requirements.txt
pip install packaging
pip install zappa
This will install a tool called Zappa, which will help you deploy your code.
Next, you'll need to set up Zappa. Run:
zappa init
It'll take you through a wizard. Just accept the defaults for everything.
Lastly, run:
zappa deploy dev
This will deploy your code to Lambda. It'll take a few minutes, so let it run. At the end, it'll give you a URL---copy this down, since you'll need it in the next step.
Lastly, I also recommend running the following command, since you'll need the resulting files in the next step as well:
python generate_custom_slots.py
Make sure your Kodi box is turned on and running when you run this script, as it'll be grabbing names of movies, shows, and other media from your library.
You're almost there! Now we just need to set up an Alexa skill for this code.
Step Five: Create Your Alexa Skill
To connect Ipson's code with our Echo, we'll need to create an Alexa "Skill" that uses that code. This app won't be distributed to anyone, it'll just be in "testing mode" forever, connected to your own Amazon account for use with your Echo.
To start, set up a free Amazon Developer account. Head to this page, log in with your Amazon account, and register for a developer account. Fill in the required fields, agree to the terms, and say "No" when you're asked if you're going to monetize your apps.
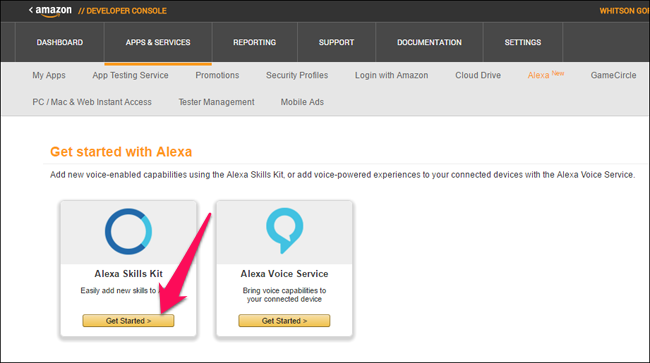
Once logged in, head to "Alexa" in the top toolbar. Click the "Get Started" button under "Alexa Skills Kit".
Next, click the "Add a New Skill" button.
Give your skill a name---I called mine "Kodi"---and give it an invocation name. This is what you'll say when you want to invoke a command. For example, my invocation name is also "the living room", which means I'll have to say "Ask the living room to..." to give Alexa commands for my media center.
In my experience, long invocation names work better than shorter ones. I used "Kodi" for awhile ("Ask Kodi to...") but Alexa occasionally had trouble finding movies. I couldn't tell you why, but longer invocation names like "the living room" work almost flawlessly for me. So try choosing something with a few syllables.
Click Next when finished.
Click "Add Slot Type" button in the middle of the next window.
Create a new slot called SHOWS. Head back to your kodi-alexa-master folder, open the SHOWS file with Notepad++, and copy the shows into the box on Amazon's page. This will help Alexa recognize the shows you dictate to it.
Alternatively, you can just list some of your TV shows in the box, one per line. You don't need to add every show in your Kodi library, but it's good to have a decent number of examples (I've found 20 or 30 is pretty good).
Click OK when finished.
Repeat this process with these Slot Types: MOVIES, MOVIEGENRES, MUSICARTISTS, MUSICALBUMS, MUSICSONGS, MUSICPLAYLISTS, VIDEOPLAYLISTS, and ADDONS (If you don't have information for any of these, create the slot type anyway---Ipson's code requires it---and just write the word "Empty" in the box. It won't cause any problems.)
Again, you don't need every single show, movie, or artist in these slots, so you don't need to update them every time you add a new movie to your library. It just helps to have a decent number of examples in each.
When you've created all nine Slot Types, head back to the kodi-alexa-master folder. Open the speech_assets folder and open the IntentSchema.json and SampleUtterances.txt files with an app like Notepad++.
Select all the text in the IntentSchema.json file and paste it into the "Intent Schema" box on the Amazon Developer website. Repeat this process with the SampleUtterances.txt file, placing the text in the "Sample Utterances" box.
When you're done, click Next. It may take a few moments to build the interaction model.
On the next page, choose "HTTPS" for the Endpoint Type and paste in the URL you got at the end of Step Four. Choose your geographical region (North America or Europe) and select "No" for Account Linking. Click Next.
On the next page, select "My development endpoint is a subdomain of a domain that has a wildcard certificate from a certificate authority". Click Next.
You shouldn't need to add any information on the Test page, though you can test certain aspects of the code if you know what you're doing. Otherwise, click Next.
On the Publishing Information page, fill out the required fields---but don't worry too much about what you put in, since you won't be submitting this app for certification. You're the only one who will be using this app. (Here is a 108x108 icon and a 512x512 icon for you to use.) Click Next when finished.
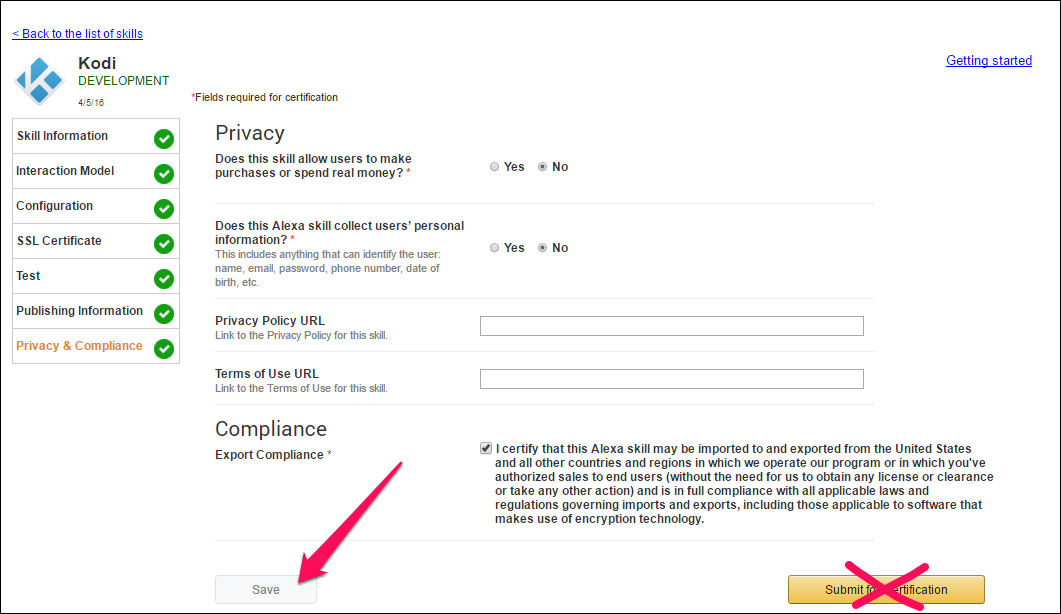
On the final page, choose "No" for both privacy questions and check the Complicance box. Click the "Save" button when you're finished. Do NOT click the "Submit for Certification" button.
Step Six: Test Your New Commands
If all went well, you should be able to test your new commands now. Make sure your Kodi box is turned on, and try saying something like:
"Alexa, ask the living room to play season one, episode one of Friends"
(...obviously replacing that with an episode and show that you have on your machine.) It may take Alexa a moment, but hopefully she should respond and start playing the show in question. If you get an error and the episode doesn't play, go back and make sure you did everything properly.
You can ask Alexa if you have any new episodes, ask her to play the next episode of a show, or even use her to control Kodi, as inefficient as it may be ("Alexa, ask the living room to pause," "Alexa, ask the living room to navigate down," etc.). Check out the SampleUtterances.txt file to see all the things Alexa can do with this integration. If you ever want to add a new phrase that corresponds to one of those functions, just log back onto your Amazon Developer account and add it to the list we pasted in step four.
It isn't the quickest or easiest thing to set up, but once you get it working, it's easily one of the coolest things you can do with your Amazon Echo, in my opinion. Now I can start watching TV while cooking in the kitchen, or when my remote's batteries are dead. This is the kind of power Amazon Echo was designed to have, and even though it takes a bit of work, it's well worth it.
Having trouble? Check out this thread on the Kodi forums, as well as the original GitHub page, or drop a line in our comments below.
Title image from doomu/Bigstock and Amazon.

