Quick Links
On the desktop, apps like Dropbox and Google Drive sync folders between your devices. But on your phone, it only gives you access to your cloud storage. An app called FolderSync lets you sync files and folders to and from your Android phone, just like Dropbox does on the desktop.
Why Use FolderSync?
There are several options out there for getting information from an Android device to a PC (or other Android devices)—some even built by Google itself. For example, Google Photos offers sync with unlimited storage for Android users. This allows users to take all the photos they want and store them on Google's servers, with the ability to access them from essentially any device at any time. It works for camera photos, saved photos, and screenshots—and it's even customizable so users are able to select which folders get synced and which don't.
Dropbox has a similar feature with automatic camera uploads.
The biggest issues with these services are limited control options, and the fact that they're only for photos. Users are able to select a few options—like what's synced, for example—but not arguably more important features, like exactly where photos are stored. FolderSync is an Android app that opens that door completely, with granular control of what's synced, where it goes, frequency, and many other factors.
There are two versions of FolderSync available. FolderSync Lite is the free, ad-supported version of the app, which is limited two two accounts and is lacking more advanced features like sync filters and Tasker support. The full version, which costs $2.87, is ad-free and completely unlimited.
It's probably easiest to test out the app with the free version, then make the jump to the premium version of advanced functionality is required.
How to Set Up FolderSync
As with many feature-rich apps, setting up FolderSync for the first time can be a bit overwhelming. As long as you know what you're looking at, however, it can be pretty painless. And once you've done it a few times, it becomes second nature.
The first few parts of the setup process are pretty straightforward, where you'll go through a basic walk through and select the startup screen. It really doesn't matter what you choose here, you can change it later in the settings menu.
First, it will ask you which screen you want to see when you start the app. I usually just start with the home screen, because that allows quick access to all the other options.


If you've got an SD card or your phone's storage is formatted into two different partitions, you'll also need to give FolderSync access by tapping the "External Storage Permission" button, selecting the SD card or partition, and hitting "Select" at the bottom. This will allow FolderSync to access files found in areas that it may otherwise not have access to.


The last two options are simple: select whether or not to allow the app to automatically send crash reports if something goes wrong, which helps the developer correct issue and build a better overall apps; and then a final review of the setup. Hit "Save" in the bottom right corner, and you're ready to start configuring sync options.


This is where the real fun starts, because it's where things can start to get complicated (I mean, customizable). Before we jump into that, though, let's talk a little bit about the terminology FolderSync uses:
- File Manager: The app's built-in file manager.
- Sync Status: See what's currently syncing and if there are any sync issues to address.
- Accounts: This is where you'll add and modify cloud accounts, like Dropbox and Google Drive.
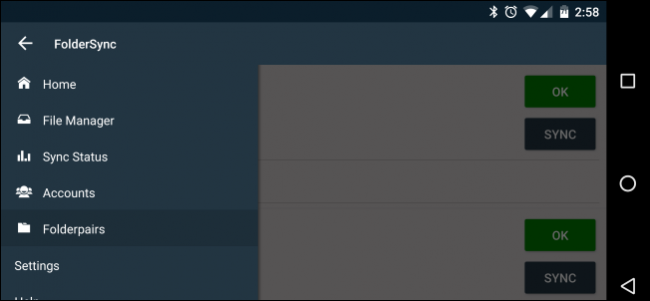
- Folderpairs: This is where you'll control which folders are synced to and from the mobile device, as well as the location they'll sync to on the remote end.


Right out of the gate, there are two different way to start up a sync: manually or with the automated wizard. They both do basically the same thing, but the manual option offers more control over sync options, which is definitely worth looking into. The good news is that you can set up everything with the wizard, then jump into the folderpair to edit the more intricate options.
How to Set Up Syncing with the Wizard
Like most wizards, this process is fairly straightforward. First, tap the "Create new sync" button and name the folderpair—choose something that's unique and describes what you'll be syncing. In this example, I'm setting up a folderpair for screenshots.


Next, you'll add a cloud account. FolderSync supports most of the popular services like Dropbox, Google Drive, Amazon Cloud Drive, Box, OneDrive, and several others. Hit the "Add Account" button and select which account you'd like to add, which will start the setup process.


Like with folderpairs, the first thing you'll do is choose a name. I wouldn't make this one specific to the action, since you could eventually add different folderpairs that sync to the same service—instead, I generally just give it the same name as the service I'm setting up. For example, for Google Drive, I just call it "Drive."


From there you'll just key in your cloud storage service's credentials by hitting the "Authenticate Account" button. Once you're logged in, be sure to hit the "Save"button in the bottom right, otherwise it'll discard all the info you just entered and you'll have to start over.


After the account is selected, hit "next" to choose the sync type. There are three primary options here:
- To local folder: This pulls data from a folder in your cloud storage and transfers it to the Android device.
- To remote folder: This pushes data from the Android device to a folder in your cloud storage.
- Two-way: This keeps the data synced between the service and the device.
For this example, we're going to create a folderpair that transfers all the screenshots on the Android device to Google Drive, so we'll select the "To remote folder" option.

On the next screen, you'll choose which folder to sync and where to sync it to. The "Remote folder" option is where you'll select the folder from your cloud storage service—just tap the blank area to open the folder picker. Once you've found the folder, simply hit the green checkmark in the lower right corner. If you need to create a remote folder, you can do so with the plus sign in the upper right.


The process is exactly the same for the local folder, but this time you'll choose the folder on your device that'd you like to sync. For this example, we're syncing the screenshots folder, which is found in Pictures/Screenshots on our phone. When you're done, tap the "Next" button.


The next and final screen of the wizard lets you control scheduled sync options. If you choose to set up a scheduled sync, just hit the "Use scheduled sync" checkbox and select the interval you want. There are plenty of options here, ranging from short spans like "every 5 minutes" to "every 12 hours," as well as daily, weekly, monthly, and advanced options. If you choose the "advanced" option, you can specify the exact days and times for the app to sync.


That's the end of the wizard—your folderpair should be set up now. In order to get more advanced options, like instant sync, you'll have to manually edit the folderpair.
How to Set Up Advanced Folderpair Options
Once your folderpair has been set up, you can edit it by heading into the menu (hit the three lines in the upper left corner) and selecting "Folderpairs." Tap on the option you just created ("Screenshots" in this example).


This is where you can edit the all the options you just set up—account, sync type, remote folder, local folder, and scheduling—as well as access more advanced functionality, like sync options, connection choices, notifications, and advanced settings for power users. That may sound a bit daunting, so we'll go over each section individually.

Sync Options
There are a lot of robust features here, but the one that I always enable is "Instant sync." This tells the app to keep a constant watch on the folderpair and instantly push new files to the remote folder.

There are other options here that can be powerful tools for the right situation. For example, "Delete source files after sync" can help keep space free on the mobile device—in this example, I'm never going to look at the screenshots on my device again, so it can help avoid filling up my handset's storage space unnecessarily.
The other option to pay attention to is at the bottom, with the "Overwrite old files" and "If conflicting modifications" selections. The former will allow you to choose whether to "always" or "never" overwrite old files, while the latter gives options on what the app should do if an file conflict arises. I generally just set this option to "Overwrite oldest."

Connection Options
This section is pretty straightforward, with advanced Wi-Fi and cellular options. You can set FolderSync to enable Wi-Fi for sync, to only sync when connected to certain networks (or SSIDs), or give it permission to sync on mobile networks. I'm pretty much okay with it syncing on any Wi-Fi network, but eating up my wireless data is a big no-no, so I keep those options off. Unless you're on an unlimited data plan, I'd recommend doing the same.

Notification Options
If you want to know every time FolderSync is doing something in the background, this is the place to set that up. As long as everything is running smoothly, I'm OK with not seeing any notifications, but I do want to be alerted if there's an issue. I typically just keep the "Show notification on sync error" option ticked, which helps keep the notification area on my devices clean when everything is working as it should.

Advanced Options
It's probably safe to leave most of these options alone, but if you don't want FolderSync to eat up any more battery than it has to, then you may want to tick the "Only sync if charging" box. I've been using FolderSync for years and haven't noticed any real battery drain from it, but it's still a nice option to have for the battery-conscious.

Once you're finished editing the folderpair, don't forget to hit the "Save" button in the bottom right, lest you have to set everything up all over again.
How to Force Sync and use the FolderSync Widget
Sometimes you may not want to set up folders to sync instantly, and would rather be in control of when your folderpair sync. There are a couple of different ways to do this, with the most obvious being the "Sync" button on the folderpairs page.

This button is available for each folderpair you set up, but if you'd like to sync multiple folderpairs at once, it's easiest to use one of the included widgets.
First, head to your device's home screen and long-press it. Tap the "Widgets" icon and scroll down to the "Foldersync" section, where there will be three widget options: Shortcut, 1x1, and 3x1.


The first option is a customizable shortcut that allows you to select which folderpair to sync, a favorite folder to open, or a quick way to open a specific FolderSync page.


The 1x1 and 3x1 options are simple "sync all" shortcuts that instantly force all folderpairs to sync when tapped. The 1x1 provides no feedback when syncing (unless you have the option to show a notification when syncing enabled), but the 3x1 widget will show the sync status after being tapped.

This is just the tip of the iceberg of what FolderSync is actually capable of. It's an incredibly robust application that can be as simple or as powerful as you need for it to be when it comes to syncing your data from Android to a cloud service (or vice versa).