Quick Links
The Calendar app included with Windows 10 is a modern, universal app that integrates wonderfully with Mail and other Windows 10 apps. If you're looking for a place in Windows 10 to manage your days, weeks, and months, here's how to set up a Calendar in Windows 10's Calendar app.
Add and Configure Your Accounts
Calendar can sync with your online accounts, like Google Calendar, Outlook, or iCloud. In fact, the Calendar and Mail apps are linked, so if you've already set up an account in Mail, it will show up in Calendar as well. If not, you can add it manually in the Calendar app.
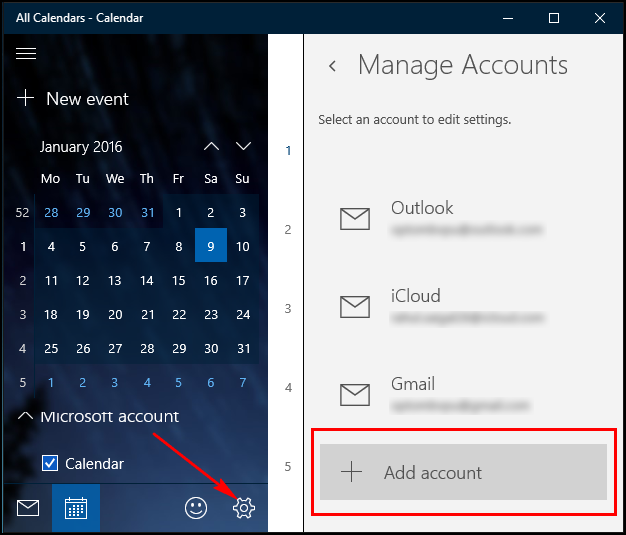
Calendar supports a range of account types: Outlook.com (default), Exchange, Office 365 for business, Google Calendar, and Apple’s iCloud. To add an account to the Calendar app, point your mouse to the lower-left of the screen and click the “Settings” cog. From the right sidebar that appears, click “Manage Accounts > + Add account.”
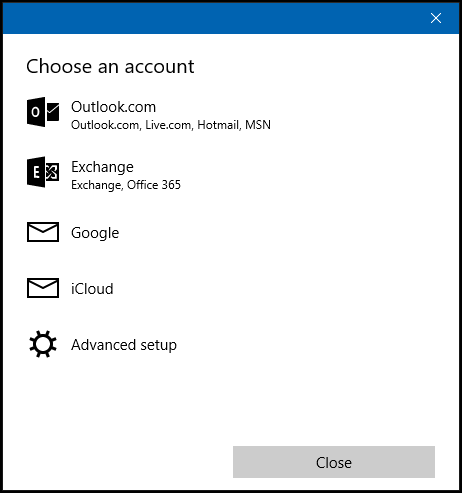
The “Choose an Account” window appears. Just like Mail app, it’s equipped with all kinds of popular calendar services. Choose the type of account you want and follow the on-screen instructions. If your settings are correct, then you get ported directly into that account’s calendar.
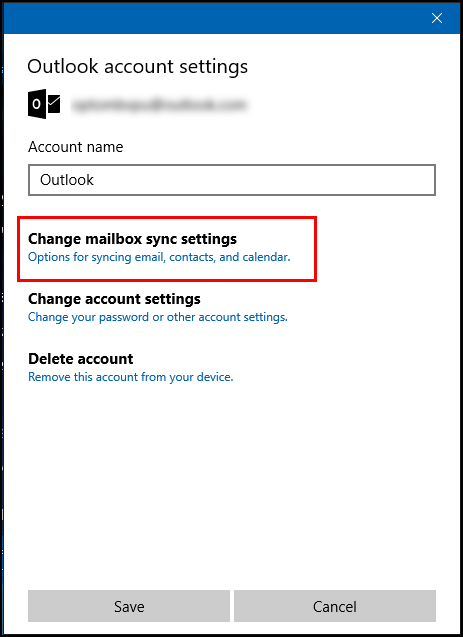
If you do not wish to see calendars from a particular account, then you can switch them off. Point your mouse to the lower-left of the screen and click “Settings.” Select the account listed in the “Manage Accounts” pane that you wish to limit and click “Change mailbox sync settings.”
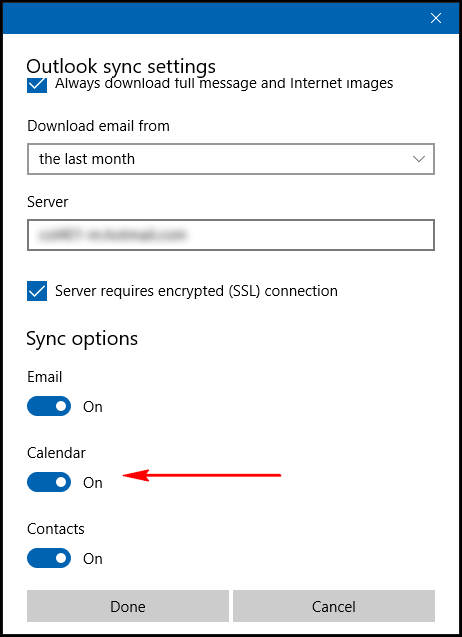
Scroll down, and under the “Sync Options” toggle “Calendar” option to off. If you’re having any sync related issues with the calendar server, click “Advanced mailbox settings” and configure the server details.
Working With Different Calendar Views
The Calendar app has a simple, minimalistic interface. The interface is divided into two sections:
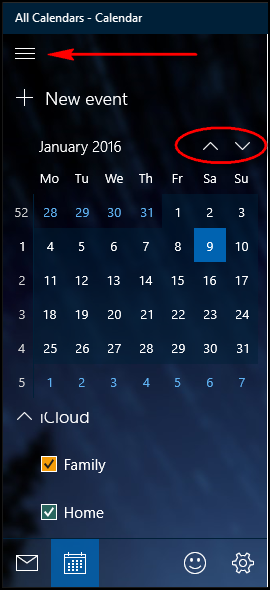
On the left, Calendar provides an overview of your calendars. Press the “hamburger menu” to collapse that pane. A compact calendar also appears at the left side. You can use it to jump to a date that’s far in the past or future.
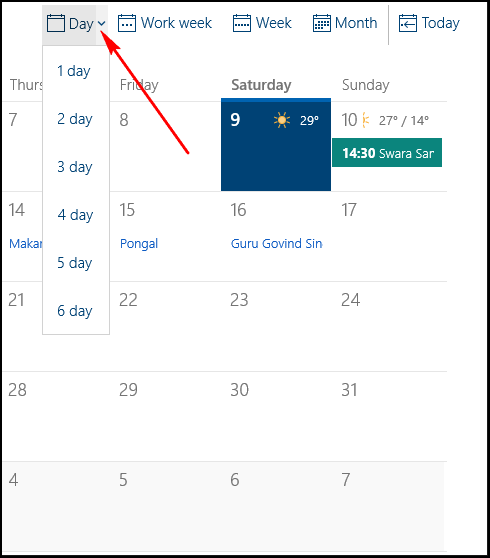
On the right, Calendar offers all the date-based views. Using the toolbar at top, you can switch among different Day, Work Week, Week, and Month view. You can click on them or press “Ctrl + Alt +1", "Ctrl + Alt + 2", and so on to switch between different views. The left and right arrow keys go to the previous or next day, and the up and down arrow keys go to the previous or next hour.
The “Day” view includes a drop-down menu, click them to specify how many Day columns you want to fit on the screen. “Work Week” view displays a traditional Monday through Friday work week in a list view. “Week” view shows up to 24 hours in a day and seven days of the week. “Month” view shows the entire month and highlights today’s date.
Adding a New Event or Appointment
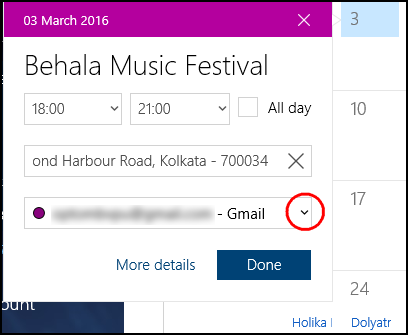
To enter a new event directly into your calendar, tap or click the correct time slot or date square. A small pane will appear for a new calendar entry on that date. Enter a name for your event. Select the beginning and ending time of your event. If the event has no time (like a Birthday or Anniversary), select the “All Day” checkbox. Enter the location and calendar account associated with it. This is a quick way for adding a calendar and most of the time, this is all you need.
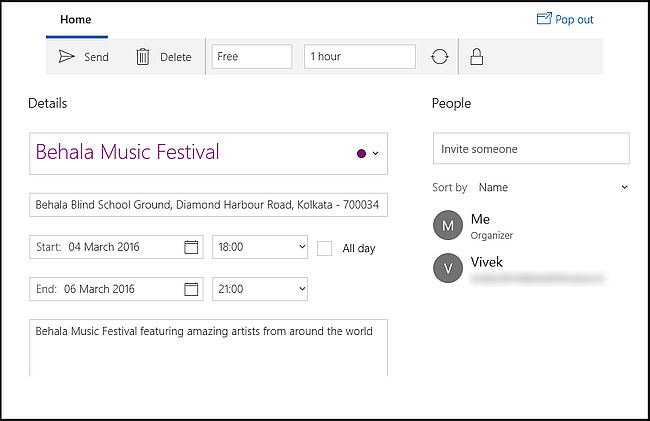
You can also click “New Event” at the top-left corner of the screen to create an event with more details. A big screen will pop up, allowing you to:
- Add the start and Ending Date, and their Time
- Use the “Show As” field to choose between Free, Tentative, Busy, or Out of Office
- Update the “Reminder” field using increments from None to 1 week.
- Set the event as Private by selecting the padlock
- Add an Event Description and Location.
To invite people, select the text field and start typing. Contacts will appear from your list of contacts in the People app. Choose the contact to add them to the event. You can invite someone by typing the email address too. Finally, click “Save and Close” or if you have invited someone, then click “Send.”
View, Edit, or Delete an Event
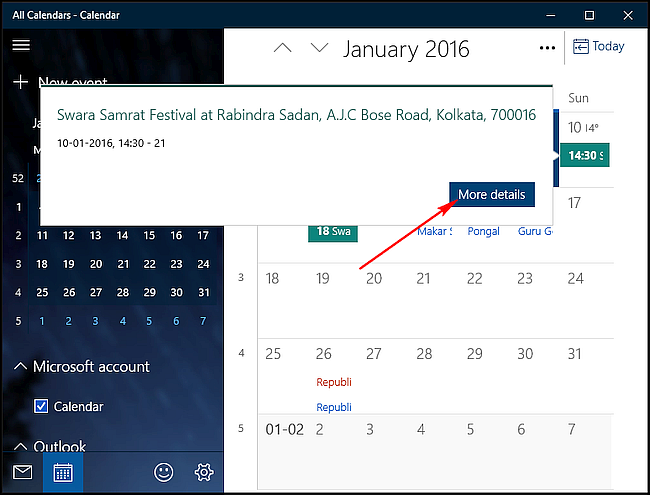
By default, Calendar will show you the event's name and time in the main view. If you mouse over an event, then a little box will pop out to show more detail, including the name of the event, location, starting date, and time. Click “More Details” to switch the event to “Details” view. Once you’ve opened the event, you can of course edit them as much as you want. Click “Save and Close” when you’re finished editing.
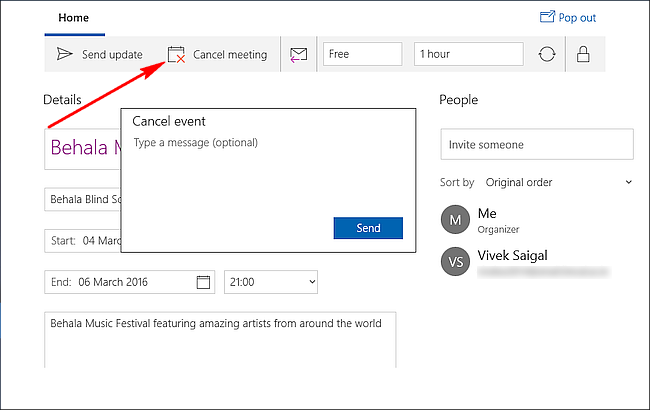
To delete an event or appointment, open the event and click “Delete” situated at the top of the toolbar. If other people have been invited, then click “Cancel meeting” instead of Delete. Type a short message and click “Send.”
Adding event and appointments to Calendar app is quite an easy and intuitive procedure. The entries you add to Calendar app will get synced to every Windows 10, Android, or iOS device you have, assuming that you have linked your accounts in those devices as well.


