Quick Links
When you insert a removable device such as a CD, DVD, or memory card into your computer, you'll often see Windows' "AutoPlay" popup. AutoPlay detects the kind of disc or media you have inserted and automatically takes whatever action you request. But if you find the feature annoying, you can disable AutoPlay very simply in Windows 10.
Enable or Disable AutoPlay in Settings
Open the “Settings” app, and click on the “Devices” icon.

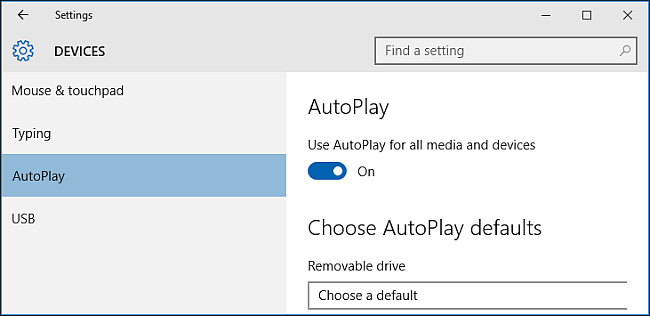
Click on “AutoPlay” on the left side, and switch on/off “Use AutoPlay for all media and devices.” With this switched off, you will never see the AutoPlay window pop up.

However, you can also leave AutoPlay on, and customize how it works. Under “Choose AutoPlay Defaults”, select the default action you want AutoPlay to perform when you connect each type of media or device. It could be a flash drive, memory card, or your smartphone. For each, you get choices like “Open folder to view files”, “Import photos or videos”, “Configure this drive for backup”, or—of course--“Take no action”. That way, you can "turn off" AutoPlay for certain types of devices by having it take no action, but leaving it on for other devices.
You can also press and hold the Shift key when you insert a device to open an AutoPlay notification, regardless of the default setting.

Enable or Disable AutoPlay in Control Panel
Windows 10's "Settings" app lets you configure AutoPlay for some types of media but not others. If you want finer control over devices like audio CDs, DVDs, Blu-ray discs, or SuperVideo, you might want to edit AutoPlay settings from the Control Panel instead.
Open the Control Panel, and from the "icons view", click the “AutoPlay” icon.

Check (or uncheck) the the “Use AutoPlay for all media and devices” box to turn AutoPlay on or off. If you want it on, select the default action for each type of media and device listed below it. You'll get the same options you get in the Settings app, like “Open folder to view files”, “Import photos or videos”, “Configure this drive for backup”, or “Take no action”. At the bottom of this page is a “Reset all defaults” button to return all the settings to their default state.

The AutoPlay window looks almost identical in Windows 7, Windows 8.1, and Windows 10. In Windows 7, you have a list with all the types of media for which you can set the AutoPlay behavior. In Windows 8.1 and Windows 10, you have the same list, but with a few more types of media available for configuration. For example, you can set AutoPlay behavior for removable drives and camera storage, while Windows 7 doesn’t include these type of media.

Disable AutoPlay Using the Group Policy Editor
Most people can disable AutoPlay from the Settings or Control Panel, and they won't need any further options. However, if you have Windows 10 Pro and want to disable AutoPlay for multiple users on the same computer, you can disable it through the Group Policy Editor.
Press “Win + R” to open the Run box and type “gpedit.msc.” Under “Computer Configuration > Administrative Templates > Windows Components”, click “AutoPlay Policies”.

In the right-hand side details pane, double click “Turn off AutoPlay” to open the Properties box. Click “Enabled,” and then select “All drives” in the “Turn off AutoPlay” on box to disable AutoPlay on all drives or choose choose “CD-ROM and removable media drives” to disable AutoPlay on these medias.

Turning off AutoPlay is incredibly easy, but if you take the time to configure it, it can be a pretty helpful feature. Note, however, that the most secure option is to set AutoPlay set to “Ask me everytime” if you prefer to keep AutoPlay enabled. This way nothing will automatically open. But if you trust everything you plug into your computer, AutoPlay can be quite convenient.