Quick Links
Apple TV has even more sophisticated content and purchase restrictions than its predecessors: it's dead simple to restrict mature content, apps, and purchases. Let's take a look at how to set and manage the restrictions.
Why Do I Want to Do This?
There are a wide variety of reasons you might want to enable content and purchase restrictions on your Apple TV and not all of them revolve around dealing with children. While the most obvious (and likely the most common reason) people want to lock down their media center hardware is to 1) prevent kids from seeing content they shouldn't be seeing and 2) prevent kids from spending money.
At the same time, however, the content and purchase restrictions are also useful for more than just parents. If you have roommates and you don't want them messing up your strategy game ladder scores you can turn off the online-multiplayer. The same things goes for purchases: no need to let roommates, visiting relatives, or Airbnb guests rack up charges purchasing seasons of TV shows, purchasing apps, or with in-app purchases.
Let's take a look at how to enable the restrictions by setting a passcode and then we'll look at the individual restrictions you can toggle on and off.
Enable Restrictions by Setting a Passcode
The first stop on our lock-down-the-Apple-TV tour is, as you might have guessed, the Settings menu. Here we'll need to create a parent/administrator passcode before the Apple TV will allow any content restrictions. That's fair enough, after all, as it would be pretty silly to set a content restriction that had no "lock" as it were.
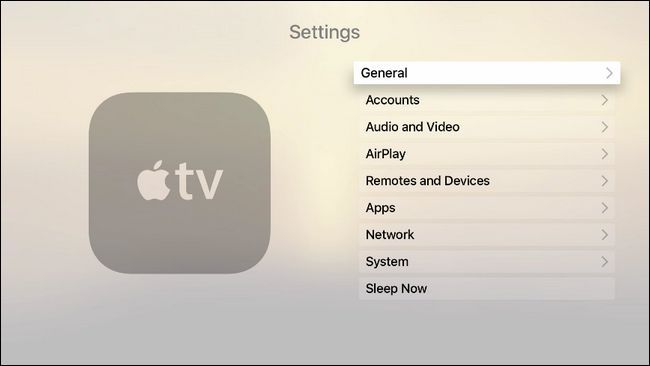
Navigate to the large gear icon on the home screen of the Apple TV and select it with the touchpad on your Apple TV remote to access the Settings menu.
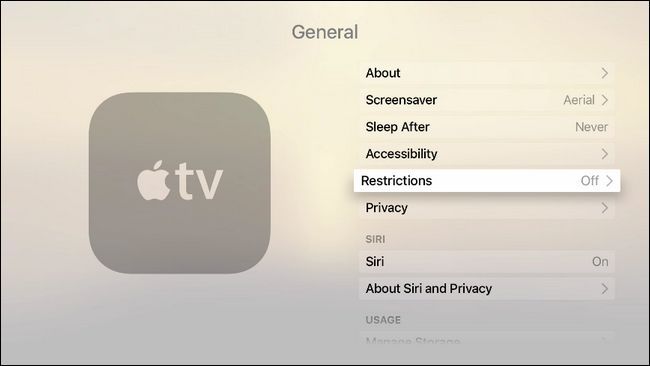
Within the Settings menu select the General sub-menu.
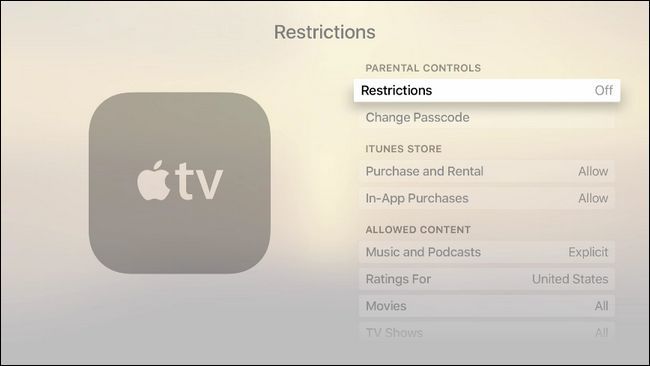
Within the General sub-menu select the Restrictions sub-menu. If this is your first foray into configuring restrictions it will be, as seen above, defaulted to "Off".
When you enter into the Restrictions menu everything but the top "Restrictions" entry will be grayed out. Click on "Restrictions" to enabled a passcode.
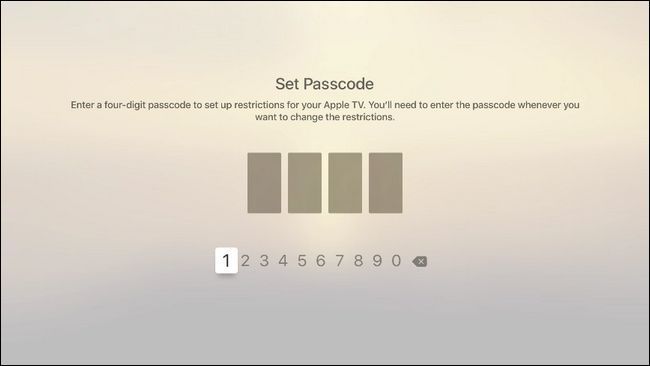
Select a four digit passcode and, when prompted, repeat the passcode to confirm. You'll be returned to the main Restrictions menu. Now that we've secured the Apple TV with a passcode let's take a look at the individual restrictions you can set.
Restricting Purchases, Apps, and More
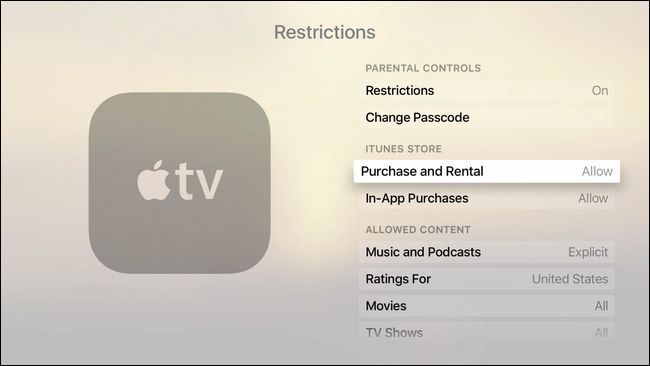
With the passcode set, let's turn our attention to what can be restricted and how you can restrict it. The one topic that is of interest to parents, roommates, and landlords alike is front and center at the top of the screen: iTunes Store.
In the "iTunes Store" sub-section you can toggle "Purchase and Rental" as well as "In-App Purchases" between the default "Allow" and "Restrict". The former stops the user from purchasing or renting any content from the iTunes store (including music, movies, TV shows, and apps) and the latter restricts any in-app purchases so nobody racks up a $500 bill for Super Power Smurf Berries in some silly Freemium app.
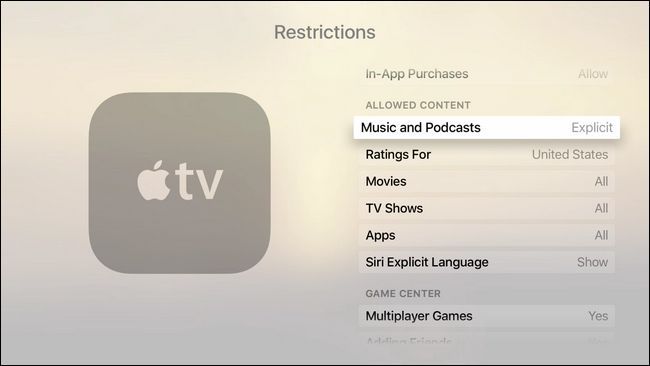
The next sub-section, "Allows Content", deals not with purchasing restrictions but with restrictions on the playback of content. Here you can toggle music and podcasts between "Explicit" and "Clean", change the rating system to represent the ratings of your country (if available), toggle movies, apps, and even whether or not Siri will display explicit language.
The movies and TV shows can be left wide open, turned off completely, or adjusted based on the rating system you selected. Using the U.S. rating system, for example, means you can restrict movies to only PG-13 and below (or any other rating) and TV shows to, say, TV-PG and below. The apps rating system is based on the iTunes ratings and allows you to turn apps off, allow all apps, or restriction the based on the 4+/9+/12+/17+ system (handy for keeping your young children away from that zombie shooter you're addicted to).
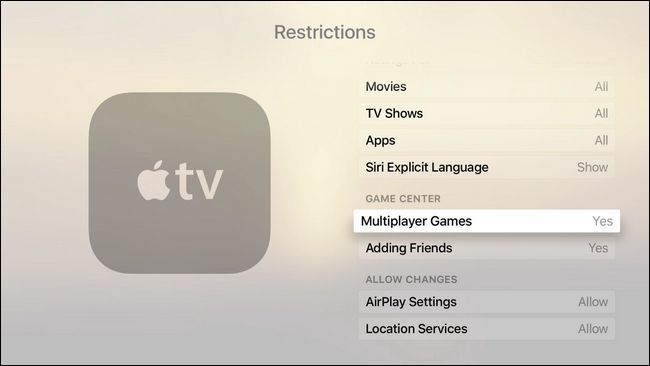
Finally there are two last sections to look at. In the "Game Center" subsection you can toggle Multiplayer Games on and off as well as the Adding Friends function. Both restrictions are useful if you want to allow younger kids in your household to play games but not to add strangers as friends or to play online with multiplayer games at all.
The last section "Allow Changes" has restrictions for AirPlay Settings and Location Services. If you use the passcode system for nothing else this is a handy thing to lock so people, grownups and kids alike, don't mess with these settings.
That's all there is to the Apple TV purchase and content restriction system. While overall we're pretty happy with the restrictions system we will say that it's a big oversight that you can't filter apps on an individual level. The content restriction works great on movies and TV shows as the content is passive and it has already been reviewed and rated. It doesn't work all that great on apps, however, as so many apps can deliver content (and it's not the content but the app that receives the rating). The Netflix app, for example, is rated at 4+ but we all know that there is tons of content on Netflix that isn't kid-friendly. It would be nice if you could create a white list of apps that your child could launch (or a blacklist of apps that required the passcode). Hopefully in future iterations of content restriction services on both the Apple TV and iOS devices this oversight will be addressed.
Have a pressing tech question about your Apple TV? Shoot us an email at ask@howtogeek.com and we'll do our best to answer it.

