Quick Links
Rainmeter is a lightweight application for customizing your Windows desktop. Rainmeter works by installing community made 'skins', many of which can change how the desktop works with widgets like app launchers, RSS and email readers, calendars, weather reports, and many others. It has been around since Windows XP, where it was used as a tool for displaying basic info on the desktop, but has since gained a large community following which has produced high quality skins which can change the whole desktop experience.
Installing Rainmeter
Rainmeter is an open source program and can be downloaded from their official website. If you want the latest updates, you can also build it from the source code at their Github repository.
Rainmeter can be installed portably as well, but it isn't recommended. The standard installation works just fine.

Installation is simple, but make sure "Launch Rainmeter on startup" is checked, or else it will have to be manually restarted after a reboot.
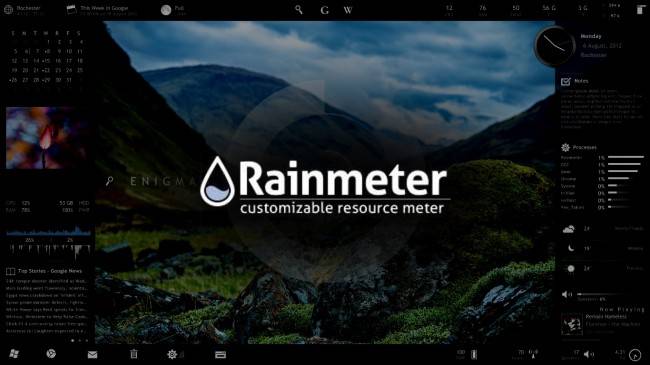
Once Rainmeter is installed, you should see a few new things on your desktop, displaying basic things like disk and CPU usage. This is Rainmeter's default skin.

To get to Rainmeter's settings, right click on any one of the skins and click "Manage Skin". A window will come up listing all your installed skins. Clicking "Active Skins" will let you manage each one individually.

You can edit the positioning and settings of each skin. If you want to make not draggable, unclick "Draggable" and click "Click through". This will also disable the right click menu, but fortunately Rainmeter adds an icon in the Windows toolbar, which also lets you access the menu.

Finding and Installing Skins
Rainmeter's default skin is useful, but fairly boring. Many sites exist for showcasing Rainmeter skins, including DeviantArt, Customize.org, and the Rainmeter subreddit. Sorting by "Top - All Time" on the subreddit brings up some of the best skins and layouts. Skins from these sites can be downloaded and mixed and matched to your choosing. Some skins, like Enigma, are essentially entire Rainmeter suites by themselves.
To install a skin, just double click on the .rmskin file. Rainmeter's window will pop up allowing you to install and enable the skin. For some skins, there are lots of different features, so if you don't want everything loaded at once, uncheck "Load included skins", and Rainmeter will simply just add them to your list of skins.

Tweaking Rainmeter
Rainmeter allows for an amazing amount of customization. If you want to get your hands dirty with the code behind the skins, it isn't too complex. Right click on a skin and hit "Edit skin", which will bring up a configuration file with lots of variable definitions.
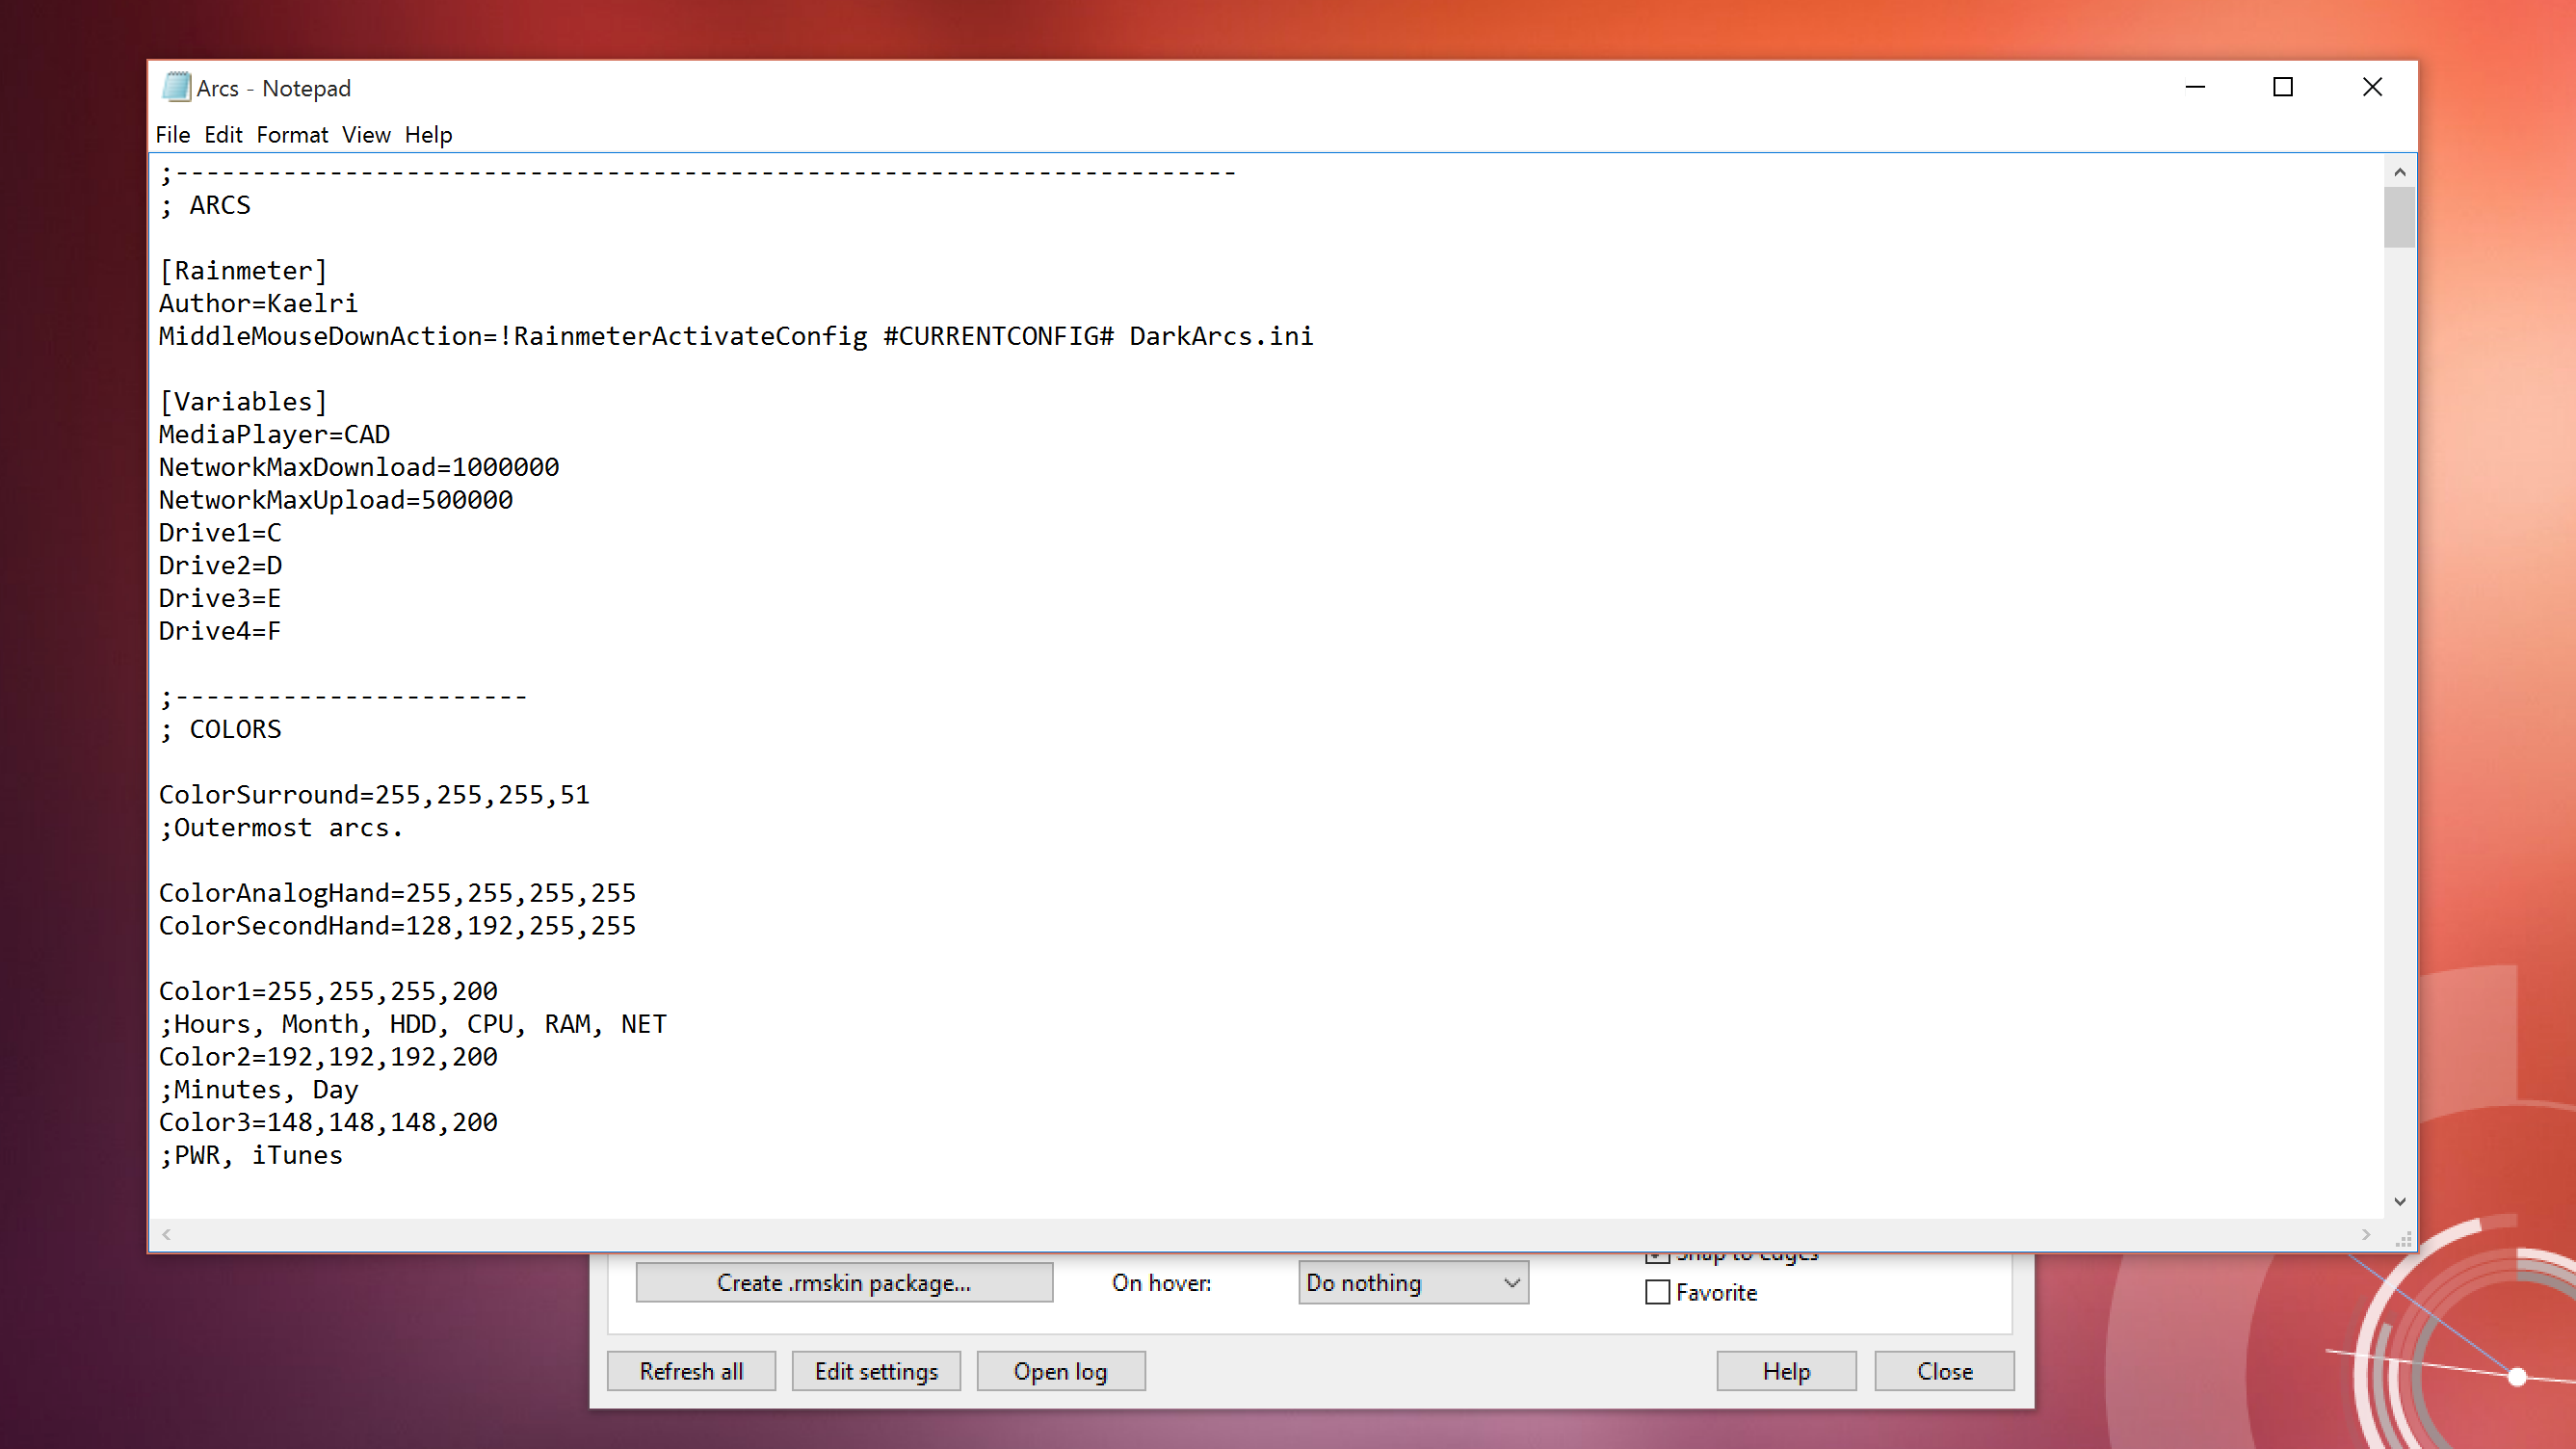
For example, if you wanted to change the color of the outer rim of this clock, you can edit the values of the variable that controls that. Most skins have comments in the configuration file, so it's easy to tell what controls what.

Alternatives to Rainmeter
If you're on a Mac or Linux, unfortunately you're out of luck, as there isn't a Rainmeter build for OS X or Linux. For Mac users, there is Geektool, which performs many of the same basic functions such as displaying info on the desktop and some basic widgets, though there isn't as big of a community following behind it, so the options for skins are limited. Geektool is also much more oriented towards people who are familiar with the command line, as it runs nearly entirely on bash scripts.