Quick Links
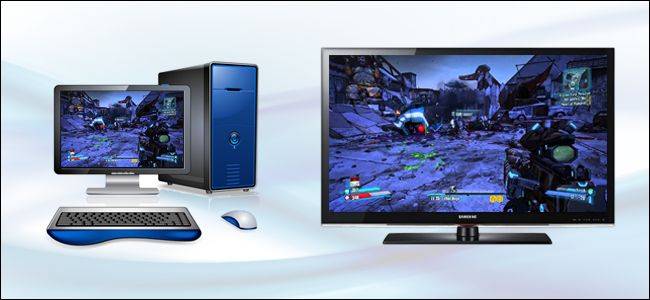
Valve's Steam Machines aim to bring your Steam game library right into your living room (but at a rather steep premium). Today we'll show you how to bring your Steam library (plus all your other computer games) to your living room for a fraction of the price with a Raspberry Pi.
Why Do I Want To Do This?
Hands down the most versatile gaming experience is the one you have on your Windows computer. Whether you're playing new cutting edge releases or emulating 20+ year old games, you can simply play more games on your PC than anywhere else.
Problematically, however, most of us keep our PCs in our home offices, dens, spare bedrooms, and anywhere but the where comfiest seat in the house with the biggest screen is: the living room. If you're like us you'd love to play your favorite titles on your living room HDTV but you're not about to either 1) build a whole new computer with a high end GPU to do that or 2) unplug everything and haul your entire computer down and gear down to the living room just to play.
Wouldn't it be nice if you could just stream what's on your PC right to your HDTV set without bringing the whole computer along for the ride? Fortunately for you, us, and everyone else who wants to pipe the powerful gaming goodness of their PC to another screen in their house, there's a way to leverage the GameStream protocol built into NVIDIA's mid-to-high-end GPUs to bring your gaming to your living room without breaking the bank.
Let's dig into the specifics of what you need and then show you how to configure your PC, Raspberry Pi, and game collection to get things up and running.
How Does It Work And What Do I Need?
NVIDIA designed the GameStream protocol so that they could get a slice of the living room/mobile gaming pie by streaming the games from your PC to your HDTV (via an auxiliary device or box that serves as a client).
We really, really, want to stress that last bit to clear up any confusion. This entire system hinges on you having a PC capable of playing the game and does not, in anyway, give you a computer attached to your TV capable of playing the games independently. The device attached to your TV is significantly less powerful than your actual PC and merely serves to display the game stream from your computer.
You can buy NVIDIA products, from the NVIDIA Shield lineup, ranging from tablets to full-blown $200 game boxes running Android intended to go right under your TV next to your other media gear, to accomplish that end. But you don't need to buy one of those NVIDIA products to access GameStream though!
Thanks to the creative folks at the open-source Moonlight project, who put together a reverse engineered and open source client software package for GameStream, we can receive and display GameStream streams on PCs, mobile devices, and embedded devices like the Raspberry Pi.
A project this cool definitely isn't free but it is definitely cheaper than either buying an off-the-shelf solution, building a second gaming PC, or waiting and shelling out big bucks for an official Steam Machine. If fate is on your side (and you already have the hardware) then this project is free. Even if you needed to purchase everything from scratch, PC aside, you'd still end up with a project cheaper than buying a dedicated machine. Let's take a look at the gear you need.
A GPU And Computer That Supports GameStream
GameStream is a proprietary protocol built into select NVIDIA GeForce graphics cards. Desktop users will find GameStream support in the GeForce GTX 650 and above. Laptop users will find GameStream support in select GTX 600M GPUs as well as all GTX 700M and 800M models.

Additionally you'll need either Windows 7 or above as well as hardware than can support the streaming process. The GameStream requirements, outlined here, indicate you should use at least an i3-2100 processor or higher with 4GB of RAM or higher. We cannot comment as to whether or not those are true requirements or recommendations couched as requirements because our test machine exceeded the requirements.
Finally, beyond just the hardware on your PC you'll also need the GeForce Experience software. This is independent of the actual GPU drivers and unless you went out of your way to install it you likely don't have it on your PC at the moment (we didn't before undertaking this project).
A Raspberry Pi Microcomputer
There are several iterations of the Raspberry Pi microcomputer by now. For this project you'll, ideally, want a new Raspberry Pi 2 (which sports a beefier processor than its predecessors). That's the unit we used for this tutorial and that's the unit we can report very positive experiences with.
You can also use the Raspberry Pi B+ model; although we didn't use that one for this tutorial in our reading on the matter many users reported using the Pi B+ with success.
This tutorial will not walk you through the initial setup of your Raspberry Pi unit as we have previously covered the Raspberry Pi extensively. If you're new to using the Pi and need to catch up to this point please take a peek at The HTG Guide to Getting Started with Raspberry Pi for an overview of important topics like selecting a good power source and then check out How to Enjoy Dead Simple Raspberry Pi Setup with NOOBS for help installing Raspbian.
Moonlight Embedded
We'll install this directly from the Raspberry Pi later in the tutorial, but we're listing it here as it's such a critical component we're making note of it here (and hoping you find uses for such a great open-source project on other devices).
You can read more about the Moonlight project here.
Remote Peripherals
The Pi, Moonlight, and GameStream all support the traditional gaming combo of mice/keyboards and you can plug gaming peripherals into the USB ports like wired Xbox controllers or use wireless controllers with an appropriate adapter.
We used both a wired mouse and keyboard plugged into the Raspberry Pi as well as an Xbox controller hooked up, wirelessly, to the source PC. (For tips on hooking up a wireless Xbox controller to your PC see this tutorial.
The range of the wireless adapter was so great there was no need to add the controller to the Pi unit at the end of the streaming tunnel; we could use the controller right off the source PC because, remember, the whole system is streaming the content from the PC (not actually generating it on the Pi).
Steam
If you check out the GeForce Experience documentation you'll find a list of supported games. That's great and all, but despite the list's length it's not very comprehensive. In fact in the introduction of the article we promised you a Steam Machine for your living room that could play any of the games your gaming PC could.
Although it's not listed on the game list, because it's not a game, you can launch the actual Steam app from the remote client and then boom you've got total access to not just your Steam Library of games but any games or emulators you've added to Steam too.
We were able to launch any native Steam game as well as old PC games, like the old god-simulation game Black & White (2001) without any issues.
Configuring Your PC
On the PC side of things setup is really simple. Your PC is already up and running, you already have a GeForce card installed, and, if you already installed the GeForce Experience when you installed your GPU, then you actually have nothing left to do!

If you do need the GeForce Experience software, and remember its not the same as your GPU drivers but an extra software suite layered over top, head over to the download page here to grab a copy for your PC.
When installing the software fresh, you really do need to reboot your PC. We know, we know. Most of the time that's just a suggestion often ignored, but this time around you'll need to actually reboot before the GameStream protocol is active. Trust us. We spent way too much time troubleshooting during this tutorial because we ignored the restart prompt.

Once you've installed it and rebooted, run the software, select the "Preferences" tab, and check that "GameStream" appears in the list of navigation options on the lefthand side. Select "GameStream" and switch the streaming on by selecting "On my network". At this point you've completed the configuration process on the PC. Let's go configure the Pi and then get down to playing some games.
Configuring Your Raspberry Pi
This tutorial assumes you have already installed Rasbian on your Raspberry Pi and you can boot it and access the command line (either directly if you configured it as such or by exiting the desktop to return to the command line). If you haven't done so, please return to the early portions of the article and check out the links on configuring your Pi.
Once Raspbian is up and running we have only a few minor things to attend to before we can start playing our games. Before we dive into all the commands we would strongly encourage you to configure your Pi to accept an SSH connection so that you can enter all of these commands from the comfort of your main computer (and with the comfort of cut and paste at that).
The first step is to add Moonlight to your Pi's repository list so we can use the apt-get command to pull down the packages instead of fussing with getting the full file URLs from the Moonlight GitHub repository and manually installing it.
Enter the following command while logged in as the root user on your Pi (the default is username "pi" password "raspberry").
sudo nano /etc/apt/sources.list
This will open up your repository sources list. Add the following line to the list.
deb http://archive.itimmer.nl/raspbian/moonlight wheezy main
Exit nano by pressing CTRL+X, save the document when prompted. Next, we'll install Moonlight. Enter the following commands.
apt-get updateapt-get install moonlight-embedded
When prompted answer all the questions "Y" to install all the necessary files.
This is the process we used and it should work for the vast majority of users. If for any reason you wish to manually install the Moonlight software and dependencies, please refer to the readme file for the Moonlight Embedded at GitHub here for additional information.
The final step is to pair your gaming PC to the Pi. Again at the command prompt on the Pi, enter the following command where X.X.X.X is the local network IP address of the gaming PC.
moonlight pair X.X.X.X
The command will generate a certificate and a four digit PIN. On your computer screen you'll see a popup like so.

Enter the PIN to complete the pairing process and authorize the Moonlight/Pi unit to access your game stream.
Playing Your Games From Your Living Room
You've installed GeForce Experience on your PC, you've installed Moonlight on your Raspberry Pi, now it's time to hook up the Pi to your TV (if it isn't already hooked up) and use a simple command to link the Pi to your PC and enjoy your games.

The format for the moonlight streaming command is as follows, where again X.X.X.X is the IP of the gaming PC.
moonlight streaming [options] X.X.X.X
What goes in the [options] section? While you can leave it empty and let everything run in the default settings there are a few reasons you may wish to tinker with the switches. Here are all the available command switches you can use in the options section.
         -720            Use 1280x720 resolution [default]
-1080           Use 1920x1080 resolution
-width          Horizontal resolution (default 1280)
-height         Vertical resolution (default 720)
-30fps          Use 30fps
-60fps          Use 60fps [default]
-bitrate        Specify the bitrate in Kbps
-packetsize     Specify the maximum packetsize in bytes
-app            Name of app to stream
-nosops         Don't allow GFE to modify game settings
-input          Use as input. Can be used multiple times
-mapping        Use as gamepad mapping configuration file (use before -input)
-audio          Use as ALSA audio output device (default sysdefault)
-localaudio     Play audio locally
If you're having issues when using the defaults you can use the command switches to make adjustments. For example it should default to using Steam as the default app but if it doesn't you can use the following command to force Steam to run.
moonlight streaming -app Steam X.X.X.X
As another example, let's say your computer doesn't do well with the default 60fps setting and you always forget to turn off the speakers on your computer before firing up Moonlight. You could downshift to 30fps and instruct the GameStream protocol to turn off the audio on your computer and only play the audio in the living room with the following command.
moonlight streaming -30fps -localaudio X.X.X.X
Once you execute the command Moonlight will automatically connect to your PC, launch Steam in Big Picture Mode, and within seconds you'll see the Big Picture Mode dashboard on your living room TV just like you would if you were sitting in your home office playing on the computer (and, in fact, if you were to go into your home office and look at the PC you'd see the screens were mirrored).
This is the moment where, if you're anything like we are when it comes to geeky projects and gaming, you'll just sit there stunned at how amazing the whole thing is. There you'll be, sitting in your living room looking at your TV but playing games that are actually on your PC in the other room... and it'll all work shockingly smoothly with crisp graphics and sharp sound. The future truly is now.
Have a pressing question about gaming in the 21st century? Shoot us an email at ask@howtogeek.com and we'll do our best to answer it. Have a clever Raspberry Pi project to share? We'd like to hear about that too.