Quick Links
Image sharpening might just be the most underutilized digital photography trick this side of studying the histogram. Read on as we explain what image sharpening is, why we need it, what it does, and why you should be liberally applying it to your own images to banish fuzzy edges and make your images pop.
Why Exactly Are Images Fuzzy in the First Place?
Before we dig into how to sharpen your images it is important to understand exactly why digital images even require sharpening in the first place. Digital images, both those created in a digital camera and by scanning images to create digital copies of analog works, suffer from limitations imposed by the digital device's sensor.
While the limitations of the sensors in comparison with the human eye are numerous there is one particular limitation that creates overly soft or fuzzy images. The human eye is able to distinguish lines of contrast with incredible clarity and sharpness. The sensor of a digital camera, however, is limited by the number of pixels, or points of data, it can collect.
When the scene before it is higher resolution than it can capture (which it always is) it is forced to capture the average of what the individual pixels on the sensor see. The result is a fuzzing of images as the camera (or scanner) is forced to do the best it can with the limited amount of data it can capture.
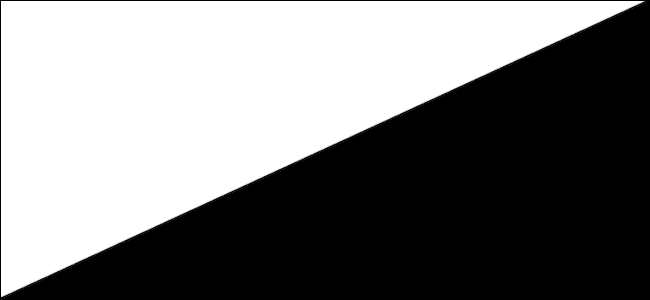
Let's look at some digital mockups of this phenomenon to demonstrate the effect before moving on to working with actual photos. In the image below we've divided the space into two triangles, one black and one white.
When viewed at a distance on your typical screen it looks like one crisp and continuous line between the black and white sections. Let's pretend for the sake of demonstration that the image above is not a digital picture presented to you on a digital screen but the intersection of two spaces in the real world. Say two halves of a canvas that have been painted with extreme precision such that, even when viewed at a very close distance with a magnifying glass in hand, the line remains crisp and distinct. This line, then, is resolved by our eyes to its maximum resolution and we perceive it as very sharp and crisp.
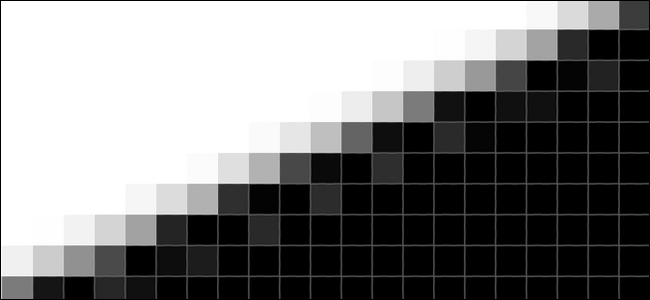
Let's view the same mockup of two triangles as if it were captured by a very low-resolution image sensor. While the image above contains nearly 200,000 pixels, the image below is a representation of black and white space as if the degree of resolution was barely over 200 pixels.
We know if the delineating line between the white and black area is razor sharp to the human eye then it should be razor sharp in the camera, right? The problem is when that razor sharp delineation is so fine it passes through a given pixel on the camera's sensor the individual pixel cannot say, "OK, half of me is white, half of me is black."
It can only record a single value for the entire pixel. As such it is forced to say, "OK, the average of the light hitting me is gray" because it cannot record part black and part white but merely the average of the photons hitting the individual pixel.
The more pixels you pack into a sensor the more detail you can resolve, but ultimately there comes a point in every digital image creation where the incoming data (the light bouncing off the subject being photographed or the photo being scanned) exceeds the capability of the sensor, the individual pixels are resigned to selecting a best-estimate-shade, and the contrast between the edges is blurred.
Fixing Fuzzy Photos with the Unsharp Mask
Now that we know what causes fuzzy photos, let's look at what you can do to fix the issue and give your images a sharpness that really helps them pop (whether you're framing them or uploading them to Facebook).
Fortunately for us the concept we just outlined in the previous section is well known and understood in the photographic community and there are multiple ways to approach correcting it. The most common way, and the way we'll focus on today, is applying what is known as an "unsharp mask."
The counterintuitively named unsharp mask becomes a little more intuitively named if you understand how the process works. When you apply the unsharp mask to an image the editing application creates a temporary mask used to compare which areas of of the image are sharp (with high contrast) and unsharp (with low contrast). It then sharpens the unsharp areas (using that mask as a guide) until it difference between the high contrast and low contrast areas have equalized per the specification of the user. Thus, the unsharp mask isn't an unsharpening tool, as the name might imply at first glance, but a tool that tells you which parts of the image are unsharp and corrects them.
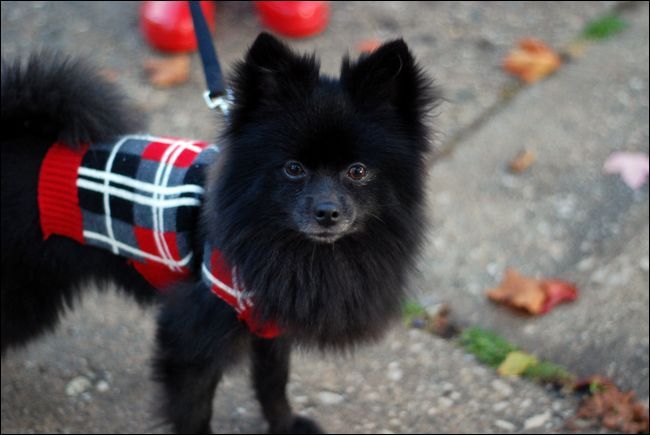
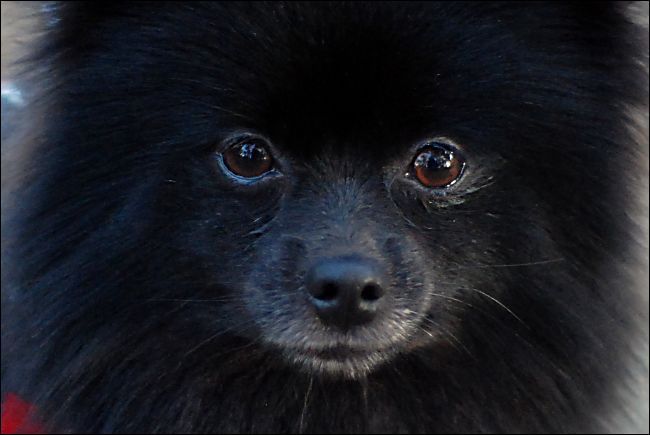
Let's enlist the help of our friendly office dog Cricket, seen above, to demonstrate exactly how the unsharp mask works and the adjustments we can make to it. Although we'll be using Adobe Photoshop for the demonstration today the unsharp mask tool is found in a wide variety of image editing applications as it is something of an industry standard. The terms and methods you'll see here apply just as readily to free editing solutions like GIMP as they do to Photoshop.
First, let's study the photo. The image above, straight from the camera without any editing, is simply reduced in size for insertion into this article. Nothing wrong with the photo at all. The subject is centered, the face of the subject is in focus, there's nothing particularly objectionable about it (unless, you know, you don't care for small dogs). But let's zoom in and take a look at the image in closer detail.
When we get in really close, it becomes obvious that the image is very soft looking. That's not the fault of the lens (we shot this image with a very sharp prime lens) but a side effect of the way the image is processed in camera, as we previously discussed.
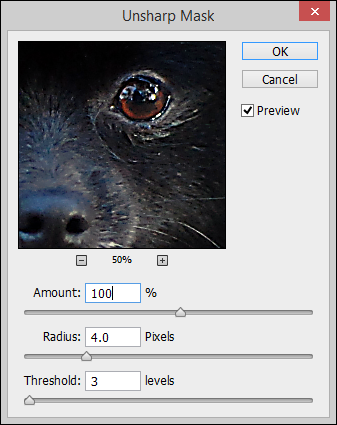
To sharpen the image, let's fire up the unsharp mask. First, prepare for the unsharp mask by adjusting your image to either 100 percent or 50 percent zoom; anti-aliasing algorithms in use by both the editor and your operating system can distort the effects of the sharpening process at other zoom levels.
In Photoshop you'll find it under Filters ->Sharpen -> Unsharp Mask.
As we mentioned above, the appearance of the unsharp mask tool is fairly universal and you'll find the three settings, Amount, Radius, and Threshold, regardless of the image editing tool you're using. The easiest way to understand what they do is to simply play around with them, but we'll highlight the key points here.
Amount: Always listed as a percentage, the amount indicates the degree of adjustment (how much light the lighter edges get and how dark the darker edges get). At the low end of the adjustment it's difficult to notice but when you max it out the contrast becomes very extreme. 50-100 percent is a safe place to start.
Radius: Specifies how large an area around each corrected point the effect is applied. The radius and the amount are intertwined; if you reduce your Amount value you can increase your Radius value (and vice versa). Increasing both to high levels will lead to significant color and contrast distortion (which may be a desirable artistic effect but will not make for a natural looking image).
Threshold: The threshold function determines where the sharpening algorithm will be applied based on a minimum brightness/contrast level. This particular setting is very useful for selectively increasing contrast in high contrast areas (such as around the eyes) but not over-sharpening areas you want to leave smooth (such as skin on the face). The lower the value the more the image will be uniformly sharpened. The higher the value the more areas will be excluded. Thus, if you wanted the whole image to have the sharpening effect applied as uniformly as possibly you would set it to zero and if you wanted to sharpen the details on a subject's face (like the pattern of their iris and eye lashes) without making their pores and wrinkles stand out, you would increase the value until you achieved the desired balance.
You'll also notice that we have the little preview window also set to 50 percent (the same anti-aliasing issues apply both to previewing the whole image and to previewing the image in the Unsharp Mask box.
Applying the settings we have above (100/4/3 for this particular image) significantly sharpens the image; let's take a look at the exact same crop we did above to see the difference.
Seen close up, the changes are readily apparent. There is a much higher contrast around the eyes, the highlights in the eyes are sharper, and the fur of the muzzle and face is more distinct.
When viewed with the same crop as the original retouched image the changes are less dramatic (as they are not seen in such a close up manner) but they make the details in the image, like the fur around the muzzle, stand out.
That's the real goal of sharpening an image. You want to recreate the sharpness of the actual subject as seen with the human eye but not create such intense and noticeable contrast that the viewer wonders what kind of manipulation was performed on the photo.
While we're looking at the photo, it's important to point out what the unsharp mask cannot do. It makes the focused area of a photo look better focused by sharpening up the edges and giving it a crisp look but it cannot add in detail that doesn't exist. You'll notice that in the above photo the eyes, muzzle, and nose became sharper (as well as the fur of the surrounding face) but the leash, concrete, moss, and leaves did not. Those objects were so far out of focus in the original photograph that no amount of sharpening could create even the illusion of them being in the focal plane.
Unsharp Mask Tips and Tricks
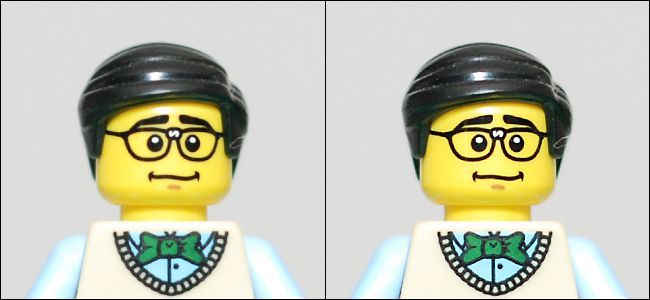
Although people and animals benefit from application of the unsharp mask (especially around the eyes which look much better when crisp and bright instead of soft focused) the unsharp mask really helps just about every image pop.
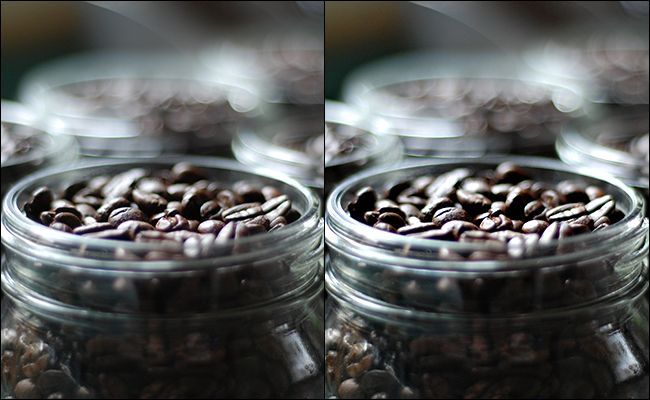
In the comparison above, for example, there's nothing wrong with the image on the left but once the softness is corrected for with the unsharp mask the increased contrast in the right image really helps the image stand out and gives it a nice crisp appearance.
To get the most from your unsharp mask application, regardless of the subject, let's run through some tips and tricks that ensure the sharpening process is a smooth one.
Disable in-camera sharpening. Above all else you want to disable in-camera sharpening. Point and shoot cameras almost always have onboard sharpening whereas high-end DSLR cameras rarely do (the presumption on the the part of the manufacturer is that the point and shoot user will not be doing any post-processing work whereas the owner of the DSLR most likely will). Photos double processed with an unsharp mask tend to look pretty awful so it's best if you disable in-camera and fine tune the sharpening on your computer.
Focus is king. A crisp physical focus in the camera is worth more than any unsharp mask can give you. Perfect your focus skills (and ditch your lens if its loose and soft in focus). As we mentioned above there's no magical way to use the unsharp mask to expand or fix the focal plane of a photo; you can only sharpen what is already in focus.
Less is more. Use the unsharp mask just enough to give the image a little pop. Think of the difference between looking at a 1080p display and a 4K display. The 1080p image is beautiful and very much high definition (compared to old standard definition televisions) but the 4K has this sharpness that just bursts right off the screen. When you're adjusting and comparing your photos you want to capture just-right sharpness increase that moves the image from "Yeah, that's nice." to "Wow, that's crisp." It's a fine line, though; once you hit that sweet spot further increasing the sharpening often yields an uncanny to outright unnatural looking image.
Sharpen last. If you're doing any other image editing, color adjustment, fixing dust, or stuck pixels, or otherwise editing the image, you always save the sharpening process for last. Think of sharpening an image as polishing a piece of jewelry after you've finished working on it. It's the last step after every piece is placed, every bit of metal bent and soldered, and the it's ready for the gallery.
Armed with an understanding of the sharpening process and how to best take advantage of it, you're ready to apply it to your own photos to turn good (albeit soft) photos into eye catching ones that really pop off the screen, living room wall, or wherever they should find themselves.
Have a pressing question about image editing, photography, or getting the most from your digital camera? Shoot us an email as ask@howtogeek.com and we'll do our best to answer it.

