There are several reasons for inserting the current date and time into your document. You may want to insert it into a letter or into a header or footer. Whatever the reason, Word makes it easy to insert the date and time into a document.
If you want the date and time to automatically update when you open or print the document, you can insert it as a field that automatically updates. The field can also be updated manually at any time.
To insert the date and time into your document, open a new or existing document in Word and press the “Insert” tab on the ribbon.

In the “Text” section of the “Insert” tab, click “Date & Time.”

NOTE: You may have to widen the Word window to see the full label on the “Date & Time” button. If you can’t make the window wider, you can find the button by looking for the icon shown on the button below. If there’s no room for a button’s label on the ribbon, the icon is displayed.
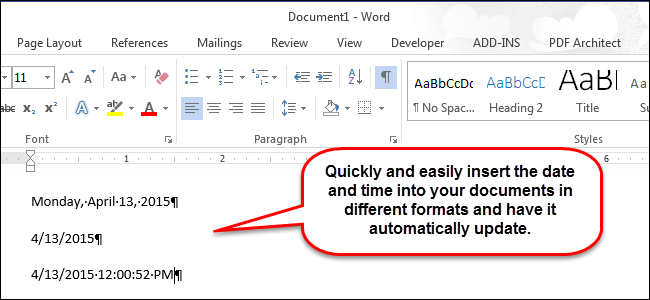
The “Date and Time” dialog box displays. Select a format for the date or time or both from the list. To have the date and/or time update automatically, select the “Update automatically” check box so there is a check mark in the box. Click “OK.”

The date and/or time is inserted into your document. If you chose to have it update automatically, it’s inserted as a field. When you put the cursor in the field, an “Update” button displays above the field that allows you to update the field manually at any time. You can also press “F9” to update the field, when the cursor is in it.

If you decide you don’t want the date and/or time updated automatically anymore, you can highlight the field, or put the cursor in the field, and press “Ctrl + Shift + F9” to unlink the field. You might want to update the field before unlinking it so it has the current date and/or time once it’s unlinked.