Quick Links
Apple's new Photos application was released as part of a recent system update. By default, Photos creates its library in your Pictures folder, but it can be easily moved or newly created.
There are any number of reasons you might want to create a new Photos library or move it to another location. We wanted to move our library because our "Pictures" folder (which is actually a special user folder) is located on our Dropbox. This causes Dropbox to constantly update whenever we're using Photos.
We don't need to have our Photos library on our Dropbox, however, because Photos is hooked into iCloud, so it is automatically backed up and synced to any other devices (iPad, iPhone, other Macs) logged into that iCloud account.

As we mentioned, by default Photos saves its library in your Pictures folder, which is in your user folder unless you move it like we did.
If you want to know exactly where your library is, you can open Photos and then "Preferences" ("Command + ,"), and the "General" tab will show you the location, which you can then open in Finder.

We click the the "Show in Finder" button and here's where our "Photos Library" is located. We want to move it back to our user folder so Dropbox stops constantly updating.

To move our Photos Library, we drag it to its new location, double-click it, and the Photos app will now point to it.

So, that was pretty easy. We'll next show you how to create a completely new System Photo Library.
Creating a New System Photo Library
There are any number of reasons you might want to create a new system library in Photos. Maybe it's become corrupted and Photos won't open, or maybe you just want to start fresh and archive your old one.
Regardless, to create a new System Photo Library, first open the location where your current system library is and drag it to a backup spot if you want to keep it (recommended). Drag it to the Trash if you don't.
Next, open Photos, which will spur the following prompt. Click "Open Other..." to either find an existing library or create a new one.

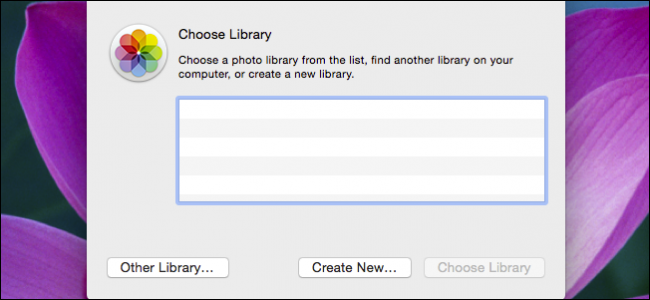
Here's the "Choose Library" dialog. If you have other photo libraries on your system, they'll be listed here. If you want to find an existing library in another location (such as the one you just backed up), click "Other Library..."

Since you want to create a brand new library and populate it with pictures already stored on iCloud, click "Create New..."
Now the Photos application opens to an empty library with ways to add photos to it: you can import them from a camera or memory card, import them from a location, or drag pictures directly into the application.

If you want to sync this library to your iCloud account, you have to first convert your new photo library to the "System Photo Library."

Remember back on our General tab there's a "Library Location" option? Click "Use as System Photo Library" to convert the new library and enable the iCloud features.

Now, if you click on the iCloud tab, you should see that your stuff is syncing and will be restored to your new Photo Library as soon as it's downloaded, while anything you add will be uploaded.

A quick check on our photos reveals that indeed that they're synced and now show up in our Photos library on our Mac, just like they do on our iPad.

It's important to note that, you don't have to use iCloud integration and it can be turned off if you want in the Preferences. You can also just never convert your new photos library into a system library and just store all your photos locally (or on Dropbox or OneDrive or any other cloud drive).
If you're a Mac owner who's used iPhoto or another third-party application, Apple's new app and its iCloud integration will likely appeal to you because it is now OS X's default, native photo application.
Nevertheless, you may still have questions or comments. If so, please leave your feedback in our discussion forum.