Quick Links
Today, we're covering the "boring" Outlook stuff. Maintenance and security, as in, maintaining and securing your Outlook 2013 data file - full of all your important data - by backing up and archiving it.
As of this far, if you've been using Outlook to compose and send e-mails, and you've taken the time to import your G-mail contacts into your address book, or the fact that you're even using an Outlook address book, means you have a lot of data that needs protecting.
Similarly, you've also probably spent a lot of time and work creating your calendars, adding tasks and todo lists, and maybe even have a bunch of notes you want to save.
All this boils down to is making sure that you at least occasionally back up your data file because as any of us can attest, it's pretty frustrating and depressing to lose all your data and have to start over.
Mail Control Panel
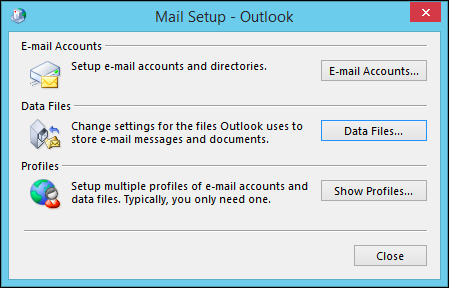
To begin, let's have a quick look at the Mail control panel in Windows.
As the image shows, you have access to three key areas of your Outlook setup. That said, clicking either the “E-mail Accounts…” or “Data Files…” buttons will open the same window, on their corresponding tabs.
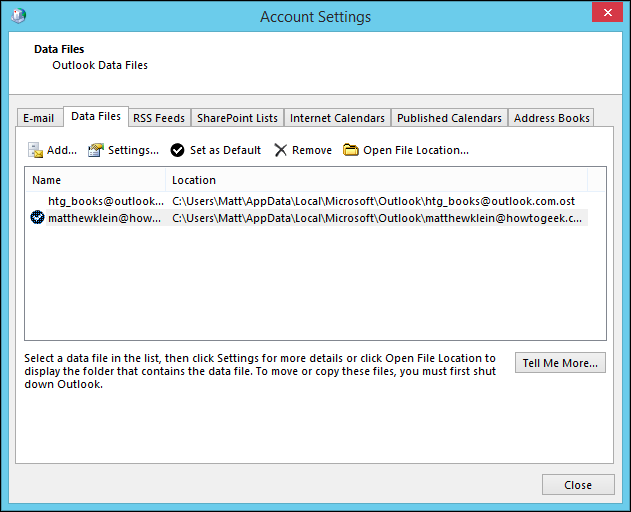
In the following screenshot, we see the E-mail tab, which will let you take actions on your e-mail account(s) such as repairing or changing them. You can also see where data is stored for each account.
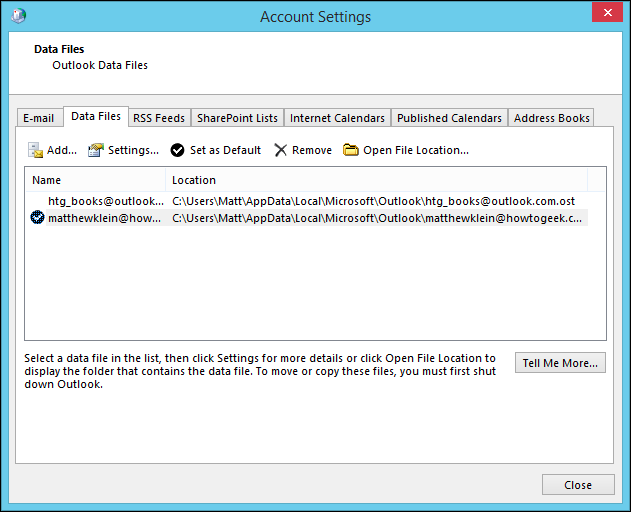
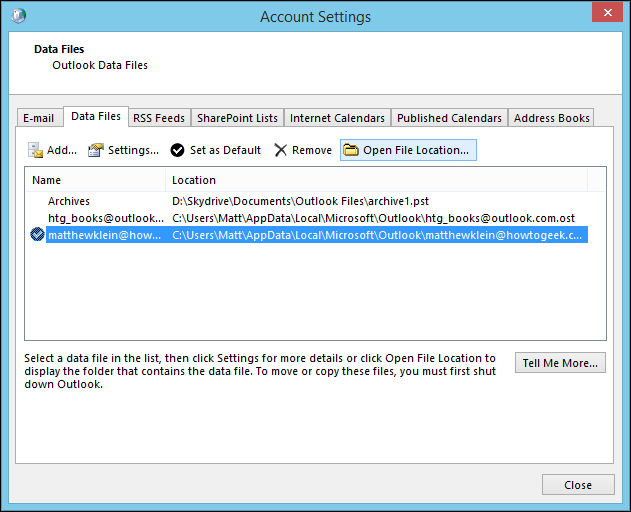
If you want to affect these data files directly, you’ll need to click the “Data Files” tab. There’s some handy things you can do here.
For example, you can click the “Open File Location” button to see where your data files are located. This is handy, because you’ll want to know where they are in case you ever need to scan and repair them (discussed in the next section).
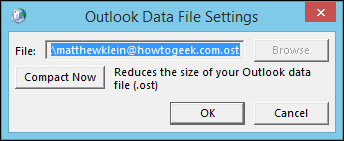
There’s another cool feature you can use from the Account Settings window. If your data file(s) has gotten huge and is taking up tons of disk space (some people collect gigabytes upon gigabytes of old e-mail), then you can compress it.
Click the “Settings” button on the Data Files tab and then click “Compact Now” to reduce the size of your Outlook data file.
The Mail control panel is a reliable way to maintain your data files and profiles, but it isn’t the only way, and the Outlook application will also let you administer to your mailboxes. We’ll show you these controls right after we demonstrate how to repair your data files.
Running the PST Maintenance Tool
If you hadn’t noticed by now, Outlook data is stored in a .PST or .OST file, and most of the time, there’s nothing wrong with that.
Unfortunately, sometimes your data becomes corrupted, which isn’t the same thing as saying it is bad or hopelessly beyond recovery, you just need to run the included Inbox Repair tool. The Inbox Repair tool or “ScanPST” will scan and repair your personal folders file, validating and correcting any errors while making a backup of your corrupt .PST or .OST file just in case something goes wrong during recovery.
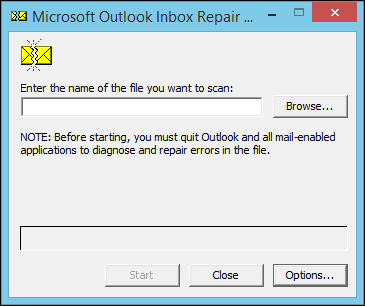
The ScanPST tool can be found in your Outlook’s install folder, usually C:\Program Files\Microsoft Office\Office15. When you locate it, double-click the ScanPST utility to start it.
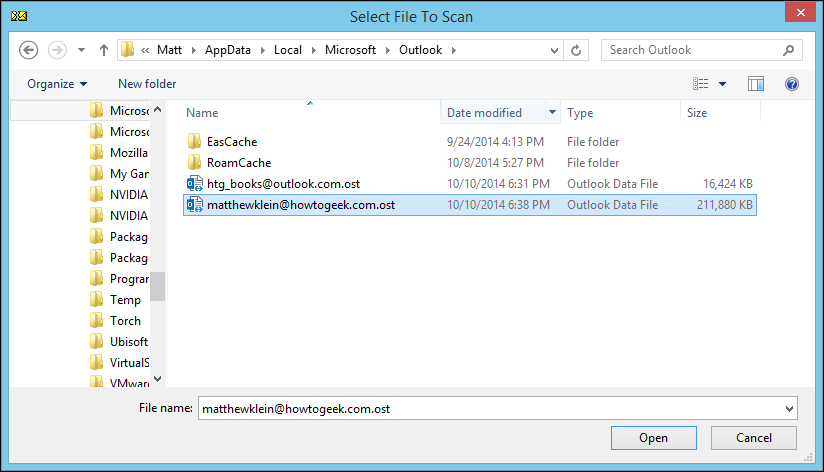
First thing you’ll need to do is browse to where your .PST or .OST files are located. In the following screenshot, you see where they are located on our computer. We choose one and click “Open.”
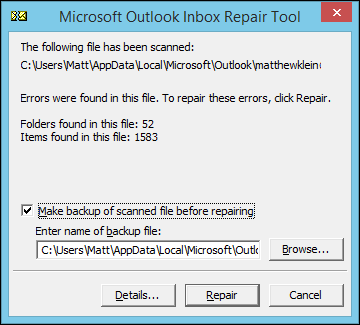
If the ScanPST tool finds any errors, it will inform you as much and offer to repair. Click the aptly-titled button to initiate said repair.
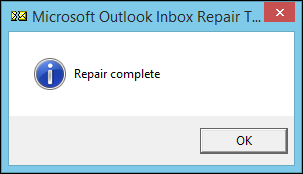
Once finished, the ScanPST tool will let you know that your Outlook file has been successfully repaired.
You can close the tool or repeat the process on any other data files as needed.
Automatically Archiving Your Data
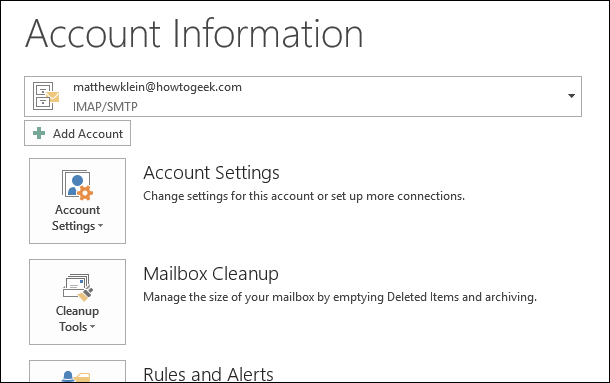
Let’s wind things up with some important information on how to best archive and back up your data. The first thing we want to discuss are your AutoArchive options. To begin, click the “File” tab on the Ribbon so that you see the following screen.
Immediately note, you can choose which account you want to attend to (if applicable) by clicking the drop-down menu located above the Add Account button.
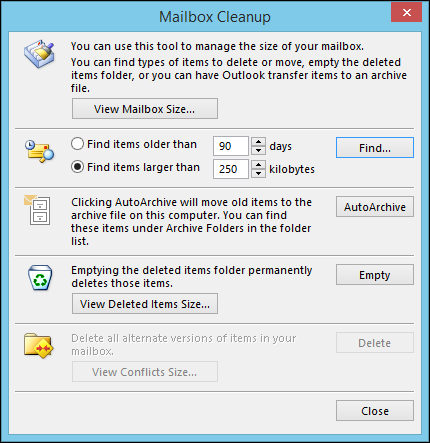
Let’s click the “Cleanup Tools” button and then select “Mailbox Cleanup” from the options. Below are the choices that you will see. Everything here is dedicated to trimming the fat from your inbox and archiving old messages.
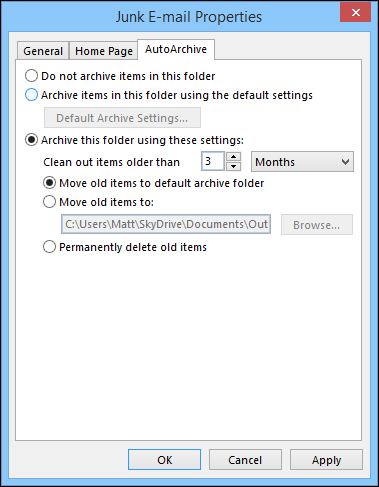
Clicking the “AutoArchive” button means that Outlook will autoarchive any mail folders that have been configured as such. In order to set your autoarchive options, you need to right-click on a mail folder and select the “AutoArchive” tab.
Here we see a typical mail folder Properties window. The AutoArchive tab will let you adjust how the folder is autoarchived. Note, in this screenshot, we have the folder configured to AutoArchive per its own schedule and actions.
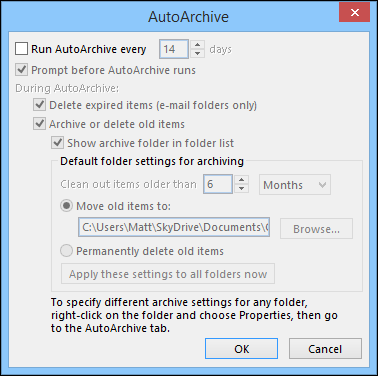
You can also assign the folder to autoarchive according to Outlook's overall default autoarchive settings. If you set the folder to default settings, and then click “Default Archive Settings…” you will see the following dialog (because they’re “default,” whatever changes you set here will apply to every folder configured to default autoarchive).
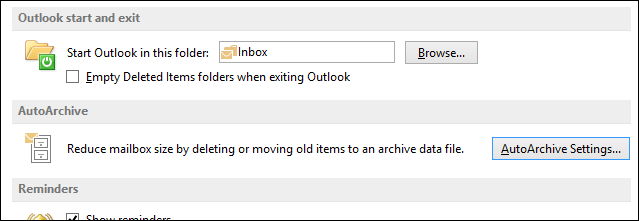
Don’t forget, you can also find these settings by opening the Options and clicking the “Advanced” heading.
Let’s move on now to manually archiving your data.
Manually Archiving Your Data
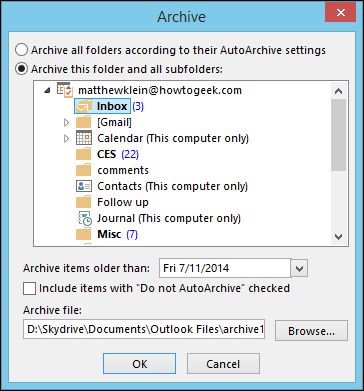
Simply, if you don’t want to use autoarchive, or you want to facilitate an archiving procedure on your own, return to the Cleanup Tools found on the Account Information screen, and click and choose “Archive” to open the following dialog.
Easy enough, you simply want to choose the folder you’d like to archive, select the date for your archive items, and then choose a folder to where you’d like your archive to be saved. That’s it, you’re done!
Backing Up and Restoring Your Outlook Data File
Backing up your Outlook data file(s) is as easy as copying your .OST or .PST files over to another hard drive, cloud server, thumb drive, or some other storage medium. You remember how to locate your data files?
Open the Mail control panel and click the “Data Files” button. Click “Open File Location…” and you can then back up your data files.
On a side note, you could permanently relocate your data files to a cloud location, such as a OneDrive or Dropbox folder, thus assuring your Outlook data is always technically backed up.
To restore your backed-up data file, let’s go back to the File tab and select “Open Outlook Data File.”
In the following screenshot, File Explorer automatically opens to our archives, but you can obviously browse to wherever your data files are located.
Select the file you want, and click “Open” so you can access the data saved in the file. Once restored, you’ll be able to browse and view items as you normally would.
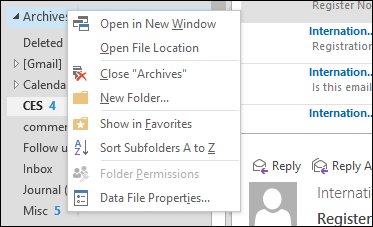
If you no longer need to access your backed-up data file, you can just right-click on the top-most folder and select the close option.
Backing up and restoring data files is largely a manual activity but if you set up your folders to autoarchive frequently, and they’re archived to a location like a cloud folder, then you have some modicum of safety there.
The best way to ensure you don’t lose any data however, is to routinely back up your data files wholesale. Got anything you'd like to add? Please let us know in our discussion forum. As always, we look forward to your feedback.


