Quick Links
At this point, smartphones are prolific. We use them for calls, text messages, social networking, photos, quick searches, streaming music, watching videos...the list goes on. But each thing you do drains your battery life, and some apps will even continue to drain your battery in the background when you aren't using them. A free app called Greenify can fix that.
How Greenify Works
Greenify saves you battery life by effectively and systematically pushing apps into a sort of "hibernation" mode---an idle state that keeps them from running in the background and draining your battery.
"But that sounds like a task killer," you may say, and "you told us not to use task killers!" That's true, but Greenify is a little different. Not only will it stop an app from running, using Android's built-in "Force Stop" mechanism, but it will also prevent that app from starting up again until you start it. It isn't a blanket feature, either---instead of just closing everything, you must first pick and choose the apps that you'd like to hibernate. So contrary to the traditional "close everything" concept, you choose the list of apps you'd like to close, and everything else stays running as it always has.
Alright, now that we've cleared that up, let's get started. The first thing you'll need to do is install the Greenify app---you can find it by clicking this link or simply searching for "Greenify" in the Play Store on your device.
There are actually two versions of the Greenify app itself. There's the free version, and a paid "Donation" version. The paid Donation version of the app offers a few additional experimental features, and it offers users that like that app the opportunity to support the App's originator. For the sake of this tutorial, we are going to cover how to use the free one. Feel free to download the paid version of the app if you'd like, but you do not need to do so to reap the core and primary benefits of this application.
It's also worth noting that there are two ways to set up Greenify: with a rooted phone, and without. There are a few differences in how they work under the hood, but for the most part, you won't notice a difference---except that the non-rooted version requires some initial setup.
How to Set Up Greenify for Use on a Non-Rooted Phone (Most Users)
After installing and launching Greenify, most users will have to go through a quick setup process. This will ensure the app has all the appropriate permissions and device access it needs, as well all verifying that all the recommended system settings required are set in place.
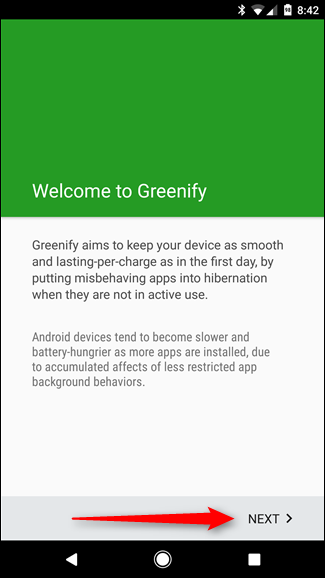
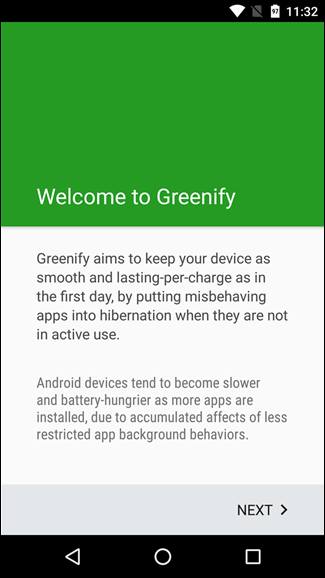
It'll start everything off with a welcome screen and a brief explanation of what the app does. Hit Next to get into the meat and potatoes here.
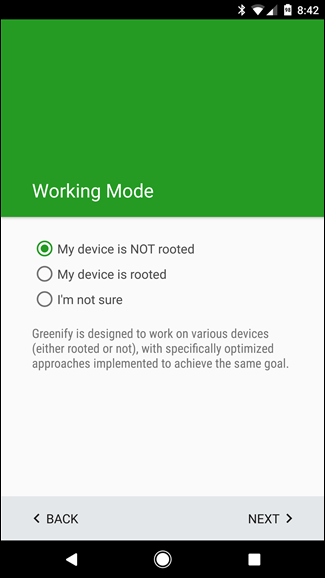
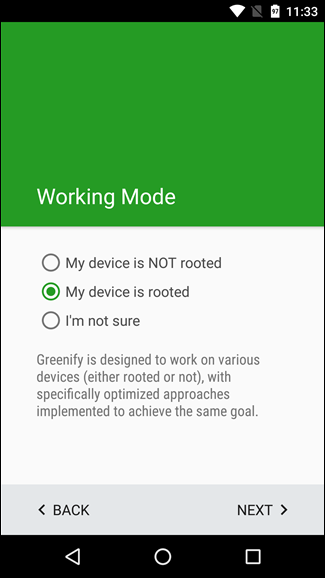
The next screen will ask for the "working mode" for your device: non-rooted or rooted. Like stated earlier, this tutorial is for non-rooted users, so select the former.
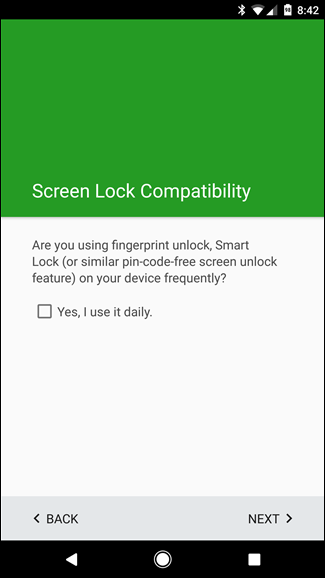
If you're using a newer device that has a fingerprint reader or you use Smart Lock to prevent the need to input your PIN or password with each unlock, verify that here.
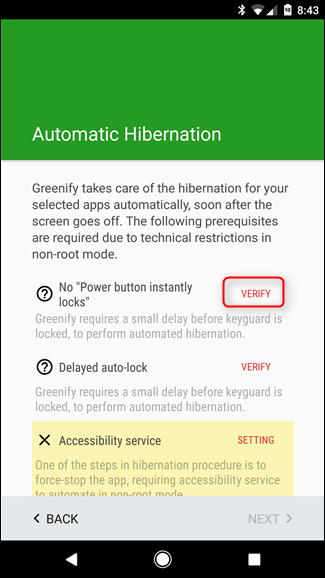
The next step is when things can get a little convoluted: Greenify needs things to be set up in a specific way to provide the best experience possible (and to do what you want it to do). Since it does its things a few seconds after you turn of the screen, the "Power button instantly locks" settings in Android's Security menu will need to be disabled. Tap the "Verify" button next to this entry to jump straight into the Security menu.
NOTE: This may look slightly different depending on what device you're using, and Greenify may in fact open the wrong menu. For example, on the LG G5, I had to back out of the Security menu and open the Lock Screen menu to disable the "Power button instantly locks" setting.
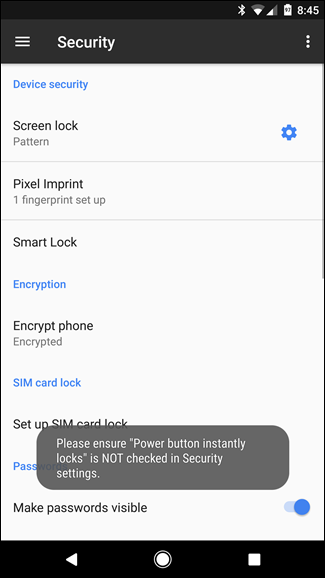
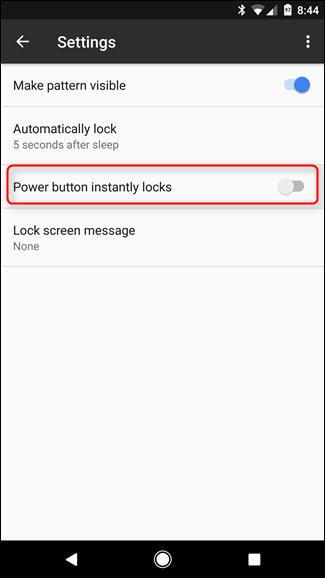
While this puts you into Android's Security menu, it doesn't put you directly into the menu where the required setting toggle is---for that, you'll have to tap that little cog icon next to the "Screen lock" entry. In this menu, toggle off the setting that reads "Power button instantly locks."
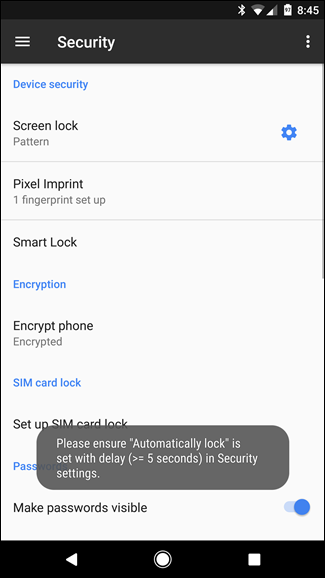
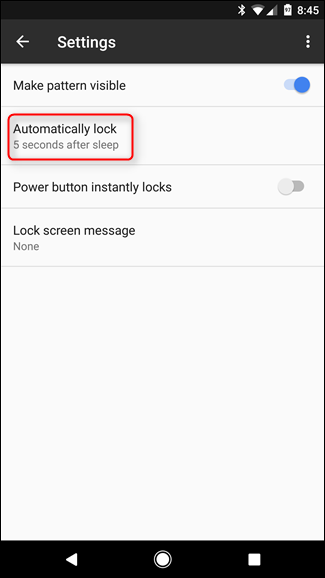
Once that's finished, just back out until you return to Greenify. The next setting you'll need to verify is auto-lock. Greenify requires a delay here of at least five seconds---tap the "Verify" button to once again be tossed into Android's Security settings.
Just like last time, it will open the Security menu, but not the exact location you need to be in. Again, tap the cog icon next to "Screen lock." Time time, make sure the "Automatically Lock" setting is set to at least five seconds.
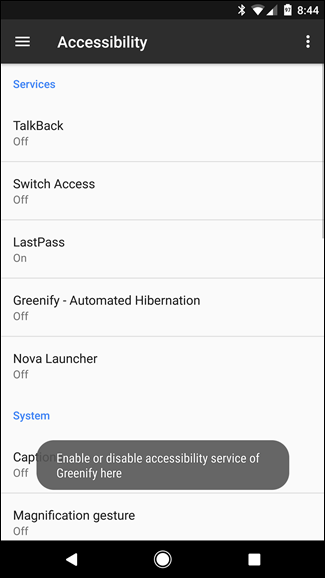
Again, back out until you're in Greenify. This time, you'll need to give Greenify Accessibility access. Tap the "Setting" button to open the Accessibility menu.
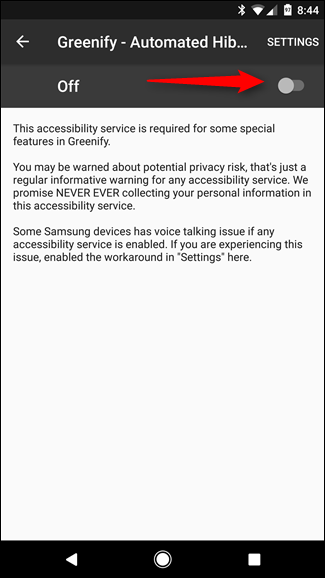
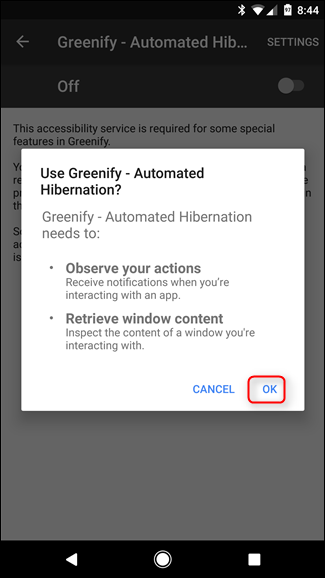
Find Greenify's entry in this menu, tap on it, then click the toggle. A verification window will pop up to let you know what this setting does---allow Greenify to monitor what you're doing and information from the active window---so click OK to enable it.
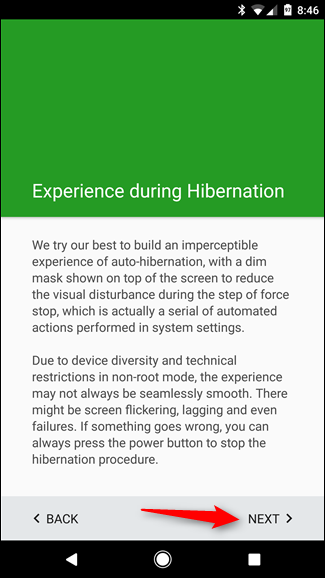
With everything set up and ready to go, Greenify will explain a little bit about what to expect from the hibernation experience. Read this for a clearer idea of what's happening and how it's going to look. After that, tap Next.
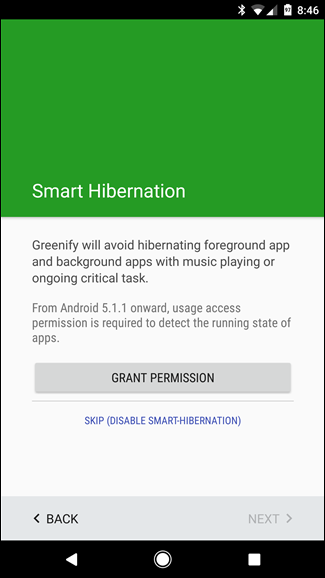
One last setting is required for Greenify to do its thing: Usage Access. This allows Greenify see what other applications are doing. Tap the "Grant Permission" button here.
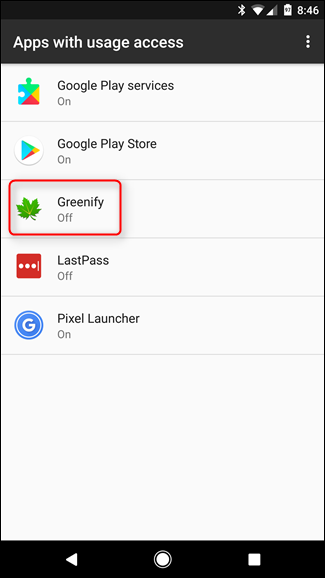
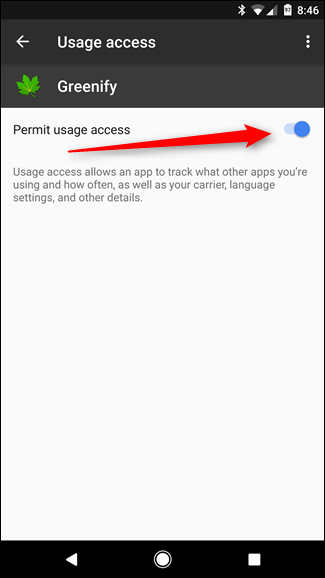
In the next window, tap on Greenify, then toggle Permit Usage Access to on.
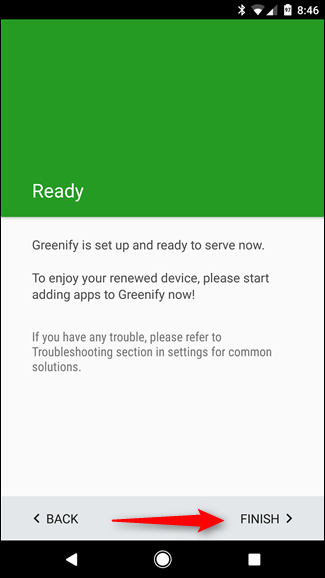
And with that, everything should be ready to go. It's a lot, I know---fortunately you only have to do this once. Tap Finish to get started using Greenify.
How to Set Up Greenify for Use on a Rooted Phone
If your device is rooted, then you're in luck: the setup process is much simpler. First, fire it up and hit Next.
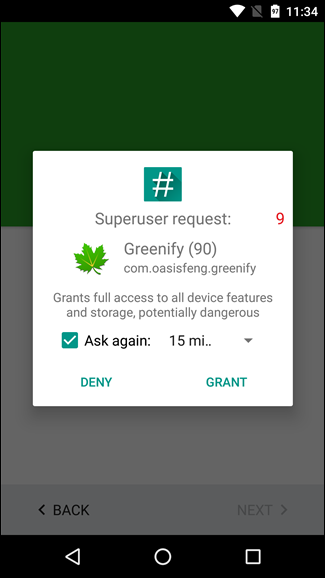
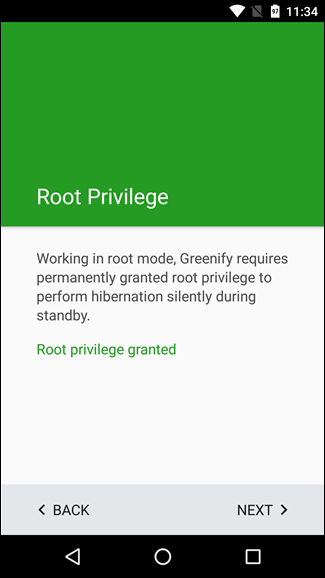
Choose "My device is rooted" on the Working Mode screen, then tap Next. The app should request root access at this point. Tap the Grant button.
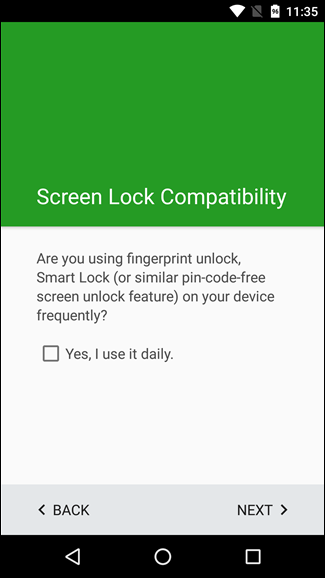
Once root access has been granted, the app will ask about fingerprint use and Smart Lock. If you use either of these things, tick the "Yes, I use it daily" box, then click Next.
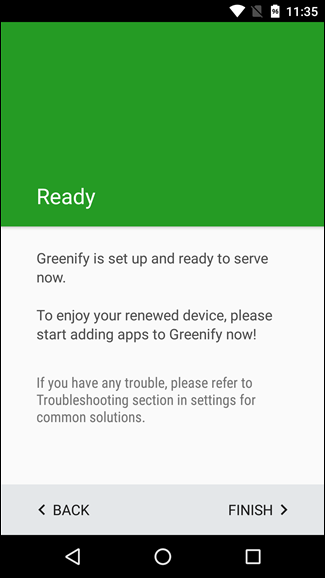
Boom, that's it. Tap Finish to get started using Greenify.
How to Use Greenify to Hibernate Apps
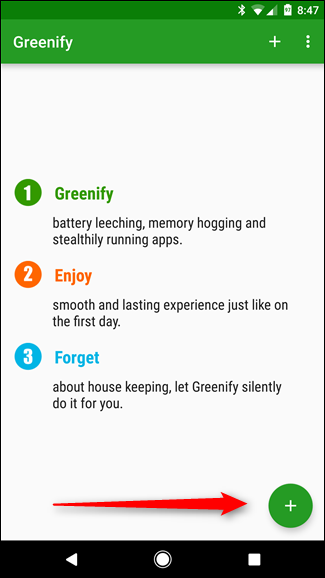
Okay! Now that you have all that setup out of the way, you can start Greenifying apps. To get things going (whether your phone is rooted or not), tap the floating action button with a plus sign on it in the bottom right corner.
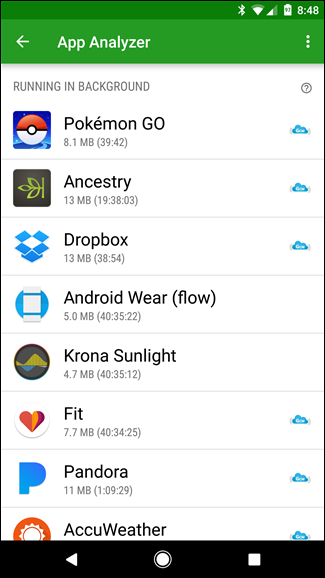
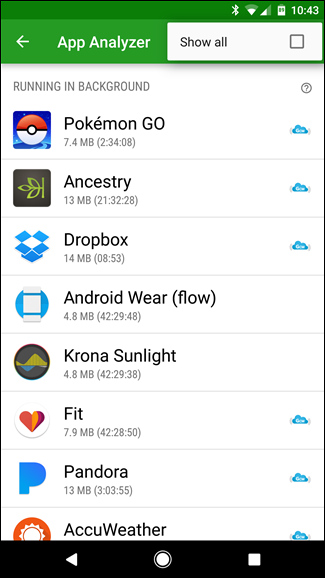
This will load the App Analyzer---a list of all the apps that are currently running, as well as apps that may slow your device down under certain circumstances. If you'd like to see all installed apps in this list, tap the three-button overflow menu in the top -right corner and check the "Show All" button.
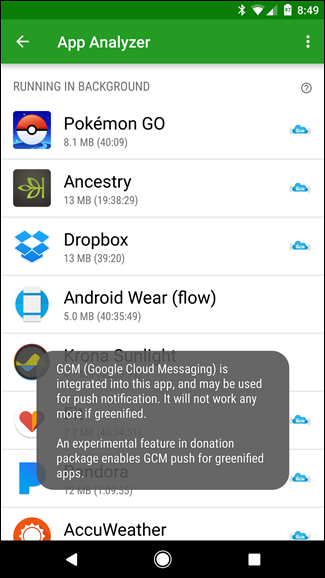
Before we get into how to Greenify apps, however, let's first talk about the little blue cloud-looking icon beside some of these. This is important, because it means the app feature Google Cloud Messaging for notifications---if you Greenify an app that uses GCM, you won't get notifications from that app when it's hibernated. Keep that in mind when choosing which apps to hibernate---if you rely on notifications from an app, don't Greenify it.
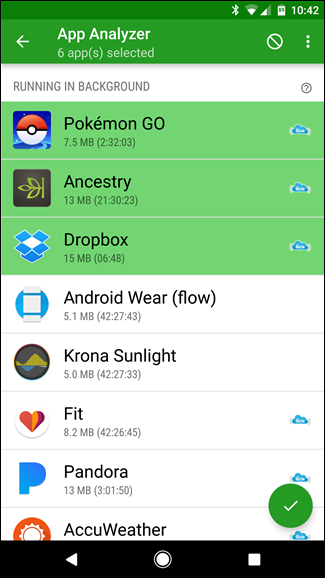
Go through and tap on the apps that you'd like to hibernate when not in use. Go through the entire list---even the apps that aren't currently running but may slow your device down. Once you've finished making your selection, tap the floating action button in the bottom right corner.
NOTE: I wouldn't recommend picking apps that you commonly use whose functionality relies on regularly phoning home. These apps can include Apps like Google Maps or Weather and conditions apps. Apps like the ones I mentioned work best when they are left alone, and may cause dysfunction or having to manually refresh them. For example, imagine having your weather app lagging days behind unless you manually refresh it. Just pick the apps that don't need to be doing anything in the background.
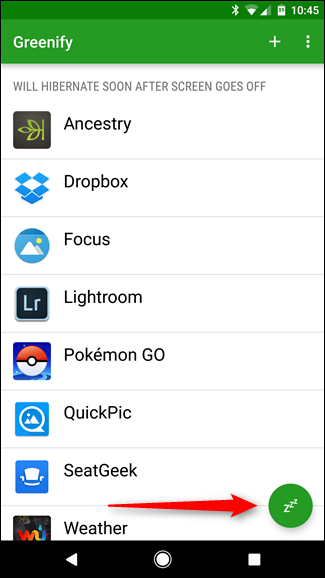
This will close the app analyzer window and let you know that those apps will be hibernated shortly after the screen goes off. To hibernate now, however, click the "Zzz" button.
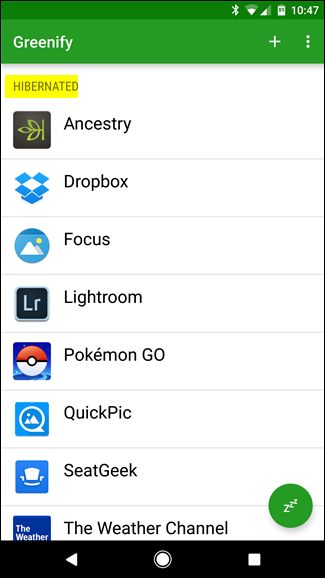
If you click that button on a non-rooted handset, Greenify will open each app's entry in the Settings > Apps menu and close it. After it has closed all the apps, it'll pop back into the Greenify page, but this time it will show that all of selected apps are currently hibernated. Ordinarily, this will happen automatically after you turn your screen off, so you won't see all the behind-the-scenes action unless you press the hibernate button manually.
If you tap that button on a rooted handset, the apps will simply go into hibernation without actually navigating to the Settings page for each app. It's essentially doing the same thing, it's just a bit smoother of an experience.
If at any point you want to add more apps to your hibernation list, click the plus sign in the upper right corner, just beside the three-button overflow menu to re-open the App Analyzer.
Caution: If you have root access and the donation version, do your research before hibernating system apps. Shutting down certain system apps may put you at risk of making your phone unstable and disabling apps that you actually want to run in the background. The Power Users among you guys have been warned!
In a smartphone imperative world, it is crucial to ensure that we can maximize battery life as much as possible. Apps like Greenify allow non-rooted and rooted users alike to maximize their battery life. Power Users can use the Donation Package version of Greenify to full reap all of Greenify's useful tools. But for the rest of us, we can hibernate our apps with ease.

