Quick Links
Want to capture a screenshot of a specific scene in your videos? If so, use VLC Media Player's built-in snapshot feature to do that. You can use a keyboard shortcut, a menu bar option, or an advanced control button to do that. We'll show you how.
Capture a Screenshot in VLC Media Player
To take a screenshot, first, open your video with VLC. Then, get to the scene that you want to capture. You can use VLC's frame-by-frame feature to access a specific frame in your video.
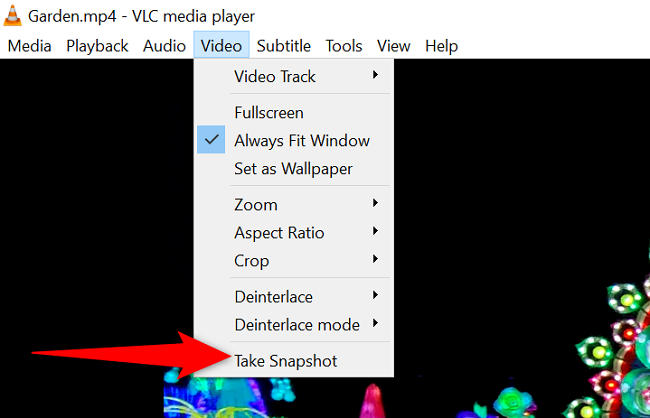
Then, capture the screenshot by pressing Shift+S (Windows and Linux) or Command+Alt+S (Mac). Alternatively, from VLC's menu bar, select Video > Take Snapshot.
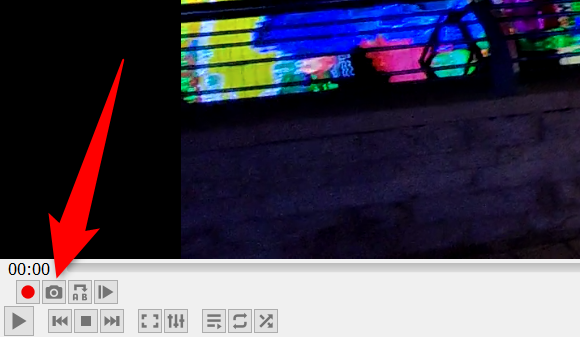
If you'd like to use advanced controls to capture the screenshot, then from VLC's menu bar, select View > Advanced Controls to enable those controls. Then, in VLC's bottom-left corner, click the camera icon to take a snapshot.
Your screenshot is now captured and saved in a folder on your computer. The following section will tell you where that folder is on your specific operating system.
Access and Change VLC's Default Snapshot Directory
To find all the screenshots you've taken with VLC, head to the following folder on your Windows, Mac, or Linux computer:
- Windows: C:\Users\username\Pictures
- Mac: Desktop/
- Linux: ~/Pictures
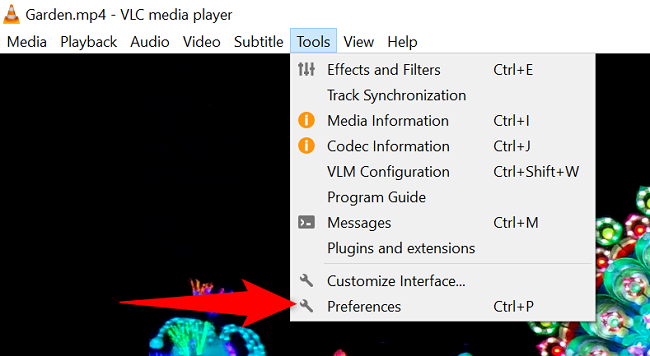
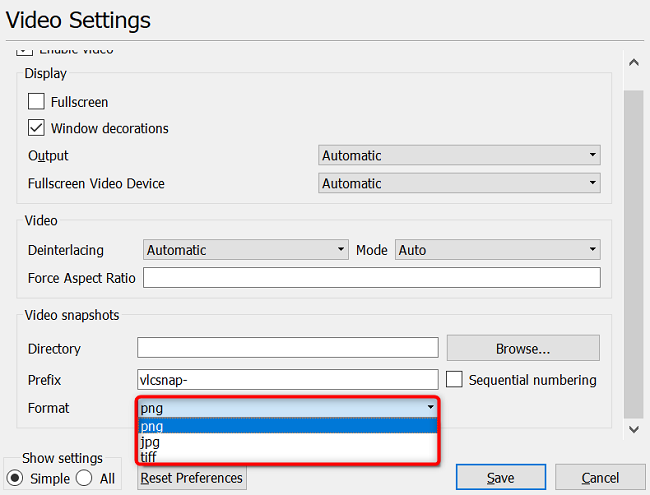
If you'd like to change where VLC stores your screenshots, or you'd like to change the file format, then select Tools > Preferences from VLC's menu bar.
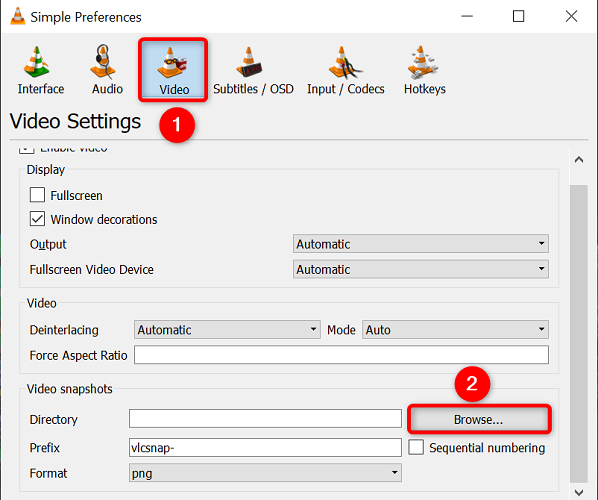
On the "Simple Preferences" window that opens, select the "Video" tab.
To change the default screenshot directory, then in the "Video Snapshots" section, click "Browse" next to "Directory." Then, choose the new folder that you want to set as the default for your screenshots.
If you'd like to use a different image format (the default is PNG) for your snapshots, then click the "Format" drop-down menu and choose a new format. Your options include PNG, JPG, and TIFF.
After you've made the changes, at the bottom of the "Simple Preferences" window, click "Save" to save your changes.
And that's how you capture still shots from your videos using a free and open-source app on your Windows, Mac, or Linux machine. Enjoy!
Did you know you can use VLC to trim your videos? Check out our guide to learn how.


