Quick Links
Your computer's BIOS is the first thing that loads when you start your computer. It initializes your hardware before booting an operating system from your hard drive or another device. Many low-level system settings are only available in your BIOS.
Modern computers predominantly ship with UEFI firmware, which is the successor to the traditional BIOS. But UEFI firmware and the BIOS are fairly similar. We've even seen modern PCs refer to their UEFI firmware settings screen as the "BIOS".
BIOS and UEFI Explained

BIOS stands for "Basic Input/Output System", and is a type of firmware stored on a chip on your motherboard. When you start your computer, the computers boots the BIOS, which configures your hardware before handing off to a boot device (usually your hard drive).
UEFI stands for "Unified Extensible Firmware Interface". It's the successor to the traditional BIOS. UEFI offers support for boot volumes over 2 TB in size, support for more than four partitions on a drive, faster booting, and enables more modern features. For example, only systems with UEFI firmware support Secure Boot to secure the boot process against rootkits.
Whether your computer has a BIOS or UEFI firmware doesn't matter much in most situations. Both are low-level software that starts when you boot your PC and sets things up. Both offer interfaces you can access to change a variety of system settings. For example, you can modify your boot order, tweak overclocking options, lock down your computer with a boot password, enable virtualization hardware support, and tweak other low-level features.
How to Access Your BIOS or UEFI Firmware Settings
There's a different process for accessing the BIOS or UEFI firmware settings screen on each PC. Either way, you'll have to restart your PC.
To access your BIOS, you'll need to press a key during the boot-up process. This key is often displayed during the boot process with a message "Press F2 to access BIOS", "Press <DEL> to enter setup", or something similar. Common keys you may need to press include Delete, F1, F2, and Escape.
Some PCs with UEFI firmware also require you to press one of these keys during the boot-up process to access the UEFI firmware settings screen. To find the exact key you need to press, consult your PC's manual. If you built your own PC, consult your motherboard's manual.

PCs that shipped with Windows 8 or 10 may require you access the UEFI settings screen via Windows 8 or 10's boot options menu. To access it, hold down the Shift key as you click the "Restart" option to restart your computer.

The computer will reboot into a special boot options menu. Select Troubleshoot > Advanced Options > UEFI Firmware Settings to access the UEFI firmware settings screen.

How to Change BIOS or UEFI Firmware Settings
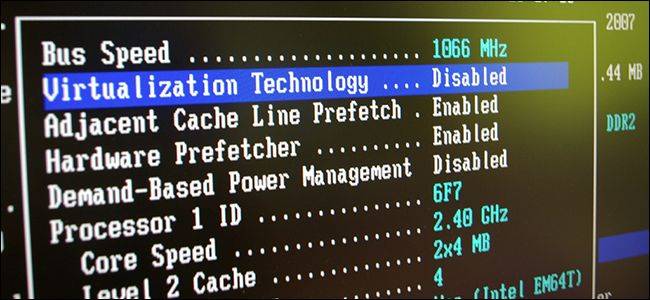
The actual BIOS or UEFI settings screen looks different on different PC models. PCs with a BIOS will have a text-mode interface you can navigate with your arrow keys, using the Enter key to select options. You'll see the keys you can use spelled out at the bottom of the screen.
Some modern UEFI PCs have graphical interfaces you can navigate with a mouse and keyboard, but many PCs continue to use text-mode interfaces, even with UEFI.
Whatever the screen looks like, you can use your keyboard or mouse to navigate through it. But be careful in your BIOS or UEFI settings screen! You should only change settings if you know what they do. It's possible to make your system unstable or even cause hardware damage by changing certain settings, especially ones related to overclocking.

Some settings are less dangerous than others. Changing your boot order is less risky, but you can even run into trouble there. If you change your boot order and remove your hard drive from the list of boot devices, your computer won't boot Windows (or whatever other operating system you have installed) until you fix your boot order.

Poke around and find whatever setting your looking for. Even if you know what you're looking for, it'll be in a different place on different computer's settings screens. You'll generally see help information displayed somewhere on your screen, providing more information about what each option actually does.
For example, the option to enable Intel's VT-x virtualization technology is often somewhere under a "Chipset" menu, but it's on the "System Configuration" pane in the screenshot below. The option is named "Virtualization Technology" on this PC, but is often named "Intel Virtualization Technology," "Intel VT-x," "Virtualization Extensions," or "Vanderpool" instead.
If you can't find the option you're looking for in your BIOS, consult the manual or help website for your PC. If you built the PC yourself, look at the manual or help website for your motherboard.

When you're done, select the "Save Changes" option to save your changes and restart your computer. You can also select a "Discard Changes" option to restart your PC without saving any of the changes you made.
If you have a problem after making a change, you can return to your BIOS or UEFI firmware settings screen and use an option named something like "Reset to Default Settings" or "Load Setup Defaults". This option reset your computer's BIOS or UEFI settings to their defaults, undoing all your changes.

Image Credit: ryuuji.y on Flickr and Thomas Bresson on Flickr