Quick Links
High pixel density displays are now common on new Windows PCs, just as they are on smartphones, tablets, and Macs. But be careful what you wish for---many desktop apps still have problems on high-DPI displays.
Windows has offered DPI scaling support for long time, but many Windows desktop applications never took advantage of it. Microsoft is working on the problem, however, and so are many app developers. In the meantime here are some settings you can change to make applications look better.
Upgrade to Windows 10
Windows 7 is still perfectly fine for many things, but it's not fine on high-DPI displays. Windows 7 was never built for these super high resolution displays, and using them with Windows 7 will be a struggle. Microsoft dramatically improved high-DPI support with Windows 8, and Windows 10 is even better. Microsoft hasn't stood still since releasing Windows 10, either. Updates like Windows 10's Creators Update continue to add improvements to high-DPI scaling.
If you're trying to use a high-DPI display with Windows 7, we highly recommend you upgrade to Windows 10. There are still ways to upgrade to Windows 10 for free, if you're eligible.
Adjust Your Display Scaling Settings
If your laptop, convertible, or tablet came with a high-density display, Windows 10 will automatically choose an appropriate display scaling setting for it. However, you may want to adjust this setting yourself to make items appear larger and more readable, or make elements appear smaller so you have more screen real estate.
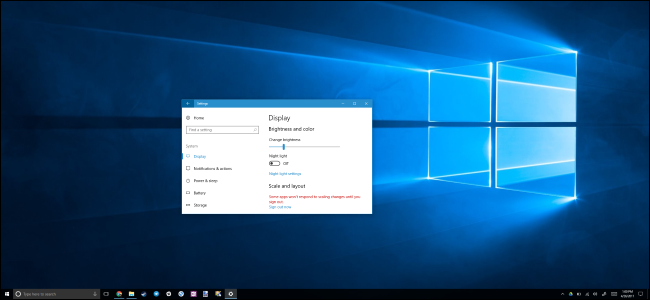
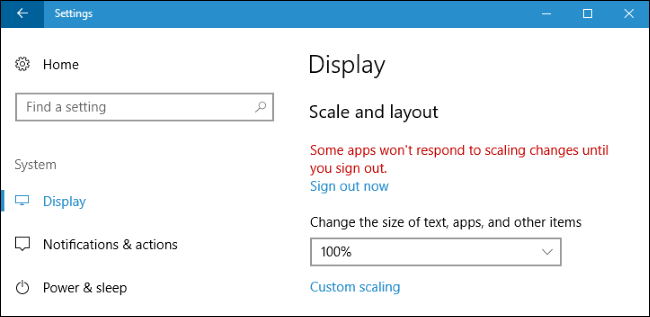
To change this setting on Windows 10, head to Settings > System > Display. Change the option under "Scale and layout" to your preferred setting. If you have multiple displays connected to your PC, you can select them at the top of this page and configure separate scaling levels for each. The ideal setting will depend on your the display and your eyes, so feel free to experiment. You can also click "Custom scaling" and set a custom percentage value between 100% and 500% from here, but Microsoft recommends you choose one of the default options in the list for maximum compatibility with applications.
NOTE: if you have trouble adjusting these settings, you may want to check out this article---some software may be interfering with Windows' scaling settings.
Your change will happen instantly. However, some older programs won't notice the change until you sign out of Windows and sign back in.
Override System DPI Scaling for an Application with Blurry Fonts
Some third-party desktop applications will have blurry fonts and look bad when you enable DPI scaling. This is because Windows is just blowing them up to appear larger---it's like if you zoomed into an image. The image would appear larger and more readable, but blurrier.
Theoretically, this applies only to “older” applications that aren’t aware of DPI scaling. In practice, this problem still applies to many common desktop applications, including Steam.
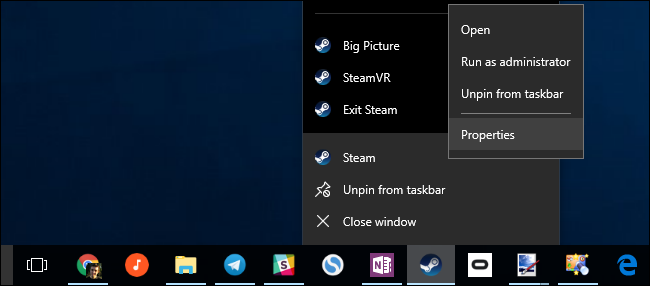
To fix this problem, you can adjust your DPI scaling settings for an individual application that isn't working well. To do so, right-click the desktop application’s shortcut and select Properties. If the application is on the taskbar, right-click the taskbar icon, right-click the application’s name, and select Properties.
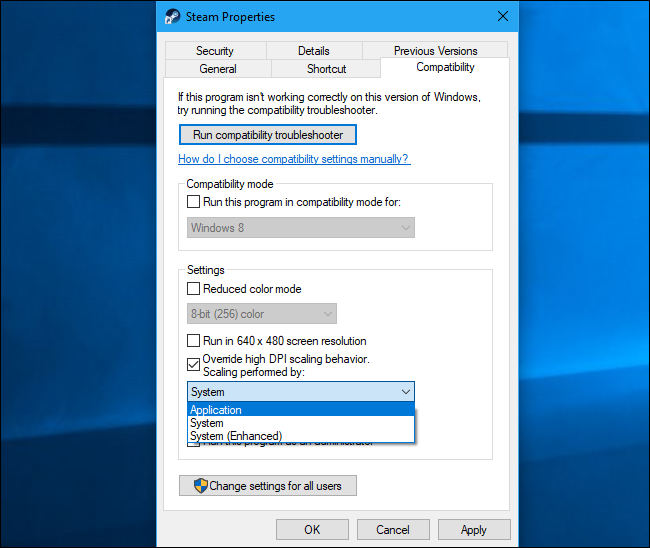
Click the "Compatibility" tab and check the "Override high DPI scaling behavior" option.
You'll need to choose one of three high DPI scaling options from the dropdown as well. Here's what they do:
- Application: Windows will leave the application alone. This will disable DPI scaling for the application entirely, and it will appear tiny, but not blurry. This option was previously known as "Disable display scaling on high DPI settings", and it does the same thing.
- System: Windows will use its normal behavior. Applications that don't respect system DPI settings will be "bitmap stretched" to appear larger so they're more easily readable, but will often appear blurry. This is the default behavior.
- System (Enhanced): Windows will scale applications in a more intelligent way. This option will result in crisp text and some other elements in applications that would normally appear blurry with normal System scaling. In the Creators Update, this only works with GDI-based applications. This new feature is why Device Manager and other system tools finally don't have blurry text in the Creators Update.
After choosing your preferred option, click "OK". You'll need to close the application if it's running and launch it once again for your changes to take effect.
If you're not sure which option you want to use---for example, if you're not sure whether the developer used GDI (the Windows Graphical Device Interface) for a desktop application---feel free to try various settings. Close the program and reopen it after changing your settings to see what works best for that application.
For example, for Steam, the "System (Enhanced)" scaling does not work properly. Steam will appear blurry even if you select this option. You'll need to choose between "Application" scaling that makes Steam appear sharp but small, or the default "System" scaling that makes Steam appear large but blurry.
Windows 10's new Universal apps, available in the Windows Store, scale nicely on larger high-DPI displays. But few developers have embraced Microsoft's application platform, and Microsoft is still struggling to drag all those old desktop applications---including many desktop applications built into Windows itself---into the future. This should continue to improve over time as developers update their applications and Microsoft improves high-DPI support for desktop applications in Windows.


