Quick Links
Last week we told you all about camera white balance and how to fix color issues right in your camera. But what about the photos you've already taken that need a little help? Read on as we show you how to fix color issues in existing photos.
Why Do I Want to Do This?
Several readers contacted us after we published the white balance explainer with a simple request: to show them how to fix their existing photos with white balance problems.
While the best practice is to make the adjustments in-camera to save yourself post-processing work later on, we totally understand how easy it is to end up with photos that have poor white balance. Even when you have carefully set everything on your camera, you'll still end up with photos now and then that need a good edit.
For example, let's say you're taking photos at a family event with a supplemental flash on your camera, and in one of the photos the flash is still cycling (thus the color balance is off because you set the color balance to match the blueish light of the flash, not the reddish light of the incandescent lights in the room). If that photo perfectly captures grandma laughing with her new grandson, it's definitely worth saving with a little editing.
Fortunately, correcting color issues in photos is generally quite simple, non-destructive, and doesn't require any sort of ninja-level photo editing skills. Read on as we show you how.
What Do I Need?
For this tutorial, you will need one of two things (or both if you want to follow along with the two distinct workflows).
- Picasa
- Adobe Photoshop
-
If you're looking for a free workflow, we'll first show you how to color correct in Google's free Picasa photo editor/organizer. If you're looking for a more powerful/flexible way to color correct, we'll also walk through how to color correct in Adobe Photoshop.Before proceeding, we strongly recommend reading our white balance explainer. Not only will you learn how to set your camera to take properly balanced photos, but you'll also learn about science of white balance which will make it easier to understand what's going on when you're working with color balance in a photo editing application.
Color Correcting Photos in Picasa
Picasa is free photo organizer and simple photo editor produced by Google. Not only is it easy to perform basic corrections in Picasa, but the editing functions are non-destructive and you can reverse them at any time.
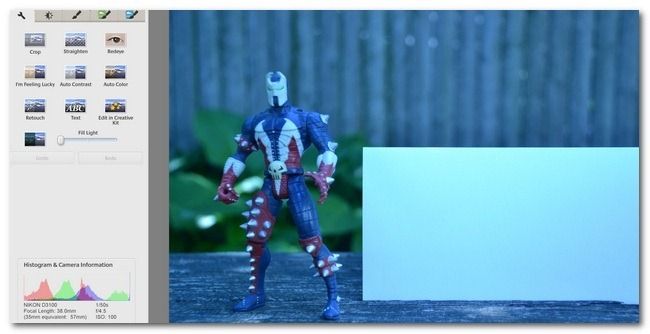
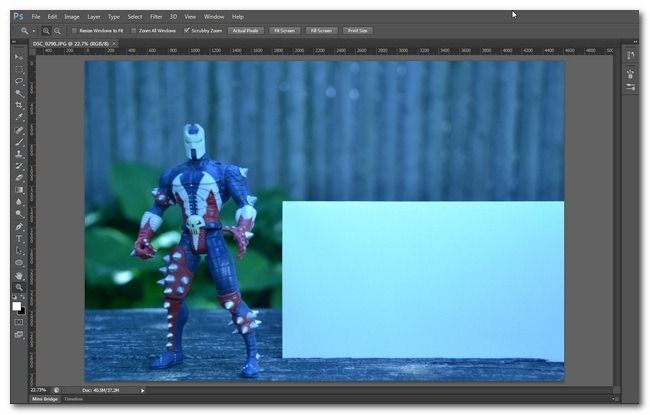
For both this section of the tutorial and the Photoshop section of the tutorial, we're going to color correct the same photo we used in the camera white balance tutorial so that you can easily see how post-processing white balance correction stacks up against in-camera white balance correction.
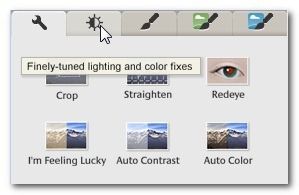
The image above has been loaded into Picasa. To the left of the image is the editing panel. Click on the second tab to access the lighting and color adjustments:
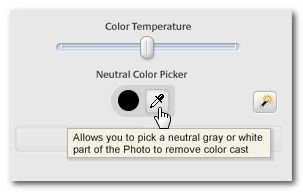
Once you are in the second editing tab, look at the bottom of the panel for the "Color Temperature" slider and the "Neutral Color Picker".
You can manually adjust the Color Temperature slider, but we suggest saving that as a last step if the other steps don't yield the results you want. A good first step would be the use the Neutral Color Picker. Lots of people go right to the little magic wand icon to the right of the color picker (the little yellow wands in Picasa are the one-click fix buttons), but the Neutral Color Picker is a nice mix between full automation and user-controlled input.
To use the color picker, click on the eye dropper and look for an area of the photo that you know has a white or gray neutral color space. In our sample photo it's very straight forward, as we included a white card in the photo, but any neutral color will suffice (a white shirt, gray concrete, a cloudy sky in the background, etc.)
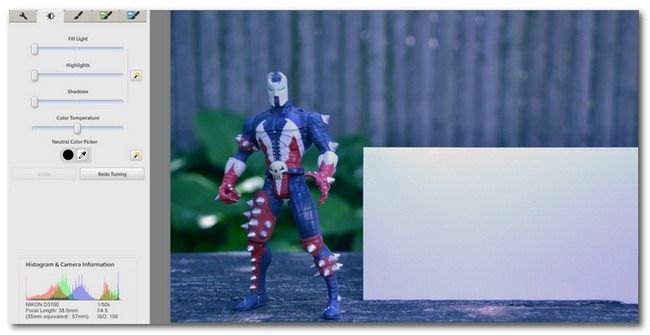
Let's click on that white card and see how it adjusts the color:
Don't be afraid to sample multiple points in your neutral color space. In the case of our white card, the card itself had a slight bit of shadowing across the surface, which meant that portions of the white card were cooler in temperature than other areas. Depending on which section we sampled, we ended up with slightly warmer or cooler color tones.
As it stands, the photo above has significantly better color balance than it did before. It's not perfect and a little on the cool side, but for a few clicks of the mouse in the upper area of our white card, it's pretty darn good.
At this point, many people might opt to warm the image up just a hair by sliding the color temperature slider slightly to the right. Generally speaking, if you're working with portraits, family snapshots, or other photos featuring people, you will want to error slightly on the side of warm white balance, as it makes people look healthier (where as a slight or extreme blue-cast white balance imparts a sickly look).
Color Correcting Photos in Photoshop
Photoshop is a radically more advanced (and proportionately more expensive) application that allows for a wider range of edits and adjustments.
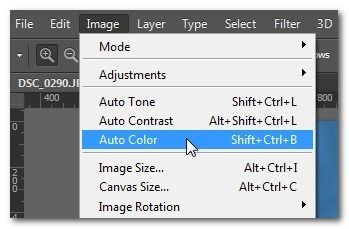
Let's open up our photo in Photoshop and demonstrate the easiest way to color correct, the Photoshop equivalent of Picasa's one-click fix. With your image open, navigate to Image -> Auto Color:
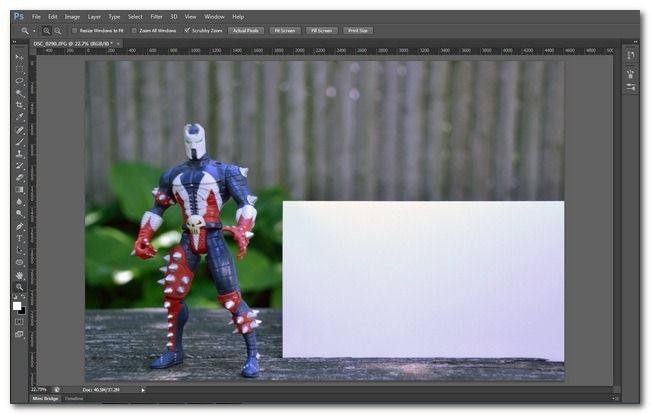
If you're expecting Photoshop to knock it out of the park given that it's pretty much the gold standard of professional photo editing, you won't be disappointed:
Unlike Picasa's basic color adjustment that left a little blue tint in the image, Photoshop's automatic algorithms pretty much nail it right out of the gate: Spawn's color, the color of the white card, and the color of wood and plants all looks very true-to-life. In fact, this color corrected image looks indistinguishable from the actual in-camera white balance correction we did in our previous tutorial.
That said, you don't always have an image that is such a great candidate for auto correction--this image has a huge swath of white in it which offers a nice big area for the auto correction algorithm to work from.
There are several ways you can approach color adjustment in Photoshop, but like the simpler equivalents in Picasa, they can be far too fiddly. For example, in Photoshop you can manually adjust the color tint of the shadows, mid-levels, and highlights, but it's not the most efficient way to approach the task and certainly not the kind of thing you'd want to make a regular work flow out of.
A much easier approach is to use adjustment curves. For those of you that have been following along with our recent Photoshop tutorials, you will recall that we used adjustment curves heavily in our tutorial: How to Enhance Your Black and White Photos with Adjustment Curves. In this tutorial, we're not going to manipulate the curves for artistic/dramatic purposes, but we are going to use the same basic tools.
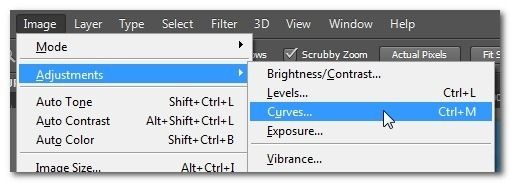
Right click on your image in the Layers panel and select "Duplicate Layer". This will be our working layer where we make the curves adjustments. With this layer selected, navigate to Image -> Adjustments -> Curves, as seen in the image above.
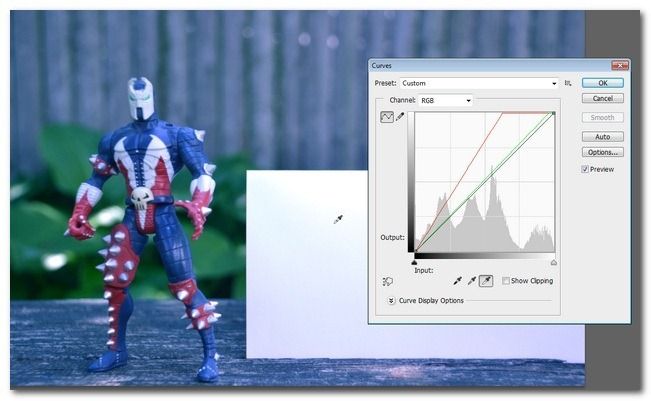
Select the white eyedropper and then pick a point in the photo to serve as the white anchor point.
Unlike in our black and white tutorial, we'll be leaving the gray and black droppers alone. You should only use the gray and black droppers when correcting your image if you have a true 50% gray point in the photo (like a 50% gray reference card) and/or a true black reference point like a very deep shadow or a black object (e.g. a black reference card). Using the black dropper on anything but a black reference point will really darken your image and using the gray dropper on anything but a 50% gray object will skew your colors pretty heavily.
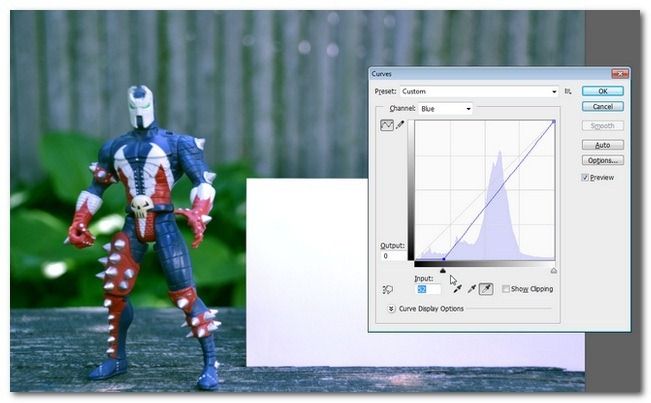
Returning to the image above, you can see the image has a slight blue cast to it. It's much better than it was, but it still requires a little massaging. Once you've set your white point with the Channel selection set to RGB (the default), as we just did, you can further tweak things by selecting the individual channels. Since we want to tame the blueish-green tint the photo has, let's start by switching the Channel selection to Blue and sliding the black arrow on the horizontal slider slightly to the right:
This goes a long way towards correcting the blue cast, but we still need to do the same with the green channel. Repeat the process. Remember, you don't have to limit yourself to a strict linear adjustment. We're using the Curves tool so you can click on that sharply angled line in the Red, Blue, or Green Channel and curve it gently to further tweak the color.
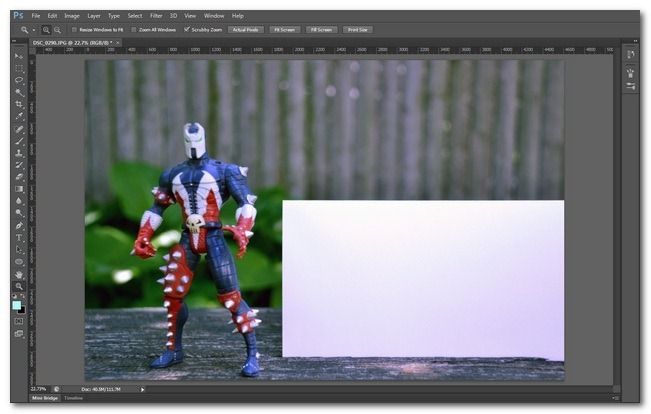
Let's look at it after we've adjusted the Blue and Green channels:
Much better! You'll notice that it looks almost identical to the automatic correction, except that we've errored slightly on the side of warming the image (like we mentioned before, if you're photographing people and not looking for perfect 100%-true-to-life color correction, a little bit on the warm side is the way to go).
Have a photo editing tip, trick, or workflow to share? Join in the conversation below to share your know-how.


