Quick Links
Many low-level tweaks can normally only be performed on Android by flashing custom ROMs. The Xposed Framework allows you to modify your existing system without installing a new custom ROM. All it requires is root access.
Sure, you may want to flash a custom ROM like CyanogenMod to get the latest version of Android or use a wide variety of tweaks, but if you like the version of Android you already have, the Xposed framework is very flexible. Think of the Xposed Framework as building your own custom ROM for Android. Instead of downloading something like CyanogenMod, which comes with a bunch of new features baked in, Xposed lets you add just the features you want, one by one, through individual modules. No ROM flashing required. This article has a few examples of the things you can do, if you're curious.
How It Works
To perform various low-level tweaks, developers have to modify system APK (app package) files. They generally release these changes as a custom ROM, which users have to flash onto their device.
The Xposed Framework requires root access to install, but should be able to work without root afterwards. It extends the /system/bin/app_process executable to load a specific JAR file on startup. This file's classes will be part of every app process on the system -- even system service processes. It's then possible to modify an app's behavior at runtime -- no ROM flashing or modifying app APK files required.
The Xposed Framework isn't guaranteed to work on every phone, nor are the individual models. It's designed to work with most Android 4.0 and later devices. In addition, it (or its modules) may not work on heavily modified ROMs, or devices that heavily modify certain pieces of code (Samsung devices may run into issues, for example). The only way to know is to browse the Xposed forums or try it out for yourself. There are unofficial builds out there for TouchWiz and other versions of Android, if you're willing to give them a shot.
Your phone will also need to be rooted. There's no way around this, so if you haven't rooted yet, there's no better time than now! Every phone is a little different, so check out our rooting guide, and the XDA Developers Forum for your specific device for more information on how to root it.
Lastly, keep in mind that--just like unlocking your bootloader and rooting--Xposed modules have access to deep system functions on your phone, and are a security risk. Only install modules from developers you trust, or search for open source modules and stick to those. Everything from here on out is at your own risk, so be careful and install responsibly.
You can browse the different Xposed tweaks available at Xposed's web site, and see lots more info and frequently asked questions on the Xposed forum at XDA Developers.
Step One: Install the Xposed Framework
The Xposed Framework isn't available in Google Play, so you'll need to install it through one of two other methods.
Update: If you're running Marshmallow or above, you can install the a newer, "systemless" version of Xposed, which is much more flexible than the old version discussed in this article. First, you'll want to read about systemless root, and then learn how to install systemless Xposed here.
If you're running a version of Android Ice Cream Sandwich, Jelly Bean, or KitKat, you can download the Xposed Installer APK from Xposed's home page, then transfer it to your phone with a USB cable or an app like Dropbox. Then, launch the APK to begin the installation and skip to the next section.
If you're running Android Lollipop or Marshmallow, installation is a bit more complicated: you'll need to flash the framework using a custom recovery like TWRP, then sideload the installer. (Though remember, if you're running Marshmallow, you can also install the systemless version, which is better.)
Head to Xposed's forum thread on XDA Developers and download three files: the Xposed Installer APK, the Xposed Framework ZIP, and the Xposed Uninstaller ZIP. You may have to do some research to figure out which .zip file to download. "sdk21", "sdk22", and "sdk23" refer to Android 5.0, 5.1, and 6.0, respectively; "arm", "arm64", and "x86" refer to ARM, 64-bit ARM, and Intel processors, respectively.
So, since I have a Nexus 5X--which has a 64-bit ARM processor and is running Android 6.0.1 Lollipop--I downloaded the Xposed Installer APK, the xposed-v80-sdk23-arm64.zip file, and the xposed-uninstaller-arm64.zip file.
Transfer all three files to your phone using a USB cable or an app like Dropbox.
Next, reboot your phone into TWRP recovery. Doing this is a bit different on every phone–for example, you may have to hold the Power and Volume Down buttons simultaneously, then use the volume keys to boot “Recovery Mode”. Google instructions for your specific model to see how it’s done.
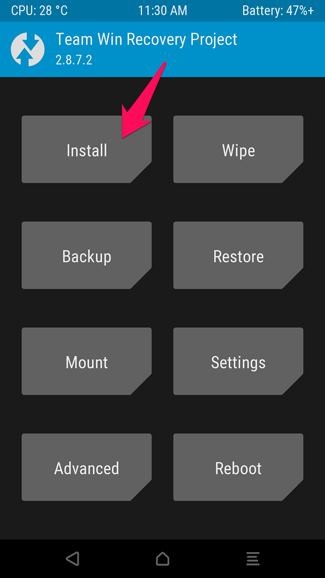
Once you’ve done so, you’ll be greeted with the familiar TWRP home screen. Click the Install button.
NOTE: You may want to make a backup in TWRP before continuing with this process.
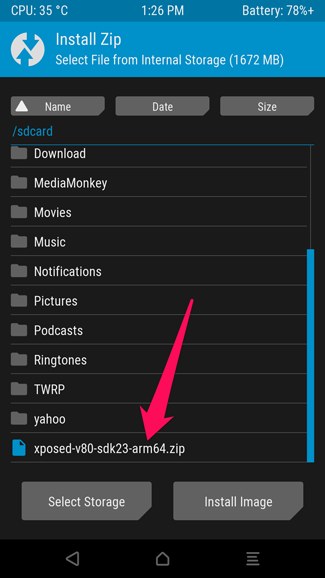
The following screen will appear. Scroll down and navigate to the Xposed framework .zip file you transferred earlier.
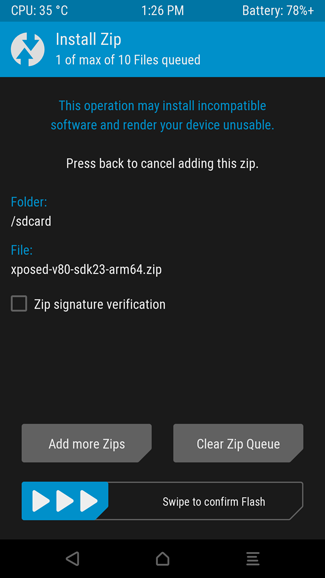
Tap the Xposed zip and you’ll see this screen. Swipe to confirm the flash.
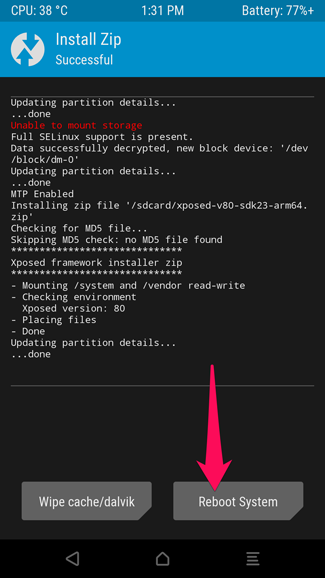
It should only take a moment to flash the package. When it finishes, tap the "Wipe Cache/Dalvik" button, then reboot your system.
If TWRP asks if you want to install SuperSU now, choose “Do Not Install”.
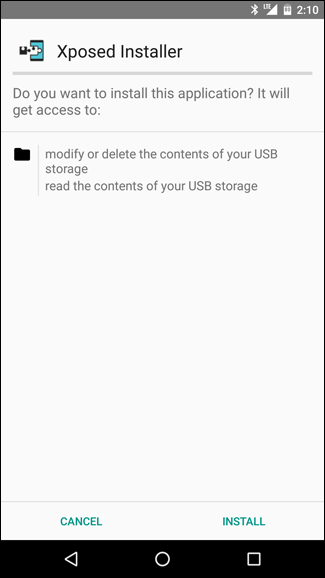
Your phone may take a few minutes to reboot, as it may "re-optimize" your apps. Give it time, and when it finishes, launch the Xposed Installer APK you transferred earlier. This will install the app you'll use to manage your modules.
If you run into any problems with the installation--like your phone goes into a boot loop--just flash the Xposed Uninstaller .zip file in the same fashion and things should go back to normal. If all else fails, restore from your last TWRP backup.
Step Two: Set Up the Xposed Installer and Download a Module
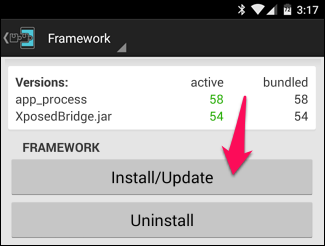
Launch the Xposed Installer and you'll be greeted with the screen below. Devices running KitKat will need to tap the "Framework" option, then tap the Install/Update button to install the Xposed Framework. You'll need to reboot your phone when finished. Lollipop and Marshmallow users will have already done this through the .zip flashing in the previous step.
Remember, Xposed requires root access, so if you get a prompt at this point from your superuser app. Grant Xposed Installer superuser rights to continue.
Now that Xposed is all set up, it's time for the fun part: installing modules. Xposed modules contain the different tweaks you can use to customize your system. Some are small, and only perform one function, while others are packages containing many useful tweaks. For this guide, we're going to use a very simple example: XInsta, an Xposed module that adds an option to download photos from the Instagram app.
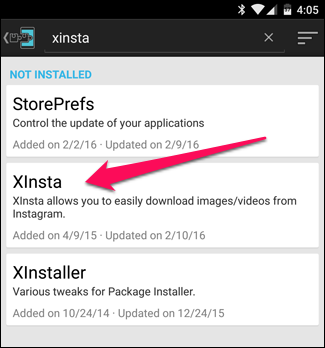
Tap the "Download" section of the Xposed Installer and tap the search button in the toolbar. Search for "xinsta" and select the XInsta module that appears.
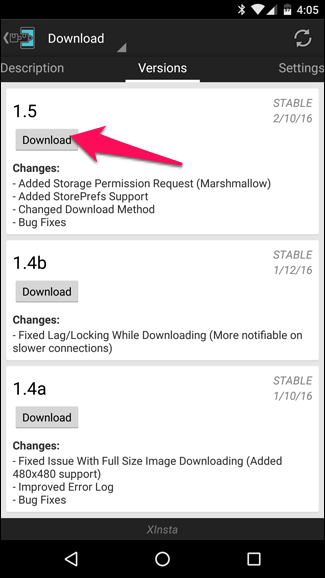
Swipe over to the Versions tab and tap the "Download" button on the latest version. This will download and install the Xposed module in question.
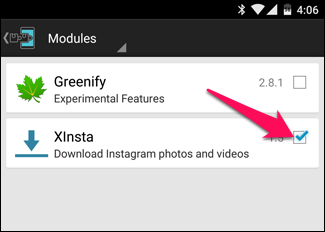
When finished, the module will be installed, but not activated. In the Xposed Installer, head to the Modules section (or just select the notification that appears in your notification dropdown). Check the box next to the module you want to activate, and reboot your phone.
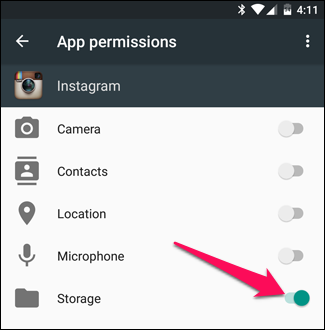
If you notice in the module's description, it has one prerequisite: you need to give Instagram permission to access your phone's storage. These kinds of things are common, so be sure to read the module's description before you try to use it.
To do this, head to Settings > Apps > Instagram > Permissions and switch "Storage" to On.
Then, open the Instagram app and click the three dots next to a photo--if all went well, you should have the option to download that photo to your device.
Congratulations, you just successfully installed your first Xposed module!
Step Three: Tweak Your Module (if Applicable)
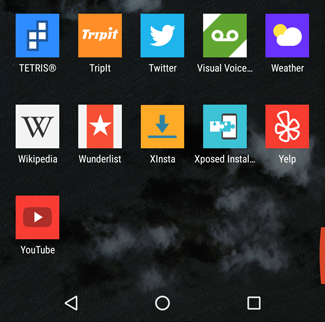
Many of the Xposed modules you download will have their own interface, from which you can tweak different settings related to the module. You can usually access this by tapping on the module in the "Modules" section of the Xposed Installer. In other cases, the module may even come with its own icon in the app drawer, as seen below.
Be sure to check out the settings for your modules. You never know what kind of goodies will be in there.
You can also long-press on the item's entry in the Xposed Installer to update or uninstall the module.
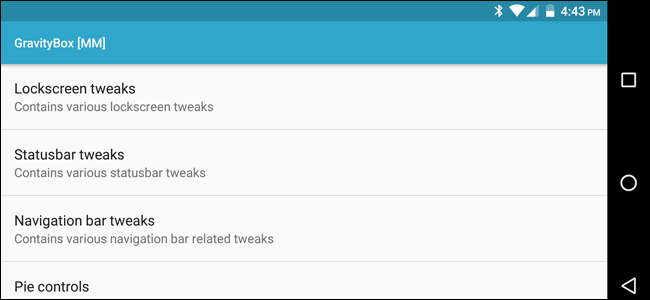
Now that you're up and running, we recommend browsing the Xposed module section to see all the things Xposed can offer. Our list of the best Xposed modules is also a good place to start exploring. I highly recommend GravityBox, pictured earlier in this article, which collects of many useful tweaks into one customizable package.
Uninstalling the Xposed Framework
If you ever want to uninstall the Xposed framework, return to the Xposed Installer app, tap Framework, and tap the Uninstall button. If you installed the framework using a .zip file, however, you'll need to uninstall it by flashing the uninstaller .zip file from the XDA thread using TWRP.
Be sure to perform an uninstall in the Xposed Installer app before removing the Xposed Installer app from your device.
The Xposed Framework may just be a tool for Android geeks to tweak their phones, but it's a faster, easier, and less invasive tool than a custom ROM is. This could also be used to install themes and perform other invasive customizations that would normally require a custom ROM. The Xposed Framework's method doesn't involve changing your device's operating system and can be easily reversed, which makes it a great option for tweakers that really like to dig in.


