Quick Links
If you find yourself underwhelmed by the photos you've been snapping, there's a good chance that underuse of depth of field manipulation is to blame. Read on as we explain what depth of field is and how you can use it to create more interesting and dynamic photos.
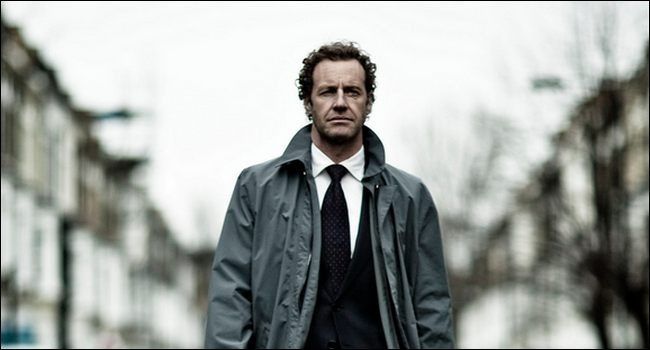
Photo by Matt Clark.
What Is Depth of Field and Why Should I Care?
At its most simple, depth of field refers to the amount (the depth) of focal plane (the field) available to the camera. This depth is defined by the range of objects in the photo that are acceptably sharp to the viewer. Objects which are too close or too far away from the lens fall outside of this acceptable range of sharpness and are out of focus.
Depending on the equipment and the settings, the depth of field can be razor thin (as is the case with macro photography where the focal plane may be a millimeter or less in width), or the depth of field may appear infinite (as is the case with a point and shoot camera where everything from a few feet in front of the camera to mountains miles away from the camera are in focus).
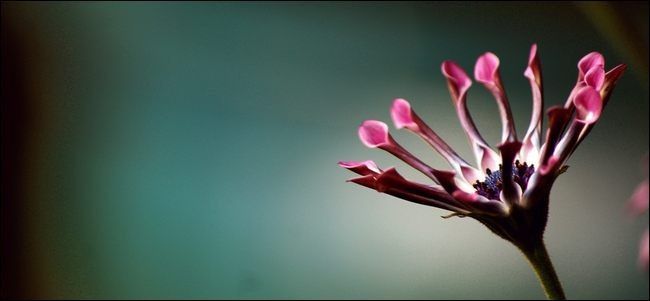
Manipulating the depth of field between these two extremes is the key to controlling how someone viewing your photo sees what you were trying to capture. By manipulating the depth of field, for example, you can decide to keep the background in sharp focus (because you want the viewer to see the monument you're standing in front of) or gently blur the background into a soft backdrop for a portrait (because you want the viewer to focus on the face of the person and not the busy city street behind them, as seen in the photo above by Conor Ogle).
How Can I Manipulate the Depth of Field?
There are three principle methods by which you can manipulate the depth of field in your photographs, one of which we are going to focus on today.
First, the focal length of the camera lens increases or decreases the depth of field. Wide angle lenses, such as architectural and fish eye lenses, have a very wide depth of field. Extreme telephoto lens have a very shallow depth of field. Changing from one lens type to another has a significant impact on the depth of field you can capture.
Second, the distance from your subject changes the depth of field. This effect applies to all lenses, even the ones on your eyes. Hold your finger up close to your eye and focus on it. Everything behind the finger is out of focus. Hold it out at an arm's length, now the room is in focus. If your friend were to walk out thirty paces and hold up their finger for you to focus on it, everything would be in focus. The closer you focus on an object, the shallower the depth of field.
Finally, and this is of most interest to us today, you can adjust the aperture of the camera's lens in order to manipulate the depth of field--this technique is much easier than swapping out lenses or dashing closer or further away from your subject. So while it's important to be aware of how your focal length and distance from the subject affects your images, it's more practical in most situations to adjust the depth of field via the aperture.
What Do I Need?
When it comes to manipulating depth of field, using a (D)SLR with an adjustable aperture is king. Being aware of depth of field is great and it can help you improve your photography with any kind of camera, but if you want to actively manipulate it in a consistent way, you need a camera that allows you to show in aperture-priority or full manual mode in order to adjust the camera's aperture. (More on this whole aperture adjusting business in a moment).
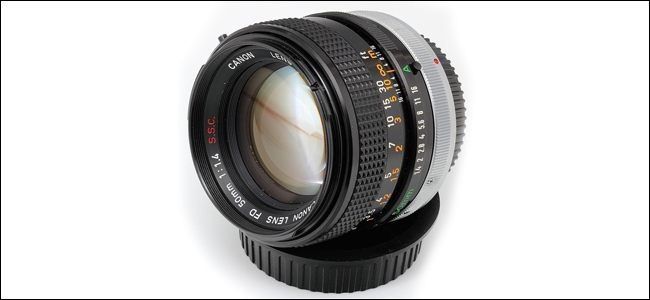
Photo by s58y.
Ideally, you want two things to really make playing with depth of field easy:
- A (D)SLR camera
- A Prime Lens with a large maximum aperture
The camera and lens we commonly tote around for everything from candid snapshots to portraits in the park is a Nikon D80 with a 50mm f/1.8 lens. Even if you're using the kit lens that came with your camera, say a Nikkor 18-55mm f/3.5-5.6, you can still achieve a wide range of results. Prime lenses are ideal, however, for experimenting with depth of field in your photos because they generally offer the largest possible range aperture settings available.
Adjusting the Aperture to Manipulate the Depth of Field
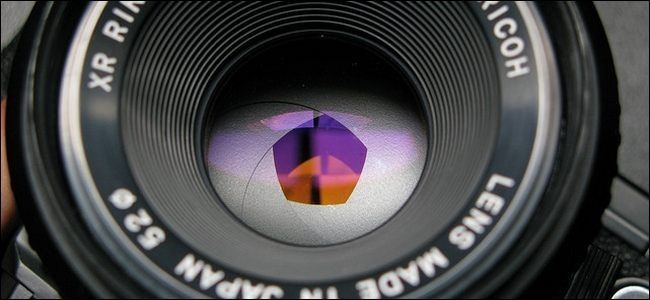
Inside your camera's lens is a mechanical iris made from little overlapping blades. The opening created by the mechanical iris, like the pupil in your eye, is called the aperture. Just like your own iris expands or contracts to allow more or less light into your eye, the mechanical iris in the camera adjusts to do the same--when the camera is left on fully automatic mode, that is.
Photo by Nayukim.
What we're interested in doing is breaking free from the creative restrictions imposed by leaving the camera in fully automatic modes, and instead manipulating the iris of the lens (and thus aperture) to create more interesting photos.
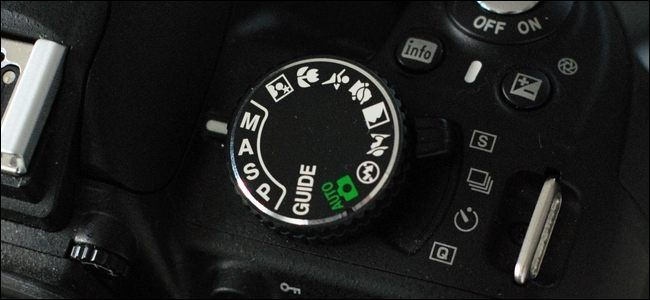
Look at your camera's mode selection dial--the mode selection dial from a Nikon DSLR is shown above. In order to really maximize what you can do with depth of field, you're going to want to use either A (sometime denoted as Ap) for Aperture Priority Mode or M for Manual Mode.
In both modes, you'll be able to set the aperture setting, but in Aperture Priority Mode, the camera's built-in metering will adjust the exposure time for you. In Manual Mode you'll need to adjust both the aperture and the exposure values which is a little more challenging. To start with, there's no shame in letting the camera crunch the numbers for you--go ahead and use Aperture Priority mode.
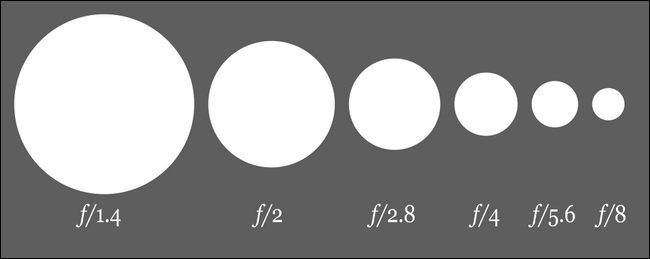
Before we start shooting away, let's lay down the most basic rules to keep in mind. The aperture number (or F-number) is a ratio. Specifically it is a ratio between the focal length of the lens and the diameter of the aperture. As such the smaller the f-number the larger the opening of the aperture/lens iris.
The most important thing to remember when manipulating the depth of field in your photographs is:
Small F-number -> Big Aperture -> Shallow Depth of Field
Large F-number -> Small Aperture -> Large Depth of Field
You want creamy backgrounds for portraits? Open the aperture up. You want tack sharp background all the way to the horizon for stunning landscape photos? Close the aperture down.
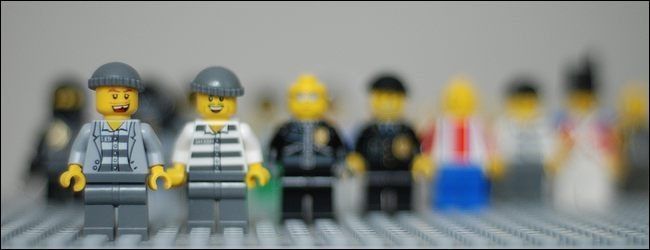
To demonstrate just how quickly small changes to the aperture yield big changes to the photograph, let's round up some willing LEGO figure assistants and line them up on the table in our office.
In the first photo, we've set our focus on the closest LEGO figure and adjusted the aperture as wide as it will go on our lens (f/1.8):
The figure closest to the lens is sharp, but the focus falls off immediately after that (the second figure is only an inch behind the first). You'll also notice that while the photo has a nice dream-like quality to it with all that soft focus, it's also not razor sharp even in the acceptable depth of field range; that's a tradeoff you make with most lenses. Shooting with the aperture as absolutely wide open as it will go is usually not the sharpest setting the lens can offer.
Let's adjust the aperture to f/10 and see what happens:
We lose a little light in the adjustment (remember the only thing we're changing is the aperture setting for the sake of consistency), but now the first two figures are really sharp and the third figure is significantly more in focus than in the first image. Our depth of field has expanded from a fraction of an inch to a few inches.
In the last photo, let's close down the aperture as small as we can with this lens, f/22:
The difference between f/10 and f/22 isn't as great as the difference between f/1.8 and f/10, but there are still noticeable changes. The faces of the LEGO characters in the background are clearer, and as we follow the figures down the stair-step pattern of the front row, more of the figures are in focus.
That's all there is to it! Open up the aperture to reduce the depth of field, close it down to increase it. Armed with that skill, you're ready to leverage depth of field manipulations to make everything from portraits of your kids to photos of the Grand Canyon look better than you ever thought possible.
For more photography articles, including more ways to use the depth of field to your advantage, check out these additional How-To Geek photography articles:
- The How-To Geek Guide to Custom Photo Bokeh
- How to Enjoy Macro Photography on the Cheap
- What Do I Need To Know Before Buying A New Lens For My Camera?
- Improve Your Photography by Learning the Elements of Exposure
- HTG Explains: Cameras, Lenses, and How Photography Works
Have a photography question or tutorial you'd like to see on HTG? Join in the conversation below and let us know.

