If you own a lot of DVD's, you might want to convert them to an ISO image for backup and easily playing them on your media center. Today we take a look at ripping your discs using DVDFab, then using ImgBurn to create an ISO image of the ripped DVD files.
Rip DVD with DVDFab6
DVDFab will remove copy protection and rip the DVD files for free. Other components in the suite require you to purchase a license after the 30 day trial, but you'll still be able to rip DVD's after the trial.
Install DVDFab by accepting the defaults (link below)...a system restart is required to complete the install process.
The first time you run it, a welcome screen is displayed. If you don't want to see it again check the box Do not show again, then Start DVDFab.
![sshot-2010-03-22-[22-27-46]](https://static1.howtogeekimages.com/wordpress/wp-content/uploads/2010/03/sshot20100322222746.png?q=50&fit=crop&w=750&dpr=1.5)
Pop the DVD in your drive and click Next.
![sshot-2010-03-22-[22-30-00]](https://static1.howtogeekimages.com/wordpress/wp-content/uploads/2010/03/sshot20100322223000.png?q=50&fit=crop&w=750&dpr=1.5)
Now select your region and check Do not show again, then OK.
![sshot-2010-03-22-[22-30-22]](https://static1.howtogeekimages.com/wordpress/wp-content/uploads/2010/03/sshot20100322223022.png?q=50&fit=crop&w=750&dpr=1.5)
It will then open the DVD and begin to scan it.

Under DVD to DVD you can select either Full Disc or Main Movie depending on what you want to rip. If you want to burn the DVD to a disc after it's created select the Full Disc option.
![sshot-2010-05-11-[20-03-51]](https://static1.howtogeekimages.com/wordpress/wp-content/uploads/2010/03/sshot20100511200351.png?q=50&fit=crop&w=750&dpr=1.5)
Now click the Start button to begin the ripping process.

After the ripping process has completed, you'll get a message telling you it's waiting for you to put in a blank DVD. Since we aren't burning the disc, just cancel the message.

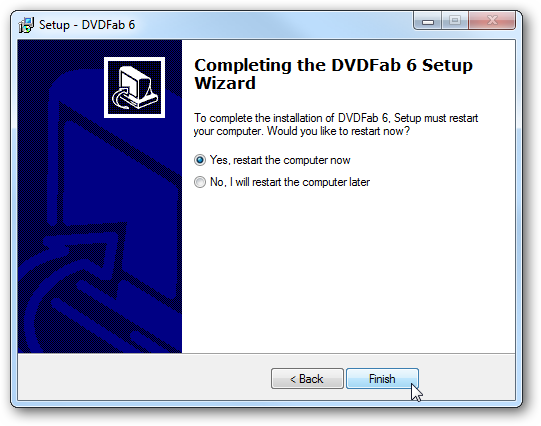
Click Finish and close out of DVDFab or just minimize it if you're going to keep using it to rip another DVD.

By default the temporary directory is in My Documents \ DVDFab \ Temp...however you can change it in settings.

If you go to the Temp directory you'll see the DVD files listed there...

Convert Files to ISO with ImgBurn
Now that we have the files ripped from the DVD, we need to convert them to an ISO image using ImgBurn (link below). Open it up and from the main menu click on Create image file from files/folders.

Click on the folder icon to browse to the location of the ripped DVD files.
![sshot-2010-03-22-[20-31-54]](https://static1.howtogeekimages.com/wordpress/wp-content/uploads/2010/03/sshot20100322203154.png?q=50&fit=crop&w=750&dpr=1.5)
Browse to the DVDFab temp directory and the VIDEO_TS folder for the source and click Ok.

Then choose a destination directory, give the ISO a name, and click Save. In this case we ripped the Unbreakable DVD, so named it that.

So now in ImgBurn you have the source being the ripped DVD files, and the destination for the ISO...then click the Build button.

If you don't create a volume label, ImgBurn is kind enough to create on for you.

If everything looks correct, click Ok.

Now wait while ImgBurn goes through the process of converting the ripped DVD files to an ISO image.

The process has successfully completed.

The ISO image of the DVD will be in the output directory you selected earlier. Now you can burn the ISO image to a blank DVD or store it on an external hard drive for safe keeping.

When you're done, you'll probably want to go into the temp DVDFab folder and delete the VOB and other files in the Video_TS folder as they will take up a lot of space on your hard drive.
![sshot-2010-03-22-[21-16-48]](https://static1.howtogeekimages.com/wordpress/wp-content/uploads/2010/03/sshot20100322211648.png?q=50&fit=crop&w=750&dpr=1.5)
Conclusion
Although this method requires two programs to make an ISO out of a DVD, it's extremely quick. When burning DVD's of various lengths, it took less than 30 minutes to get the final ISO. Now, you'll have your DVD movies backed up in case something were to happen to the discs and are no longer playable. If you use Windows Media Center to watch your movies, check out our article on how to automatically mount and view ISO files in Windows 7 Media Center.
With DVDFab, you get a 30 day fully functional trial for all of its features. You'll still be able rip DVD's even after the 30 day trial has ended. The more we've been using DVDFab, the more impressed we are with its capabilities, so after the 30 day trial you should consider purchasing a license. We will have a full review of the of it to share with you soon.