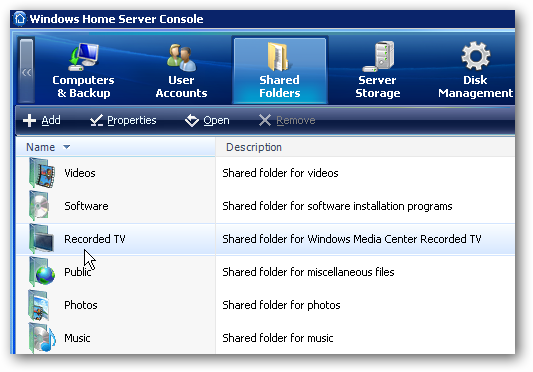
Windows Home Server comes with some shared folders in different categories by default, and chances are you'll want to create your own as well. Today we show you how to create your own shared folders, manage permissions, enable folder duplication, and more. Note: For this article we're accessing the Home Server Shared Folders from Windows 7. Default Shared Folders After installing Windows Home Server you'll notice that the default shared folders are Music, Photos, Public, Recorded TV, Software, and Videos. These folders cannot be deleted, but we can create our own folders if needed. We can also go through and change permissions and view folder histories. Accessing Shared Folders You can access your shared folders on the server a few different ways. One is to double-click the Shared Folders on Server icon that was created on the Desktop when you installed WHS Console.
![sshot-2010-02-24-[18-39-16]](https://static1.howtogeekimages.com/wordpress/wp-content/uploads/2010/02/sshot20100224183916.png?q=50&fit=crop&w=750&dpr=1.5)
Or right-click on the WHS Console icon in the tray and select Shared Folders.

Open WHS Console and under Shared Folders right-click and Open the folder you want.

You can also go into Network and double-click on the Home Server icon...

Which ever method you use, it'll open the Shared Folders directory and you can begin browsing through your data.

Add New Folder Adding a new folder is pretty straight-forward. Open Windows Home Server Console and under Shared Folders click Add from the toolbar or right-click an empty area in Shared Folders and select Add from the context menu.


Either way it will pop up the Add a Shared Folder wizard where you type in the name for the folder and give it a description if you want to. You'll need to decide if you want to enable folder duplication or not. With it enabled, it duplicates the folder and files contained in it across multiple drives on the server. It will take twice as much space on the total storage of your server and can take a while for the process to complete. In this example...these files are going to be large video files, and we don't need to create a duplicate.

Next we need to select the type of access each user will have for the new folder. The types of access are as follows...

The folder has been successfully created and you can close out of the wizard and start adding files.

Now in Windows Home Server Console we can see the created folder named DVD Movies. We also see the Description, it's currently empty, Duplication is off, and a status of Healthy.

Delete a Shared Folder If you ever find that you need to delete a shared folder you created, right-click the folder and select Remove from the menu.

Then click finish on the warning message if you're sure you want to delete it. Remember that if a folder is duplicated, that will be deleted as well. Also you can't delete the folders that were included by default by WHS.

Change Folder Properties We can also go back and change the properties and user access to the folders at any time. In this example we created a Documents shared folder and want to enable Folder Duplication and change user access. Just right-click the folder and select Properties.

The Properties window appears and under the General tab we want to mark the box next to Enable Folder Duplication. You need at least 2 drives on your server to enable folder duplication. What it does is automatically duplicate the folder and its contents over to another drive. It also syncs the folder with the duplicate. So for example if you take a file out of the folder, that is updated in the duplicate as well. This is very handy incase one of the server drives fail, you'll still have access to the folder contents. Remember that duplication takes twice the amount of space of total storage space. You might want to use this feature for your most important files and documents.

Click on the User Access tab to change the type of access each user has to the folder.

You'll get a message reminding you that the new permissions won't go into effect until the user logs off then back on to the machine.

If a user tries to access a file that you haven't assigned rights to, they'll get a File Access Denied error message.

You can also check out folder history and see how it has grown over time. Right-click a particular and select History...which brings up a screen showing what's been going on. You can choose to display week, month, year, or a full history.

If you try to view the history of a folder that hasn't had enough time to accumulate any, you'll get the following error. A folder needs to be in operation for a minimum of one week.

Conclusion Windows Home Server is an excellent way to centralize all of your data, and access it from different machines throughout the house or small office. Managing the shared folders on the server will be one of the main administrative functions you'll need to do. You'll be able to administer user account access to the folders on the network and over the web. The Folder Duplication feature is a great way to ensure there is redundant backup of your most important files. This guide should help get you started with using and understanding shared folders on your home server. You might want to also check out our articles on how to manage user accounts in WHS, and how to backup WHS folders to an external drive.