Navi-X is a free media portal add-on for popular media center applications and mobile devices; read on as we show you how to supercharge your streaming media experience with one-stop access to thousands of content sources.
The web is saturated with content but it can be a real hassle to get that content from the source to the device you want to watch it on. You might be aware, for example, that several of your favorite shows are available in streaming video format, but who has the time to figure out exactly how to get those streams to appear on your XBMC or PS3? What about video and podcasts? There’s so much good content out there but who has time to dig through it all and copy it over to the appropriate devices?
This is where Navi-X steps in; Navi-X is a media portal application available for a wide variety of devices (such as the XBMC, Boxee, Apple TV, iPhone/iPhone, PS3, Android devices, and Nintendo Wii) that brings together streaming television, movies, photography sites, podcasts, and even live television.
For the purposes of this tutorial we’re going to highlight how to install and enjoy Navi-X on XBMC 11.0 Eden. If you wish to install Navi-X on other devices we’d recommend checking out the links on Navi-X’s Google Code page for your specific device.
Installing Navi-X for XBMC

Since Navi-X is not in the official XBMC repository, the first thing we need to do is add-on the Navi-X repository to our XBMC installation. If you’d like to take an in-depth look at installing add-ons (both from the official repository and third-party ones) in XBMC, check out our full guide to XBMC add-ons here. We’ll quickly cover the relevant steps for adding on the Navi-X repository here.
First, you need to download the ZIP files that contains the Navi-X information. Visit the Navi-X downloads page and grab the newest XBMC version. As of this writing, it’s version 3.7.5. Now put that ZIP file somewhere accessible by your XBMC unit—this could be on a network share, on a flash drive, or you could FTP it right over to the XBMC unit.
Navigate to System –> Add-ons –> Install from zip file. Select the location of the ZIP file and then select the ZIP file, hit OK. A little box will pop up in the lower right hand corner that says “Navi-X enabled”
You’ll find the Navi-X media portal under Programs.

You may wish to add a shortcut to save yourself the hassle of navigating through the sub-menus in the future. You can create a homescreen shortcut for Navi-X by navigating to System –> Settings –> Skin –> Add-on Shortcuts. There you can add Navi-X to the Program shortcuts.
Navigating and Enjoying Navi-X

Navi-X is so packed with stuff it’s easy to get overwhelmed. We’d suggest a two-prong plan of attack. First, poke around in everything. Most entries have layer after layer to explore. Second, use the menu button frequently to mark things you’d like to check out later.
Do that end, start in Navi-Xtreme Medial Portal. From there you can use the search function, check out site scrapers, see user-moderated content lists, and check out the most-viewed content from the last day and week.

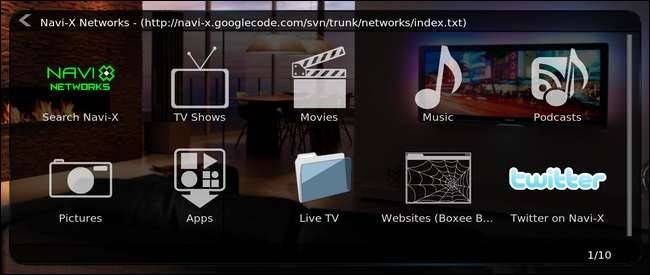
While there is interesting content in most of the options here, Click on “Navi-X Networks” to get one of the more cleanly formatted sub-menus:

Let’s check out some television shows, currently there are almost 40 TV networks and content sources represented in Navi-X:

Were you thinking Food Network, because we were definitely thinking Food Network. Most of the content sub-menus are organized with entries like Full Episodes, Top Videos, etc. Let’s check out Full Episodes and then pick a show. Giada at Home? Why not:

At this point we could either watch the content or hit the menu button to save a specific episode for later viewing (or back up and favorite the entry for the entire show).

You can repeat this process of exploration and saving with any of the content you find on Navi-X and, if you use the menu button on the top level of the Navi-X browser, you can even set a specific playlist as your default list to jump you right to your favorite content.
There’s one last thing you’ll want to configure before you go crazy exploring and building playlists and setting favorites. Navigate back to the top level of the browser and hit the exit/ESC key to pull up the following menu:

Click on “Sign in” and create a free account. Navi-X will backup your playlists and favorites as well as sync them between other devices. It’s a great way to make sure that you don’t lose your saved content and that it’s accessible whether you’re at another XBMC unit or messing around with Navi-X on your smartphone.
Now it's time to start browsing content, building playlists, and enjoying media from the far flung reaches of the web. If you find something particularly awesome or interesting, make sure to share it with your fellow readers in the comments below.