After writing yesterday's article about creating a shortcut to the Safely Remove Hardware dialog, a number of readers mentioned to me that they'd like create a shortcut to immediately eject a specific drive, so we'll cover that here.
Using the built-in Windows dialog is more powerful and probably would suffice for most people, but for those of us that want complete control there's a small freeware utility called USB Disk Ejector.
Note: This utility only works for ejecting USB devices, so if you need to eject another type of device you'll have to use the Windows method.
Using USB Disk Ejector from the GUI
This utility is really quite slick... launch it and then either double-click or press enter on the usb device you'd like to eject. There's literally nothing else to it.
If you assign a hotkey to the executable through a shortcut, you can operate the entire thing from your keyboard. Quite useful for keyboard ninjas!
Using From the Command Line (Advanced)
You can also use the utility from the command line, and pass parameters to tell it which drive to eject. It will work silently by default, so there won't be any popups to deal with.
You can start off by passing in the /? parameter to show the help dialog:

Now that you know the command line options, you can test them out... for instance, my flash drive is mounted as my G: drive, so I'd use this syntax:
usb_disk_eject /removeletter G

You will only get a message if there is an error. For instance, if you run the same command a second time without the USB drive mounted, you'll get this message that doesn't seem very accurate:

You can also use the partial name matching if your USB drive seems to change letters a lot, but the syntax is slightly strange. To check for a partial name, append * to the beginning of a keyword. Do Not put a second asterisk in the search string, as it won't work.
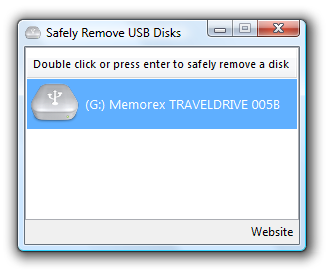
For instance, the full name of my flash drive is "Memorex TRAVELDRIVE 005B" so I could use the full name:
usb_disk_eject /removename "Memorex TRAVELDRIVE 005B"
Or I could just use *Memorex as the name instead:
usb_disk_eject /removename "*Memorex"
Note: the /showeject parameter didn't work for me at all under Vista, but it might work for you.
Create a Shortcut to Eject a Specific USB Drive
Now that we know how the syntax works, we can include that into a shortcut that can be launched from an icon or hotkey. Right-click on the desktop or elsewhere and choose New \ Shortcut.

In the location box, you'll put the full path to the USB Disk Eject application file, and then append the /removeletter parameter to the end including the drive letter.
C:\path-to\USB_Disk_Eject.exe /REMOVELETTER G

You'll want to give the shortcut a reasonable name, and then you'll have an icon you can use to immediately eject the drive:

Note that you could use the /removename parameter instead if you choose.
Assign a Hotkey to the Shortcut
Now that we have a shortcut, we can assign a hotkey to the shortcut by right-clicking on the icon and choosing Properties. On the Shortcut tab you'll see a place to assign the Shortcut key:

Add in the shortcut key and close the dialog. As long as the shortcut is on your desktop you shouldn't have to restart anything for the hotkey to work. You can also move the shortcut to another folder, for instance your quick launch bar.
Tip: If you add the shortcut to the Windows Vista quick launch bar, you can use the built-in hotkeys instead of bothering to assign one manually.