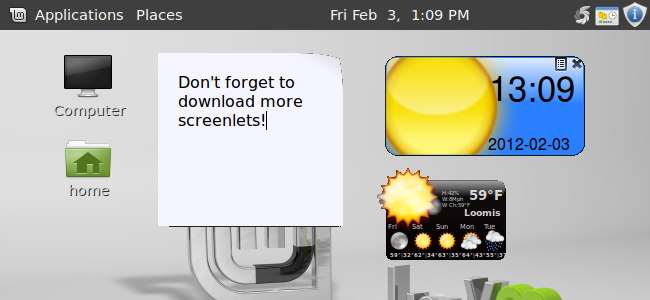
Screenlets are small applications that are similar to Gadgets in Windows 7, that allow you to place things like sticky notes, clocks, calendars on your Linux Mint desktop. Screenlets represent items you might keep on a physical desktop, plus more.
We’ll show you how to install the Screenlets program, add screenlets to your desktop and remove them, and how to add screenlets that you download from the internet.
To install the Screenlets program, select Other | Software Manager from the Applications menu.

Enter “screenlet” (without the quotes) in the search box in the upper, right corner of the Software Manager window. You do not need to press Enter, because the results displays as you type. Click “screenlets” in the list that displays.

Click Install on the screen that displays.

You must authenticate when installing software. Enter your password in the Password edit box and click Authenticate.

The progress of the installation displays at the bottom of the Software Manager dialog box.

You may notice that the Software Manager dialog box still says the application is not installed even though the installation has finished. That seems to be a minor bug. To fix it, click Search results at the top of the dialog box, and then click “screenlets” in the list of search results again.

The dialog box should now say Installed and show a Remove button, as well.

To close the Software Manager, select Close from the File menu.

To open the Screenlets application, select Accessories | Screenlets from the Applications menu.

For this example, we will add the ClearWeather screenlet to the desktop. To do this, select the ClearWeather screenlet in the pane on the right side of the Screenlets Manager dialog box. Click Launch/Add.

The screenlet is added to your desktop. You can move it to a different location by clicking and holding down the mouse button on the screenlet as you move it.
Right-click on the screenlet to access a menu for it allowing you to change settings, add another instance of the screenlet, or remove the screenlet from the desktop. To change the zip code for the ClearWeather screenlet, so you can view weather for your current location, right-click on the screenlet and select Zip Code from the popup menu.

On the Zip Code dialog box, enter the desired zip code in the edit box and click OK.

The ClearWeather screenlet should now display the weather for you chosen location. However, by default, it displays the temperature in Celsius. If you’re used to Fahrenheit, you can change this. Right-click on the screenlet and select Properties from the popup menu.

On the ClearWeatherScreenlet dialog box, click the Options tab and then click the Weather sub-tab. To view the temperature in Fahrenheit, select the Use celsius temperature check box so there is NO check mark in the box. Click Close to accept your changes and close the dialog box.
NOTE: The Screenlet sub-tab is available for all screenlets and allows you to change properties common among all screenlets. It may be the only sub-tab available if there are no specific settings for the current screenlet.

You can also add screenlets to your desktop that you download from the internet. The following sites are two places containing screenlets you can download for free.
Once you have downloaded one or more screenlets to a folder on your system, open the Screenlets Manager again and click Install.

On the Install dialog box, make sure Install Screenlet is selected (it should be the default selection) and click OK.

On the Install a Screenlet or SuperKaramba theme dialog box, navigate to the folder in which you saved the downloaded screenlets and select a screenlet. The screenlets should be .tar.gz files. Click Open.

Once the screenlet has been added to the Screenlets Manager, the following dialog box displays. Click OK to close it and return to the Screenlets Manager.

Select the newly installed screenlet in the right pane and click Launch/Add on the left.

The screenlet is added to the desktop. You can change properties for it just as described earlier.

When the Screenlets Manager is running, an icon displays on the panel. Right-click this icon to access options for the Screenlets Manager. You can quickly open the Screenlets Manager after you have minimized it by selecting Screenlets Manager from this popup menu. You can also easily install Screenlets, get more Screenlets, launch installed Screenlets, close or restart all Screenlets, and quit the Screenlets program.

To close a specific Screenlet, right-click on the screenlet on the desktop and select Quit this <name of screenlet> from the popup menu. If you have more than one of the selected Screenlet open, you can close all of them by right-clicking on any one of that particular Screenlet and selecting Quit all <name of screenlet>s.

You can add many different kinds of screenlets to your desktop, such as a wireless monitor, a network monitor, and a CPU meter. There is also a screenlet that allows you to follow your friends tweets and post your own, and one to display your Google Calendar events on your desktop.