Running Windows 8 from a USB should not be confused with installing Windows on a USB drive--in this case, instead of installing it on the drive, we're just running it straight from the portable drive. Here's how to do it.
This is actually a new feature in Windows 8 called Windows To Go, but if you have been using the Windows 8 Developer Preview you will know that the binaries were removed for this release. The feature which will use a wizard called the Portable Workspace creator relies on existing Windows Deployment technologies, most notably imagex.exe which is a tool used to manage .WIM files. In order to do this there is a few things we need:
- A bootable Windows 8 PC (You can also use a Virtual Machine)
- A USB 3.0 16GB USB (This will work on a USB 2.0 but might appear to be a bit slow)
- A Windows 8 ISO File or DVD
- An active internet connection (To download the WAIK)
So grab those few things and a hot cup of coffee and lets get started, at this point you should have your Windows 8 PC booted up and your USB connected.
WAIK
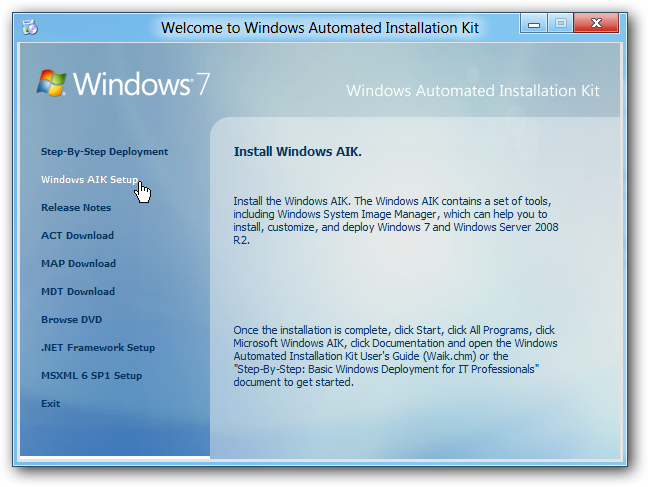
As mentioned are going to have to obtain a copy of imagex.exe, luckily for us it is distributed as part of the WAIK (Windows Automated Installation Kit) which can be downloaded from the Microsoft website.
Note: The download is just under 1.7GB so if you have a slow internet line you might be waiting for a while.
Once the download has completed this will need to be installed on your Windows 8 PC, the install is just of the next, next, finish type and doesn't require any thinking.
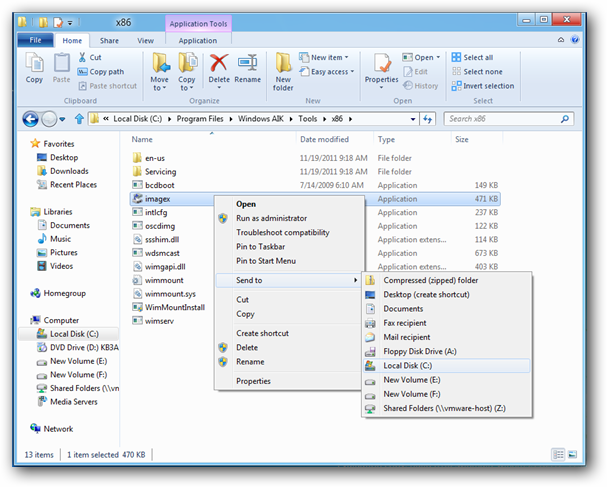
Once the WAIK has finished installing if you are running a 32-Bit version of the Developer Preview navigate to C:\Program Files\Windows AIK\Tools\x86 and send imagex.exe to the root of drive C:\
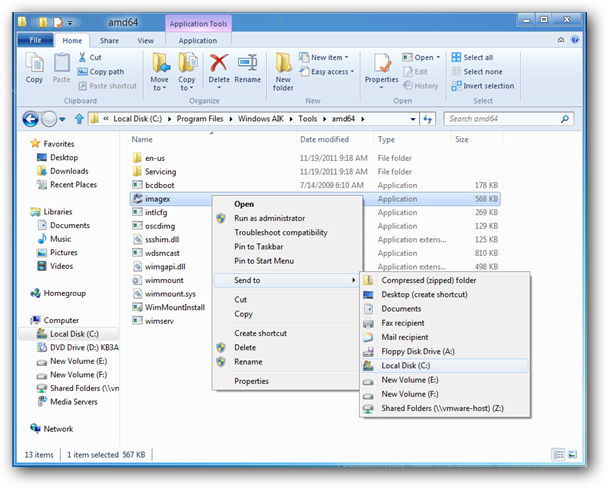
If you are running a 64-Bit installation you need to navigate to C:\Program Files\Windows AIK\Tools\amd64 and send imagex.exe it to the root of the C:\ drive.
Creating The USB
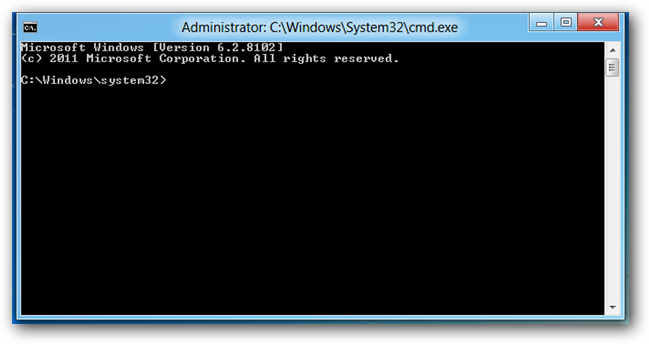
At this point you need to either insert the Windows 8 DVD or mount the Windows 8 ISO file, by right clicking on it and choosing Mount. Switch to the Windows 8 Start screen then type CMD and press Ctrl + Shift + Enter to run a Command Prompt with administrative rights.
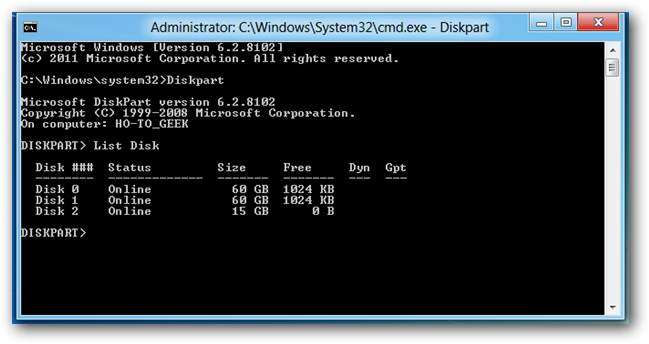
Now type the following commands into the command Window:
Diskpart
List Disk
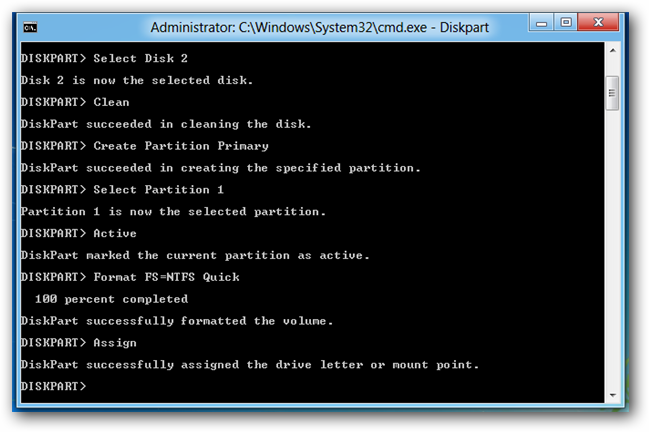
Then run the following commands
Select Disk 2 (Replace Disk 2 with whatever number you USB Disk is, seen above)
Clean
Create Partition Primary
Select Partition 1
Active
Format FS=NTFS Quick
Assign
Exit
Type Exit to leave Diskpart, but keep the command Window open.
Now type the following command
C:\imagex.exe /apply D:\sources\install.wim 1 H:\
Note: Substitute the D:\ for the drive letter that your Windows 8 DVD is in and the H:\ for the drive letter of your USB.
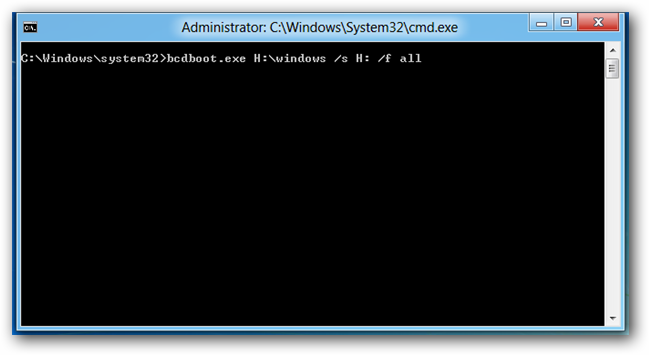
Now drink what is left of your coffee as you wait Windows to expand the WIM file onto your USB. Once its done, a success message will be displayed. The only thing left to do is to copy the files needed to make the USB bootable to the flash drive. To do this run the following command.
bcdboot.exe H:\windows /s H: /f ALL
That's all there is to it, now you have a fully functioning installation of Windows 8 Developer Preview running from your USB. The first time you boot from the USB, Windows will install all the drivers you need for the PC you booted on.
Note: Just as a side note the final version of the Portable Workspace creator will let you clone your entire Windows machine (Programs, Customizations, Settings) to a flash drive, using the above method you will have a clean installation of Windows 8 running from a USB, your programs will NOT be transferred as we are applying the stock Windows 8 Developer Preview WIM to a flash drive, rather than cloning your existing installation.
Thanks to Windows8Italia for pointing this out.


