Quick Links
Just like your car, your house, and even your body, your computer needs a good cleaning every once and a while to prevent dust build-up and overheating. Cleaning a PC is easy to do and only takes about 20 minutes, so today we're going to cover how to effectively clean the inside of your desktop computer.
Editor's Note: This article shows how to completely clean everything inside of the computer case. You don't necessarily have to remove the RAM and video card if you don't want to. We do recommend cleaning your computer on a regular basis.
How often should I clean my computer?
Depending on your environment, you may need to clean your computer more or less often. Computer placement is one important variable. Keeping your computer on the floor allows for dust, hair, skin cells, and carpet particles to get inside easier. If you keep your computer above the floor---say, on your desk---particles are less prone to getting inside.
If you smoke near your computer, tar, ash, and other gunk can build up in your computer's fans and on inside surfaces. Ridding your computer of these things every 6 months can increase your computer's performance.
If you're the owner of a pet that sheds, you might want to clean your computer more often. The inside of your computer is just as susceptible to fur clogging fans and other areas of your computer.
In short, if you keep your computer off the floor, don't smoke, and don't have shedding pets, you can probably get away with cleaning your computer once per year. If any of those things do pertain to you, you might want to clean your computer every 6, or even 3, months. And, as always, if your computer starts getting hotter than usual, open it up to check for any dust or hair buildup and then clean it.
Preparation

Do not open your computer while it is running or with any cables attached to it. It is always safer to remove all peripherals such as USB cables, audio cables, video cables, and especially the power cable. Yes, keeping the power cable connected does ground the PC and it's often okay to leave it connected while working inside the case. But, even the tiny trace of moisture from canned air can cause trouble if the components are getting power.
Next, move your computer to a well-ventilated area such as your backyard or garage. This is especially important to consider if your computer has built up a lot of dust that will be blowing around. Breathing all that old, accumulated dust isn't good for you and if you're in an enclosed space, the dust is just going to settle back on your stuff---including back on your computer.
If you're limited on space just be sure to keep a vacuum (not for cleaning the inside of the computer; more on that soon) nearby for a quick clean up afterwards. And if you're worried about inhaling dust, you can always stop at your local hardware stop to pick up a cheap dust mask for less than $5.
Gather Your Tools

Before you begin opening your computer's case, you'll need to gather your cleaning tools. We highly recommend not using a vacuum to clean dust off your computer components. This can create a static buildup and could potentially fry important electrical components on your motherboard, video card, and other places. It's just a bad idea, so spare yourself the agony and pick up a compressed air can.
That said, a vacuum can come in handy if you're dusting out your computer inside. Run the vacuum and hold the hose near---but not touching---your PC. Blow the dust out of the PC in the direction of the vacuum hose, so the vacuum can suck most of it right up.
There are a few tools you will need to clean your computer:
- Hardware set that includes screw drivers
- Can of compressed air
- Cleaning cloth
- Zip ties (optional)
- Scissors (optional)
- Cotton swabs (optional)
- Thermal paste (optional)
- Pencil or pen (optional)
One of our readers, Carlos, suggests using a small paint brush to sweep away dust where compressed air just can't reach. Some of these tools are optional, so don't stress out if you don't have them. We only had a few ourselves, and still managed to do a great job.
Open Your Case

Now that you're in a well-ventilated area with all your tools gathered, we can start the preparation process by opening up your computer's case. All computer cases are different. If you've never opened yours before and are having trouble opening it, consult your computer's manual or try searching online for guides specifically about your opening your model.
The case we're using is a Sigma Luna WB, and, just like most cases, all it takes is unscrewing two screws, and then sliding the side-panel outward. Note that if your side panel has an attached fan, you may have to disconnect a power cables to get the panel completely off.

To make the cleaning process easier, it's best to take out any components that can be easily removed. Most desktop computers allow you to remove RAM sticks, video cards, and hard drives. You don't need to do this, but you can clean more thoroughly if you do.

We recommend not removing your CPU because thermal paste that is used to transfer heat from the top of the processor to the fan needs to be replaced every time the fan is removed. If you are equipped with thermal paste and want to remove your CPU, just be sure to clean off the old thermal paste on your CPU with rubbing alcohol and a soft cloth. Then apply a fresh coat of thermal paste once you're done cleaning your computer.
Most people shouldn't need to remove their CPU and CPU fan. It just doesn't make sense considering barely any dust makes its way into the CPU socket. Then again, if you're cleaning your computer, why not go all the way? The choice is yours.
Cleaning

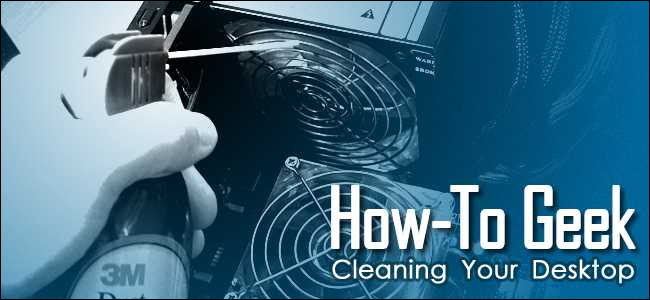
To start the cleaning process, begin with the peripherals we just removed. Grab your can of compressed air and hold the trigger to release a burst of air onto an area with a lot of dust buildup. We're cleaning an old video card that never got a lot of attention, so there were some dust clumps accumulating around the DVI ports. If you're cleaning a video card with a fan, you can use a pen or pencil to prevent the blades from spinning while you blow the compressed air.
Next, we move inside the computer case. Start by removing any dust particles that may have found their way inside the RAM slots. Take your compressed air can, aim it at a RAM slot, hold the trigger, and move it down the entire slot. Repeat this for every slot in your computer case.

Now we'll move onto the bigger equipment inside such as your CPU fan and power supply unit. Again, it's recommended to use a pen or pencil when cleaning fans to prevent the blades from spinning. Use your compressed air can to blow out any loose dust particles.

You can also use a cotton swab to clean the fan by rubbing the swab against the blades to stick the dust particles. It's a little tedious, but it makes for a nice, clean fan in the end.
The bottom of your case will undoubtedly have dust buildup. You can begin with blowing the dust away with your compressed air. If there is still dust stuck to the case, you can use a damp cloth to wipe it. Make sure your cloth is not wet, but damp. Repeat this step for all the nooks of your case.

Finally, don't forget to also clean out any other fans, ports, or enclosures as described above.
If you've got a fan that's particular gunked up, don't be afraid to use a cotton swab with a bit of isopropyl alcohol to get the blades clean. Give the fans a quick spin to make sure that the blades move freely after cleaning. If they don't, it's probably best to go ahead and replace those fans.
Decluttering Cables (Optional)
This next step is optional and is recommended for custom-built computers. Unlike professionally manufactured computers, custom-built computers don't arrive with nicely tucked away cabling that fits just right. The best way to make your case more secure and organized is to use zip ties. You also don't want your CPU fan or any other fans scraping away at cables if they're not neatly tucked away.
To start you'll need a pack of zip ties. It doesn't matter what size or color they are, as long as they can fit around all your cables. We'll be using 4-inch zip ties.
Begin by disconnecting all cables that need to be tied. Be sure to write down how they were connected for reference later and take pictures.
When you have a cable or set of cables grouped to your liking, wrap a zip tie around it and run the thin end through the fastener. Then tighten the zip tie by pulling the thin end until you can no longer tighten it. Grab your scissors and cut off the excess.
Repeat this step for as many cables as possible. You can then tuck them away to reduce their visibility and give your computer's guts a cleaner look.
The Aftermath
Plug your cables back into their correct sockets. Refer to your document or pictures from earlier if you don't remember where each cable goes. Also remember to put back any removed peripherals, such as a video card or sticks of RAM, back into their appropriate sockets.
Your computer, inside and out, should be looking as good as new. We've rid our computer of dust, hair, skin particles, and much more. Your cables should be neatly managed and out of the way of fans and other sensitive equipment. If you were having heating issues before, you'll begin to notice that it's thing of the past. And don't forget to clean your computer every 3 to 6 months to keep that performance up!