If you work on multiple computers, you probably cart your data and portable programs around on a USB flash drive. Wouldn't it be handy to have an easy-to-use portable method of storing and accessing your private files?
We have previously shown you how to use TrueCrypt to protect data on a USB flash drive. When you run TrueCrypt in Traveler Disk mode, you need to have administrator rights on the computer you are using.
We found another program, called FreeOTFE, which also creates encrypted volumes similar to TrueCrypt. FreeOTFE offers a portable mode, like TrueCrypt, which temporarily installs the necessary drivers, and requires administrator rights to run. However, the advantage of FreeOTFE over TrueCrypt is that FreeOTFE offers their FreeOTFE Explorer program that does not require administrator rights to run. It does not install any drivers. FreeOTFE Explorer is a more limited version of FreeOTFE that allows you to access the files in your .vol file, but it does not assign a drive letter to your volume. Any files accessed in a volume using FreeOTFE Explorer must be extracted first before opening.
In this article, we show you how to use the main FreeOTFE program (we just call it FreeOTFE). The FreeOTFE Explorer program is fairly easy to figure out. You can use both versions of FreeOTFE, interchangeably. The .vol files you create for storing your files can be opened by both FreeOTFE and FreeOTFE Explorer.
Download FreeOTFE and FreeOTFE Explorer from freeotfe.org.
To run FreeOTFE, you must have administrator rights. Right-click on the FreeOTFE.exe file and select Run as administrator from the popup menu.
NOTE: If you don't have administrator rights, use the FreeOTFE Explorer program.

If the User Account Control dialog box displays, click Yes to continue.
NOTE: You may not see this dialog box, depending on your User Account Control settings.

FreeOTFE temporarily installs drivers to run. Click Yes on the Confirm dialog box to install these drivers.
NOTE: When you exit the program you are prompted to uninstall the drivers. No permanent changes are made to the computer you are using.

If you click No, choosing not to run FreeOTFE in portable mode, the following dialog box displays telling you where to find instructions for installing the drivers. FreeOTFE cannot run without these drivers (FreeOTFE Explorer can).

If you did not run FreeOTFE using the Run as administrator command, the following dialog box displays. FreeOTFE opens; however, you cannot perform any actions in the program. Exit the program (select Exit from the File menu) and run the program again using the Run as administrator command.

Once FreeOTFE is open, click New to create a new volume file in which you can securely store your private files.

The Volume Creation Wizard displays. Click Next to continue.

Select whether you want to create a volume file (which is portable) or whether you want to encrypt a partition or an entire disk. For this example, we created a Volume file. Select Volume file and click Next.

To specify a name for your volume file, click Browse.

Navigate to where you want to save your volume file, enter a name for the file in the File name edit box and click Save. We chose to store our volume file in a Volumes folder in the same folder as the FreeOTFE program. This makes it easy to take the program and your volume files with you on a USB flash drive, as we will illustrate later in this article.

The full path to the volume file displays in the Volume filename box. Click Next to continue.

Enter the desired size for the volume in the edit box and select whether you want the size to be in bytes, KB, MB, GB, or TB from the drop-down list.

The next screen displays the available security options. If you're not sure which ones to select, just accept the default options. They are usually sufficient for most users. Click Next.

When creating the new volume, FreeOTFE uses some random data for the items listed on the screen. By default, Microsoft CryptoAPI is selected. If you also want to generate additional random data using your mouse. select Mouse movement. To save time, for this example, we did not choose the Mouse movement option. It takes a while to generate the random data using that method. However, for greater security, we recommend you take the time and use the Mouse movement option. Click Next.

If you chose to generate random data by moving your mouse, the following screen displays. To generate the data, wiggle your mouse around in the white box on the screen until the total number of random bits required (listed below the box) have been generated. Click Next when you are finished.

Enter a password for the volume once in the Password box and again in the Confirm password box. DO NOT press Enter after entering your password in either box. That will add Enter as a character in your password. Click Next to continue.

A summary of the settings to be used for the new volume are listed on the next screen. To mount the volume immediately after it is created, select the Mount volume after creation check box. For this example, we recommend you select this option.
You can also specify a specific drive letter to always be used (when available) for this volume. To do this, click Advanced.

Click the Drive Letter tab on the Advanced Options dialog box. Select a drive letter from the drop-down list. It is a good idea to select a drive letter that is unlikely to be used on most computers, if you want to use the same drive letter every time you mount the volume. We used E: as an example, but a letter later in the alphabet might be a better choice. Click OK when you have chosen a drive letter.

You are returned to the summary screen on the Volume Creation Wizard. Click Finish to create your new volume.

A dialog box displays when the volume has been created. You are advised to format the volume, just as you would a regular drive, and to overwrite the volume's free space before using the volume to store files. Click OK.

To format the volume, select the volume in the list on the Free OTFE main window, and select Format from the Tools menu.

The Format dialog box displays. Accept the default options and enter a Volume label for the volume. Click Start.

A warning dialog box displays telling you that all data will be erased. Because there is no data in this volume, yet, this is fine. Click OK.

Click OK on the dialog box that displays telling you the formatting process is complete. You are returned to the Format dialog box. Click Close.

To overwrite the free space of the volume with random data, select Overwrite free space from the Tools menu.

The Select Type of Overwrite dialog box displays. Select the type of random data you want to use. We selected the more secure Encrypted data option and selected the AES (256 bit XTS) option from the drop-down list. That is a commonly used secure cypher method. Click OK.

If you chose the Encrypted data option, the Random Data Generation dialog box displays. Again, to generate random data, wiggle your mouse in the white box until 512 bits have been generated. Your progress is listed below the box. When the required bits have been generated, click OK.

A Confirm dialog box displays warning you that the overwriting process may take a long time if you created a large volume. Because our volume is only 100 MB, it shouldn't take long. Click Yes.

A dialog box displays showing you approximately how much time remains in the overwriting process.

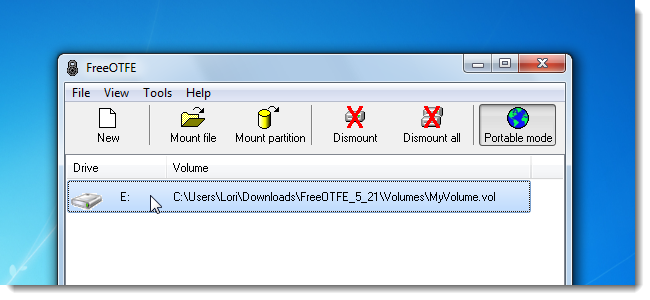
When the overwriting process is finished, click OK on the confirmation dialog box that displays. If you chose to mount your new volume after it was created, it is listed on the FreeOTFE window.

The volume displays in the Hard Disk Drives section in Windows Explorer. You can double-click on it to access it like any other drive listed.
NOTE: This is one area where FreeOTFE and FreeOTFE Explorer differs. FreeOTFE Explorer does not mount volumes using drive letters. You have to mount the drive in the FreeOTFE Explorer program.

You can copy and paste files into the volume, or drive and you can open files in your volume and edit them like you would files on any other drive.
NOTE: Another difference between FreeOTFE and FreeOTFE Explorer is that you cannot copy and paste files or open files directly from within the volume. To access files in a volume when using FreeOTFE Explorer, you must extract the files first. If you do this, we recommend that you securely delete the files you extracted once you import them back into your volume after making changes.

To dismount a volume, "locking up" your files again, click Dismount. You may see a dialog box warning you that you must force dismount the volume. Make sure all Windows Explorer windows and other windows accessing the volume are closed and that all files in the volume are closed. If you have done this and you still get the warning, you should be alright to force a dismount.

You can easily change the password and details for the volume. Before doing this, make sure the volume is dismounted. To change the password or details, select Change volume/keyfile password/details from the Tools menu. A wizard similar to the Volume Creation Wizard displays. Follow the instructions on each screen.

To change options for FreeOTFE, select Options from the View menu.

There are many options available on the Options dialog box allowing you to customize FreeOTFE. If you change settings from the defaults, it is a good idea to save your settings. We selected to save the settings to a File in FreeOTFE directory, so our settings will be available wherever we use FreeOTFE.

If you have not selected an option to Save above settings to when you click OK to close the Options dialog box, the following Warning dialog box displays. If you indicate you want your settings to be persistent by clicking Yes, you are returned to the Options dialog box. Select an option for saving the settings and click OK again.

The Options dialog box provides an option for associating the .vol files with FreeOTFE. However, when we tried this and then tried to double-click on a .vol file to mount it, the file was not listed in FreeOTFE. We had FreeOTFE open at the time, which is necessary so the drivers are loaded. Because this feature doesn't seem to work well, we recommend you mount volumes using the Mount file button in FreeOTFE.

Find your volume file on the Open dialog box, select it, and click Open.

The Key Entry dialog box displays for you to enter your password to mount the volume. FreeOTFE allows you to also use a keyfile in addition to a password using the Create keyfile option on the Tools menu. If you decide to create a keyfile for your volume, use the ... button to select your keyfile. You can also select a different drive letter using the Drive drop-down list. Click OK.

A dialog box displays confirming the drive letter used when mounting your volume. Click OK.

To easily copy FreeOTFE to your USB flash drive, select Copy FreeOTFE to USB drive from the Tools menu.
NOTE: This is where it is convenient to have stored your volumes in the FreeOTFE directory. They will be copied along with the program to the USB flash drive.

The Copy FreeOTFE to USB Drive dialog box displays. If you have more than one USB flash drive connected to your computer, choose which one to use from the Drive drop-down list. If you insert another one at this point, click Refresh to add it to the list. If you choose the default path, FreeOTFE will be copied to a FreeOTFE directory on the root of your flash drive. To select a different location, use the ... button.
You can choose to automatically run FreeOTFE when you insert your USB flash drive into a computer by selecting the Setup autorun.inf to launch FreeOTFE when drive inserted check box. You can also hide the autorun.inf file. We did not choose these options, as we have a lot of other data and portable programs on our USB flash drive and may not always want to run FreeOTFE immediately.
When you click OK, the progress of the copying of the program files displays, and a dialog box displays telling you when the files have been copied.

To close FreeOTFE, select Exit from the File menu.

You are prompted to shutdown portable mode before the program exits. This uninstalls the drivers that were temporarily installed. Click Yes to uninstall the drivers.

Using both FreeOTFE and FreeOTFE Explorer, you can easily take your private files with you and access them on any Windows computer, whether you have administrative rights on that computer or not. There is a PDF manual available for download for both programs that will help you with the features we did not cover here.