Old photographs seem to collect dirt, scratches, and bad textures as they collect dust in shoeboxes and photo albums. If you've taken the task of scanning them, but have found damage and scratches, here's how to fix them.
While only a miracle (or a talented artist) can repair extremely bad photographs, dust, scratches, dirt, and other damage can be taken care of quickly, and not just in Photoshop. Popular Freeware GIMP and Paint.NET both offer tools that can be used to make bad scans look like brand new photographs in no time at all. Keep reading to see how it's done.
Repairing Scratches in Photoshop (Video)

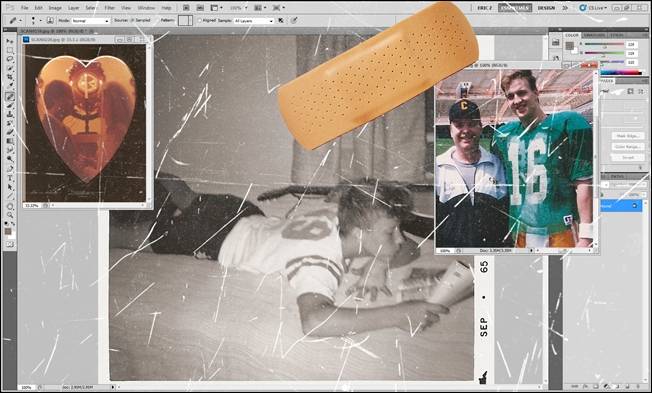
The whole problem with dust and scratches is that, even if they aren't severe, they ugly up a photo and distract from the image itself. While they may not overwhelmingly stand out in this image...

Erased with this method, it's nearly impossible to tell that they were even there in the first place. Check out the video to see the Photoshop tools in action, or keep reading to learn about the tools you can use in Photoshop, GIMP, or Paint.NET.
Tools for Repairing Images

Clone Stamp Tool: Photoshop, GIMP, Paint.NET


One of the staples of photo repair, the Clone Stamp will sample (copy from) and allow you to paint with other areas of the photograph.
In Photoshop, hold down Alt to select a sample area, then paint it over your damaged areas with your left mouse buttons.
GIMP and Paint.NET work the same way, except you have to use the Ctrl key to sample your image. Simply sample (and resample) and paint over your unwanted image areas to improve your photo.
- Photoshop: Shortcut Key (S), sample with Alt + Click
- GIMP: Shortcut Key (C), sample with Ctrl + Click
- Paint.NET: Shortcut Key (L), sample with Ctrl + Click


Marquee, Lasso Selection Tools: Photoshop, GIMP, Paint.NET


One of the most basic solutions to fixing a photo---copy and paste. The marquee and lasso select tools will allow you to pick pieces of your image, and copy them to cover up your photograph's blemishes. This is particularly helpful to cover up large areas of scratches and dust, or even large areas containing unwanted objects.
In all three programs, copy and paste are Ctrl + C, then Ctrl + V. You can use the eraser, Clone Stamps, etc to blend the area to the rest of the photograph.
- Photoshop: Shortcut Key (M) for Marquee, (L) for Lasso
- GIMP: Shortcut Key (R) for Marquee, and (F) for Lasso
- Paint.NET: Shortcut Key (S) to toggle between both


Eraser, Brush Tools: Photoshop, GIMP, Paint.NET


Not for the faint of heart, repairing large sections of photographs with the Eraser and Brush Tools is exactly what it sounds like---redrawing the lost and damaged areas. However, for certain situations, the brush and eraser can be helpful, blending copied information into the background, or painting over small spots of dust or dirt. Other than that, you can expect a lot of tedious, slow work with the Eraser and Brush tools in those unavoidable situations when you have to use them and only them to repair images.
In all three programs, simply select the tool and either erase parts of it to your background color, or paint with a foreground color to cover up anything you don't want.
- Photoshop: Shortcut Key (E) for Eraser, (B) for Brush
- GIMP: Shortcut Key (Shift + E) for Eraser, and (P) for Brush
- Paint.NET: Shortcut Key (E) for Eraser, (B) for Brush


Healing Brush and Spot Healing Brush: Photoshop and GIMP only


The tool used in the video, the Healing Brush will sample from an existing part of your image and tie it into the general appearance of the surrounding area, making your brush strokes more invisible to a casual glance. Newer versions of Photoshop have included the "Spot Healing Brush," which samples the image automatically, with no need to Alt + Click to sample manually. GIMP is sadly missing that particular tool, but does have a serviceable Healing Brush.
Paint.NET does not have this tool in the out of the box install.
- Photoshop: Shortcut Key (J) for Healing Brush, sample with Alt + Click
- GIMP: Shortcut Key (H) for Healing Tool, sample with Ctrl + Click


Other Helpful tools: Photoshop and GIMP only
While the Eyedropper tool, pictured above center is available in all three programs, Blur and Smudge are Photoshop and GIMP only tools, both reasonable for softening and blotting out damaged parts of photographs.
Use the eyedropper in tandem with your Brush tool to paint colors similar to the colors in your photograph.
Use blur to soften harsh scratches or unwanted textures from scans.
Use the smudge tool to wipe out and cover up blemishes and problem areas in your photograph.
- Photoshop: Shortcut Key (R) for Blur and Smudge, (I) for Eyedropper
- GIMP: Shortcut Key (Shift + U) for Blur, (U) for Smudge, and (O) for Eyedropper
- Paint.NET: Shortcut Key (K) for Brush
While the most helpful tool is certainly the Healing brushes GIMP and Photoshop offer, there's more than enough image editing power in the other tools and techniques combined to de-blemish those treasured photographs even if you aren't a Photoshop or a GIMP user. Dive in and give it a shot; editing out those scratches and imperfections in your scans isn't as tough as it might seem.
Image credits: Photos of the author's family, photographers unknown. Yes, that is Peyton Manning hanging out with my dad.