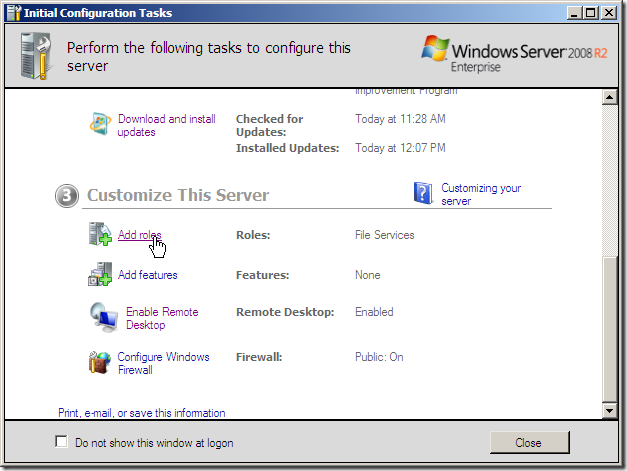
Installing a new Forest in Server 2008 is a breeze, mostly involving clicking the "”Next” button a lot. We’ll show you how. The Initial Configuration Tasks window pops up after you first install Server 2008, and will continue to do so until you click the check box for “Do not show this window at logon” down at the bottom. If you’ve previously told this window not to return, you can just go to the menu search box and type in Oobe.exe to arrive at the Server Manager window. Scroll down and click on the link that says, “Add roles.” You’ll now be faced with the possible roles to install on this server. Since we are installing a new Forest, and the first server in a Forest is required to be a Domain Controller, we are going to have to first check the Active Directory Domain Services box and then click Next.

We arrive at the next window, which explains a little bit more about what we are about to install, and a few things of note before we proceed. You can browse over it if you like, then click the Next button at the bottom of the screen.

The last stop before install is this screen, which reminds us that we are going to have to run the Domain Services Installation Wizard when we are completed. Click Install to proceed with the installation.

You’ll get to watch this for a while,

and then the successful install message will appear. It will instruct you to run the Domain Services Installation Wizard, dcpromo.exe.

We go back to the search menu box and type in dcpromo.exe.

We’re going to take the easy way of installing, since this is the first domain controller in the new forest, and we don’t have any reason to choose the advanced mode installation. We’re going to just click Next.

Since this is the first Forest, we have to create both a new domain and a new Forest, so we’ll check the appropriate button, then click Next.

Next we choose the Root Domain name.

The next page is probably the most important setting in the entire install of a new Forest. Determining the functional level of the Forest is dependent on which Windows Server versions you are going to be using. If you plan to use Windows Server 2000 or 2003, you need to set the Forest Functional Level at the level of the oldest Server version you intend to run in your network, but you won’t be able to take advantage of the additional capabilities provided in the more recent versions of Windows Server. We’ve got no ties to anything but Server 2008 on this network, so we are choosing the highest functional level.

We make sure the DNS Server box is checked, and then we proceed.

The default locations for the files to be installed will probably be the best choice, so we are going to leave these settings alone, and just click Next.

You’ll need to set an administrator password for the Directory Services Restore Mode. You could choose to set this as whatever you like, but we recommend writing it down, as we will likely be using it at some point in the future.

Here is where we get the chance to not have to do all of this the next time we need a Domain Controller, which will likely be soon. If you click the Export settings button, the settings from the install will be exported to a text file. When you are done, click the Next button to proceed.

When the installer is done running through its processes, you’ll get this nice message.

Depending on what else you have going on, the server will reboot itself automatically, and be functioning as the first Domain Controller in the new Forest you’ve created when it boots back up.