Quick Links
If you'd like to share your local Minecraft game with friends across the internet, it's a bit more complicated than just pushing a button. Let's look at the behind-the-scenes settings you have to tweak in order to connect two remote Minecraft players together.
Why Share Your Game?
Minecraft is a sandbox game and bringing your friends to the sandbox is part of the fun---but maybe you don't want to go through the hassle of setting up your own vanilla home server, running a customized server, or paying for a remotely hosted server. Maybe you just want to share your game with them across the country like you share your game with them when they're sitting in your living room on their laptop.
To make that happen, we need to tweak a few behind the scenes settings so you can share your local game through the internet in a way that allows them to easily connect to your computer.
Step One: Set a Static IP for Your Gaming Computer
First things first, you need to assign a static IP address to the computer that is hosting your Minecraft session. By doing this, you avoid having to look up the IP address of your computer on the local LAN every time you want to play with your friends online.
You can assign a static IP address at the computer level, but that's not ideal, as it may conflict with the IP addresses your router assigns to other machines. Ideally, you want to set the static IP address at the router level.
This process varies based on the manufacturer and the version of the firmware installed on your router, but our guide to setting a static IP address on a router running DD-WRT provides a good overview of the process. In most cases, you'll need the MAC address of the Minecraft computer to do this. If you run into any problems, you'll have to refer to the manual for your specific router.
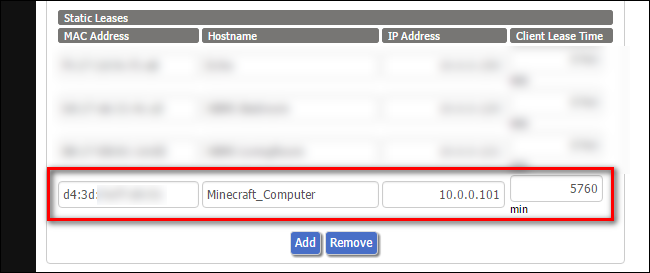
In our example, we found our computer's MAC address (which starts with "d4:3d," as shown above) and we've given it the IP address 10.0.0.101 in the static lease section of our router's configuration. After saving, your computer should keep that same IP address forever (or until you go back to these settings and change it).
Step Two: Set a Port Forward Rule
Now that you've given your Minecraft-hosting computer a permanent address on the local network, you need to set up a port forwarding rule. This allows other computers outside your network to find your Minecraft-hosting computer by requesting a specific port. You can read more about the ins and outs of port forwarding in greater detail here.
Again, like with the static IP table, the port forwarding table location and configuration varies based on the router manufacturer and firmware, but you should find something like the following screenshot located somewhere without your router's configuration menu:
In the above example, we named the port forwarding rule "Minecraft", entered the internal IP address of our Minecraft-hosting computer (which we set to 10.0.0.101 in step one), and chose a port for Minecraft to communicate on---in this case, we're using 22565 for both the external and internal port. Why this port? Well, 25565 is the default port for Minecraft LAN games, so by using the game's default port number, we ensure our friends don't have to fuss with setting a port number on their end.
Now, when anyone connects to our external IP address (more on that in a moment) at port 22565, they'll be forwarded to the same port on our Minecraft computer, and we'll be able to play Minecraft over the internet together.
However, there's one more step we need to do before we start playing, which will also make our friends' lives easier.
Step Three (Optional): Enable a Dynamic DNS Service
This step is optional, but highly recommended. It'll save you a bunch of time in the future, and make things easier for your friends as well.
The vast majority of people have an Internet Service Provider (ISP) that gives them a dynamically assigned IP address for their home connection. This is different from the internal IP addresses on your local network---think of your external IP address like a street address, and your internal IP address like an apartment number. The external IP address distinguishes your home from other homes, while the internal IP address distinguishes between the computers inside your home.
Because your external IP address is dynamically assigned, though, it means that every time your cable modem restarts, you get a new IP address. Most of the time, that doesn't matter much to you. But if you're handing out your address to your friends, it suddenly matters a lot, as you'll have to always give them your new IP address before starting a game.
You can sidestep all that by using a dynamic DNS service, which gives your home a much easier-to-remember address. Instead of 12.345.678.900, for example, your friends will just be able to type in jasonsminecraft.dynamicDNS.com. You don't have to check your IP address every time, and they don't have to fiddle with their settings every time.
If that sounds desirable to you, we walk you through the process, start to finish, in our guide to setting up a dynamic DNS service here. Follow those instructions, then come back here to start playing Minecraft.
Step Four: Start Your Game and Invite Your Friend
Now, you've assigned your Minecraft computer a static internal IP address, forwarded the Minecraft port to that machine, and (if you opted to follow step three) given your home an easy-to-remember address for your friends. It's time to put this information into Minecraft and start playing.
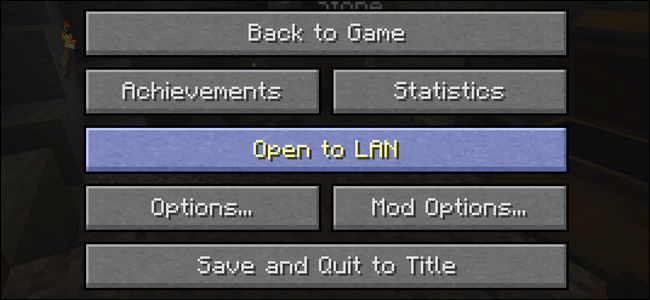
Fire up your copy of Minecraft and start your game like you normally would. Then, press the Esc key to access the in-game menu. Select "Open to LAN".
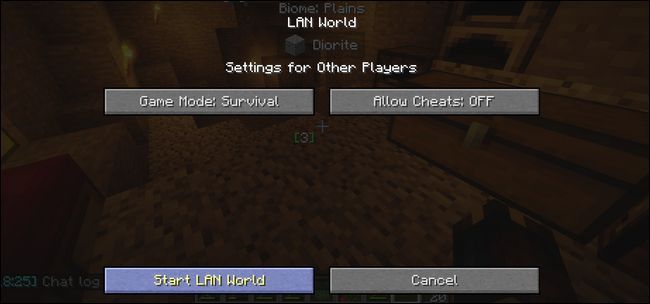
Now, you can simply click "Start LAN World". If you're curious about the different settings, check out our full guide to LAN games here.
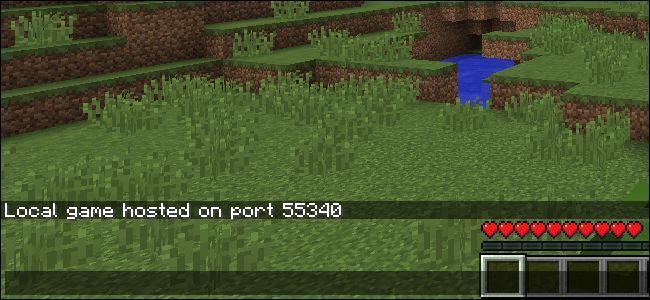
When your LAN game starts you'll see this message on your game screen: "Local game hosted on port XXXXX". Minecraft randomizes the port number every time you start a new LAN game, so this number will be different each time.
This is the annoying part: you need to take that number, go back to your router's port forwarding settings, and change the internal port for the port forwarding rule to whatever the XXXXX number was---this step is not optional. In the case of our screenshot below, that means we change the internal port number to 55340, and keep the external port number the same.
You're finally done---now your friends can connect to you.
If you skipped step three, head to whatismyip.org, and send that IP address to your friend. If you set up a dynamic DNS service in step three, send your dynamic address (e.g. jasonsminecraft.dynamicDNS.com) to your friend instead.
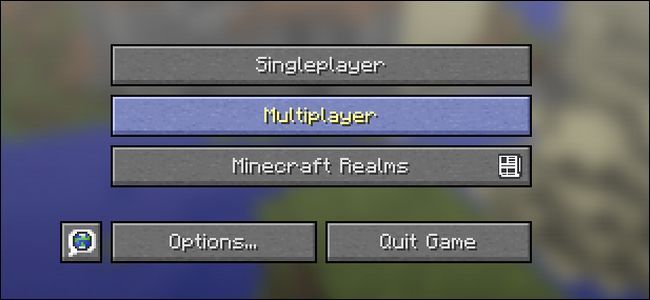
They then can launch Minecraft, click on the big "Multiplayer" button on the main splash page, and then click "Direct Connect" to plug in the IP address or dynamic DNS address you just gave them. They don't need a port number, since our port forwarding rule uses the default Minecraft port as our external port.
Thanks to the extra hoops you jumped through on their behalf, your friends can now easily connect to your game for remote over-the-internet LAN play. Just remember, every time you quit and restart your game you'll have a new internal port for the shared game---so be sure to update that port forwarding rule to avoid a troubleshooting headache.
If you share your game frequently enough with friends that going to this extra effort to update the LAN game port number will quickly become a headache, we suggest you instead run the official Mojang-supplied server software (which is free and has a fixed port number) if you want to host the game on your own computer or, for an even easier and always-on experience, you can have Mojang do the hosting for you for $9.99 a month with Minecraft Realms.

