Quick Links
The NES Classic Edition is an official clone of the original Nintendo Entertainment System, and one of the best ways to play your favorite retro games. The SNES Classic is its successor. Unfortunately, it's so popular that it's nearly impossible to get your hands on either. Don't pay $300 on eBay when you can use the modestly-priced Raspberry Pi to build your own---with even more games.
What Are the NES and SNES Classic, and Why Is the Raspberry Pi Better?

In the fall of 2016, Nintendo released the NES Classic Edition, a miniature replica of the old 1980s-era Nintendo Entertainment System. It ships with 30 classic games including Super Mario Bros., The Legend of Zelda, and Castlevania and an old-school NES controller (albeit with a very short cable and different connector to accommodate for the smaller size of the NES Classic).
It retails for $60 and ships with one controller---you can purchase a second player controller for an additional $10, bringing your total investment up to $70. Unfortunately, the console has proven so popular and Nintendo has produced so few that they're nearly impossible to find for their original list price, only appearing on sites like eBay for a 200-500% markup.
In 2017, Nintendo followed up with the SNES Classic Edition, which retails for $70 and comes with two controllers. Pre-orders have begun, and it's already proving very difficult to get one.
Don't despair, though: even if they're so rare that you've never even seen one in person (let alone had a chance to buy one), you can easily roll your own robust Classic Edition console at home---with more games and more features. In today's tutorial, we're going to combine the economical Raspberry Pi, some free software that emulates the NES, SNES, and other consoles, along with some inexpensive USB NES controllers to create a DIY version that's even better than the originals.
Better how? Not only will your DIY version include all the features of the actual NES Classic---like save states, CRT shaders for retro-looking games, and great looking organization with cover art---but it will allow you to play any game (not just the 30 included with the Classics), use any USB controller you want (not just the simple 2-button NES controller), and includes better save states and organization.
Not only that, but your system will be able to play games from other systems too---like Atari, Game Boy, Sega Genesis, and even later systems like PlayStation Portable or Nintendo 64. You can see a full list of supported systems here.
What You Need
To follow along with our tutorial, you'll need a handful of things and a bit of free time to weave them all together.
A Raspberry Pi and Its Accessories

First and foremost, you'll need a Raspberry Pi microcomputer and some basic accessories for it. The computing power required to run a Nintendo Entertainment System emulator is very low, so if you already have an older Raspberry Pi model 1 or 2 laying around, you can (and should!) use it. If you need to purchase a new Pi, by all means buy the most current Raspberry Pi 3 ($40).
In addition to the Pi, you'll need an appropriately sized SD card or microSD card (based on your Pi model), an HDMI cable to connect it to your TV, a USB keyboard (only temporarily for setting it up), and a good power supply. You'll also probably want internet access on the Pi to download updates and transfer games---you can do this with an Ethernet cable or with Wi-Fi. The Raspberry Pi 3 has Wi-Fi built in, while older models will require a USB Wi-Fi adapter.
If you're new to the Raspberry Pi, don't worry: we've written a detailed guide to all the parts you'll need, so check out that article for more info.
The Case Makes the Project

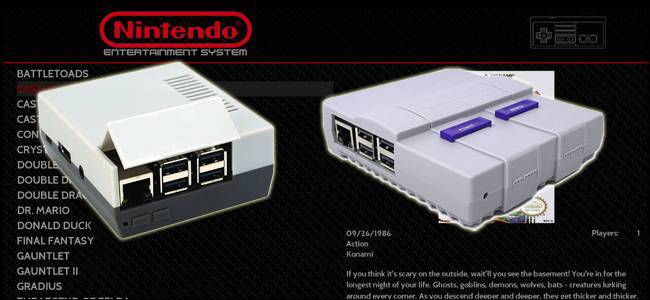
To round out your Pi setup, you'll also want a case. If you've already done a bunch of Pi projects, then you already have a case, which is fine. But if you're starting from scratch or really want the full experience, you might consider getting a custom NES or SNES-themed case for your Raspberry Pi.
There are a couple NES- and SNES-themed cases on Amazon, including the Old Skool NES case and the Super Tinytendo case. However, if you don't like the look of those for any reason, you can always 3D print your own one of these or these, or find others on sites like Etsy.
Controllers: Old School or Modern Comfort

Next, you'll need at least one USB controller (two if you want to play games with a friend). You can approach the controller situation one of two ways: First, you can go pure classic and get a pair of USB NES controllers.
This approach, we'll be the first to admit, was far more difficult than we originally anticipated. It seems like it would be incredibly simple to just buy some cheap and well made NES controllers, but in reality there is such a run on the market right now that listings are often inaccurate, controllers are difficult to get, and the best practice we can recommend at the moment is to buy multiple controllers at once, return the one you don't want, and keep the good ones (that have good heft, good button responsiveness, and play well).
We tested the two most popular USB NES controllers on Amazon: the Retro-Link controller, and a generic but well-reviewed Classic USB NES Controller (that, when actually arrived, was branded iNext). While we liked the heft of the Retro-Link better, but button responsiveness of the iNext controller was better. Practically speaking, this is a trial and error experience. (If you want something classic but more comfortable than NES controllers, we have nothing but good things to say about this Buffalo SNES controller, too.)

The other approach you can take, which is less authentic feeling but a bit more versatile, is to purchase a more modern controller, like a wired Xbox 360 controller. Not only is the build quality and availability more consistent, but the emulation platform we're about to set up, RetroPie, supports more than just the NES---so if you want to play games from other systems, a newer controller with more buttons is nice.
Either way, you'll need at least one USB controller for the project, so pick your favorite.
The Software: RetroPie and ROMs for All Your Favorite Games

In addition to the hardware, you'll also need some software to play your games. You'll need to download a copy of RetroPie, a fantastic bundle of software that combines a number of emulation tools and software into one very user-friendly interface.
For our purpose, we'll be using the premade images for the Raspberry Pi (as opposed to installing it over an existing operating system). Download the right image for your Pi model number here. Additionally, you'll need some sort of tool to burn that image to your SD card---our tool of choice is the cross-platform Etcher image burner.
Finally, and thematically the most important, you'll need some games! These come in the form of ROM files which you can either rip yourself (with the appropriate hardware) or download from the net. Acquiring ROMs is an exercise, because of fuzzy legal issues, best left to the reader---we won't directly link to ROMs or ROM sites here. That said, however, a simple Google search will take you far.
Step One: Prepare Your Pi
With all the aforementioned materials gathered, it's time to dive into preparing the Pi. First, we'll set up the SD card. Pop your SD card in your computer and fire up Etcher. The process is as easy as 1-2-3: select the RetroPie image you downloaded, confirm the SD card is the selected disk, and then click "Flash!"

Wait for the image to finish burning, eject the SD card safely from your computer, and grab your Pi and accessories. Hook the Pi up to your TV with your HDMI cable, plug in your USB keyboard and controller(s), insert the SD card, and plug in the power cable to power the system up.
If you ever get stuck during the installation process, feel free to refer to our Raspberry Pi beginner's guide, which has a bunch of useful info on the initial setup.
Step Two: Configure RetroPie
Once you've powered up the Pi for the first time with the RetroPie SD card installed, it will run through some one-time setup steps automatically (like expanding the partition, unpacking files, and so on). Then it will reboot bringing you to the controller configuration screen as seen below.

Just as the screen suggests, you should press and hold any button on your USB controller to start the configuration process. In the configuration menu, briefly press the corresponding button for each listed entry (e.g. up on the directional pad to start).

Eventually, you'll get to button entries that may not have corresponding buttons on your controller (for example, if you're using a traditional NES controller and it starts asking you about X and Y buttons). When you reach the entries for the buttons you don't have, simply press and hold a button you have already programmed for 2 seconds, then release it. This will signal to the configuration wizard that you wish to skip that button. Repeat this process until you have skipped all the unneeded entries and can click "OK" to proceed.
At this point, you'll see the following screen with the RetroPie logo and "13 Games Available" beneath it.

"Thirteen games? Sweet!" you might be thinking. Not so fast: those aren't 13 games you can play, those are 13 configuration tools for "RetroPie" (which is recognized as one of your emulators, even though it's really the underlying system). Don't worry, in just a moment we'll get around to the actual games.
If you're using an Ethernet cable with your Pi for network access instead of Wi-Fi, you can jump right to the next section to get right into putting games into RetroPie. If you're using Wi-Fi, however, press the A button on your controller to launch the menu. The RetroPie default color scheme makes it a bit hard to see in a smaller screenshot, but the entry for Wi-Fi is the last one on the list, as seen below.

When you select the "WIFI" entry, it will launch a Wi-Fi configuration tool. Select "Connect to WiFi Network".

Next select your home network, input the password, click OK, and then click OK again on the main screen to exit the application (you'll be returned to the screen you selected the Wi-Fi entry from).
Although you can use RetroPie without internet access, it is far easier to transfer your games to the device using the network.
Step Three: Add Your Games
With our Pi set up and connected to our home network, the most important step is upon us: loading it up with sweet, sweet, retro games. The easiest way to transfer games is using network shares. (You can use a USB drive, but the network setup is actually even simpler, so we'll detail that method here). Let's get started.
By default, the RetroPie box is assigned a network share named "retropie", and you can browse to it by simply opening up Windows Explorer on your PC and typing
\\retropie\
in the address box. Then, just open the "roms" folder, navigate to your system of choice (we'll use "nes" in this example) and copy any ROM files to that folder. We copied one of our favorite RPG games, Crystalis, as our test ROM.

Once you've added games, you then need to restart RetroPie (or, more specifically, the Emulation Station interface underneath). On your Pi, press the B button on your controller to return to the main menu then press the Start button to open the main menu, as seen below. Select "Quit".

Select "Restart EmulationStation" and confirm you really wish to restart it.

When it reboots, suddenly there won't be just an entry for "RetroPie" in the main GUI, but (because we added the roms to the "nes" directory) you'll see an entry for the Nintendo Entertainment System. That's a key step in setting up any emulator on RetroPie. There are tons of emulators for different video game platforms installed by default, but they will not appear in the interface until you add at least one ROM to their "roms" directory.

Press the A button see the available games. Select the game you wish to play (the only game in our case) and press A again.

After a very brief moment, the NES emulator will finish loading your ROM and you'll see the game just as if you'd loaded it up on a vintage NES unit.

At this point, you can play the game just like you were playing the original. If you need to restart the game, simply press SELECT and B at the same time. If you want to exit the game back to the RetroPie menu, press SELECT and START at the same time. Feel free to repeat this step for SNES games, Genesis games, and whatever other systems you want to play.
The Juicy Extras: Cover Art, Shaders, and Save Games
That's all you need to get started playing. But if you want the full "I built my own NES Classic" experience, there a few more extra features we need to tap into: cover art (which make your library pretty and easy to browser), shaders (which make the game look more retro on your modern TV), and save states (which let you save your game, even if the original game didn't support it. These are all features included in the official NES Classic.
Add Cover Art to Your Library
Once you have a bunch of games copied over to your "roms" folder, head back to the NES menu (where we just launched our test game), press the Start button to open the menu, then select "Scraper".

In the next screen, you can adjust the settings. Leave the scraper as "THEGAMESDB". You can toggle ratings off if you want (we left it on). Then select "Scrape Now".

Because this is our first scrape, switch the filter to "All Games". By default, the scraper is set to just use the system it is loaded in (in this case, NES), so no need to change anything. Finally, ensure "User Decides On Conflicts" is turned on. This is important, otherwise the scraper may scrape the wrong data if it isn't sure if the game is Double Dragon or Double Dragon II.
The only reason you would not want to use that setting is if you had hundreds of games to scrape and did not want to manually confirm each selection (you would, however, have to go back and manually fix any conflicts later, game by game). When you're ready, select "Start".

As the system works, you will be prompted to confirm each selection (even if there is only one pick). Press A once you have selected the correct game.

When it's finished, you'll have a nicely organized game collection.

Get that Old School CRT Vibe with Smoothing and Shaders
One thing you might notice immediately after plaing a game is how vibrant and crisp the graphics look. In fact, upon loading up our demo game Crystalis, the first thing I noticed was that the colors were so much brighter and the lines so much sharper than I remembered.
The primary reason for this disparity is how images are displayed on a digital display versus an analog CRT display. Your computer monitor and HDTV are presenting the game with a perfect 1:1 pixel-to-pixel ratio, whereas your old CRT display was phosphor-based with a softer image and light/color "blooming" around the individual points on the screen.
To compensate for that, you can set up your system to apply shaders or smoothing algorithms in order to recreate that CRT effect. Not sure if that's something you care about? Let's compare images captured from the same game at the same moment with different effects applied. First, let's look at how the very first playable moment in Crystalis looks with no shaders or smoothing.

Notice that the lines are all very crisp, significantly more crisp than you probably remember (if you played the original game on the original hardware). If you like this crisper look with sharp edges, then by all means play the game this way.
Let's take a look at how the game looks with the graphics smoothed out using the smoothing algorithm. If you're using an older Pi, this is a great option as the smoothing algorithm (unlike the shaders) puts little to no load on the GPU.

Looking at this on your computer monitor or a mobile device with a sharp high resolution screen, you might be thinking "That looks... blurry." but when viewed at a distance (like that between your couch and television), the smoothing effect does give games a more CRT-like feel and the blur doesn't feel so intense. Stand back and look at the rocks on the edge of the picture compared to the first image and you'll see what I mean.
Finally, you can using shaders to create CRT effects like scanlines and even slight distortion (as the front of CRT displays was slightly curved in most cases). Here's a simple CRT shader applied.

Again, when viewed in a close comparison crop like we have here, the effect seems pronounced (just as if you were sitting very close to a CRT screen). But when viewed at a distance, it looks very natural. In fact, even though I didn't mind how the game looked sans smoothing or shaders, it was when I turned on a CRT shader I went "Oh! That looks like the game I remember!"
Both the smoothing and shaders settings are located in the same place, but there's a little tweak we have to perform before we dive into that menu. Although RetroPie is supposed to ship with shaders already preloaded, in our experience you need to manually update the shaders list (which you'll need an internet connection for, so plug in that Ethernet cable now if it isn't already). Return to the RetroPie setup menu we originally visited and select "RetroArch" from the menu, as seen below.

This will launch the very retro-looking RetroArch configuration menu. Select the entry "Online Updater".

Within the "Online Updater" menu, select "Update GLSL Shaders".

Down in the lower left corner, in tiny yellow text, you'll see a little update indicator, showing that "shaders_gsls.zip" is downloading. Wait for it to finish. Once the process is complete hit the Esc key on your keyboard or the B button on your controller to back out of the menus all the way to the main menu. There, select "Quit RetroArch". Once back in the RetroPie menu, select "RetroPie Setup".

Inside the RetroPie setup menu, select "configedit - Edit RetroPie/RetroArch configurations".

Select "Configure basic libretro emulator options".

Here you can choose to configure shaders and smoothing on an emulator-by-emulator basis, or apply it universally. Unless you want different shader settings for each system, it's best to just select "Configure default options for all libretro emulators".

Within this menu, you'll find all the settings you need for both smoothing and shaders. It's important to note that smoothing and shaders are an either/or solution---you can't use both at once. If you're trying to decide between the two, remember that smoothing is much lighter on the Pi's resources than shaders.
If you want to use smoothing, select "Video Smoothing" and change the "false" to "true". You can then return back to the main menu and play with the smoothing enabled.

If you want to use shaders, you have two steps. Ensure that "Video Smoothing" is set to the default of false. Then set "Video Shader Enable" to "true". Finally, select "Video Shader File" to select the shader you wish to use.

The shaders list might look a little daunting, but there is an easy solution. Simply look for shader files with "pi" in the name, like the "crt-pi.glslp" file seen above. These shaders have been optimized for the Raspberry Pi's less powerful GPU. You can always use other shaders, but don't be surprised if performance suffers.
If at anytime you no longer wish to play with smoothing or shaders (or wish to change which shader you are using), you can simply return to these menus and set the values to false or change the shader file.
Set Up Save States...Because Contra Is Really Hard
If you're a purist, you might just want to skip this section altogether. Some games natively support saving your progress, some games do not (you can, for example, save your game in The Legend of Zelda but you cannot in Super Mario Bros.).
Even those games that support saving require you to save the game in a specific way, often using some in-game mechanism like visiting an inn or checking in at a space station. With emulators, you can save the game anytime and anywhere, just like you might save a file in Microsoft Word as you work on it. It also gives you multiple save slots per game, so you can have as many save files as you want. It might not be the purist way to do it, but man is it a nice way to cut down on your frustration levels while playing insanely difficult games.
You can save and load your game as you play by using controller-based hotkeys. For those of you using a controller with lots of buttons (like the aforementioned Xbox 360 controller), you don't need to do any fiddly key mapping at all, you can simply use the default RetroPie/RetroArch button maps for your controller. Check out this RetroPie wiki entry to see the default joypad hotkeys.
If you're using the NES controller, however, the limited number of buttons really imposes a bit of a burden. If you wish to use the save state system, you will need to do some minor keymap editing. The default keymap for saving and loading save states uses the shoulder buttons on a controller, which aren't present on the NES controller. We'll need to remap those buttons in order to access those functions. There are two ways to do so: you can either edit the retroarch.cfg file located in
\\retropie\configs\all\retroarch.cfg
(which is very very tedious) or you can use the RetroArch interface (which is a normal amount of tedious). We'll walk through the latter.
To use the keymap interface, launch the RetroArch menu system again (from the main RetroPie menu, select the RetroPie category and then select "RetroArch"). Within the main menu, select "Settings". Before we make any changes, we need to toggle on save-on-exit setting to preserve those changes.

Within the Settings menu, select "Configuration".

Within that menu, select "Save Configuration On Exit" to toggle saving on. Without this setting, any changes we make will not be preserved when we exit the RetroArch menu system.

Press the B button or the Esc key to back out of the menu until you're at the main RetroArch menu again. Select the Settings menu.

Select "Input". Here is where you'll find all the settings for keybindings and related configurations.

Select "Input Hotkey Binds". Here we can change what the hotkey combinations on your controller do.

In order to both unlock access to the RetroArch menu while in-game, as well as give us proper access to save states, there are three button combinations we need to map: save, load, and access the RetroArch menu. You can opt to use whatever button combinations you wish for each of these, but the button combinations we've selected for this tutorial are optimal in the sense that they do not interfere with any existing keymaps.
Let's start with "Load state". Select that entry and press A on your controller. You'll be prompted with a four second countdown to press the key you wish to map to this function.

You want to map the Down key on the directional pad so that when you press the hotkey activator (the Select button) and Down it will save your game. Select "Save state" and map it to the Up key on the directional pad. Go ahead and leave the "Savestate slot +/-" entries alone as those are fine (it is set so that you can click left or right to change the save slot).
Finally, scroll all the way down to the bottom of the list until you see "Menu toggle". Select it and then map the A button to it (this will allow you to press Select+A) in the game to access the RetroArch menu.

Press the B button to back out of the menus until you are at the main screen and then select "Quit RetroArch" to save your changes.

At this point you're all set and can now use the following button combos:
- Select+Start: Exit the emulator.
- Select+B: Reset the emulator.
- Select+A: Pause the game and open the RetroArch menu from within the emulator.
- Select+Right: Increase the save slot (e.g. move from Save Slot #1 to #2)
- Select+Left: Decrease the save slot (e.g. move from Save Slot #2 to #1)
- Select+Up: Save the game to the currently selected save slot.
- Select+Down: Load the game from the save in the current save slot.

Now you can play through even the hardest of games without having to start from scratch every time you get a Game Over.
You're finally done: we've not only recreated the experience of using the NES Classic, but we've actually created a superior version, since it can play any NES game ever made, supports more save slots than the NES Classic, more shaders and video options, and (if you wish to do so) you can reach beyond the scope of this tutorial and even use Game Genie-like cheat codes, instant replays, and more. Check out the RetroPie and RetroArch wikis for more information about all the advanced features tucked away in the platform, as well as our guide to RetroArch's advanced settings.
Image Credits: Fynsya/Etsy and Clive Darra/Flickr.