Quick Links
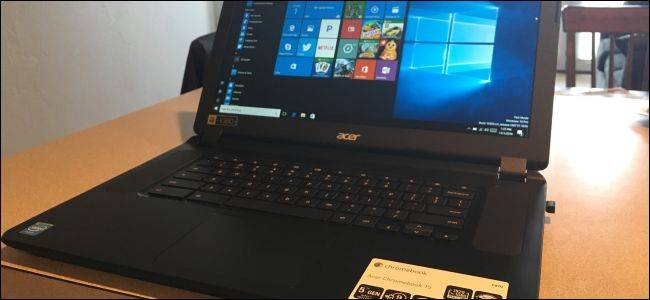
Chromebooks don't officially support Windows. You normally can't even install Windows---Chromebooks ship with a special type of BIOS designed for Chrome OS. But there are ways to install Windows on many Chromebook models, if you're willing to get your hands dirty.
What You Need to Know About This Process
We'll say it again: this isn't officially supported. To do this, you'll have to install a replacement BIOS for your Chromebook (technically it's a UEFI firmware, which is the modern replacement to the traditional BIOS). This will allow you to boot and install Windows. The replacement BIOS can only be installed on Chromebook models that it supports, so you can't do this on every model of Chromebook.
You'll need some additional hardware as well. You'll need a USB keyboard and mouse just to install Windows, because your Chromebook's built-in keyboard and mouse won't work in the installer. And you'll need a PC running Windows to create the USB installation media for your Chromebook.
Even after you install Windows, you won't be out of the woods. Windows doesn't ship with hardware drivers for various pieces of hardware, like the touchpads incorporated into many Chromebooks (which makes sense, since Chromebook manufacturers never bothered creating Windows drivers for these components). If you're lucky, you'll find third-party drivers that were hacked together to give Windows support for these components.
This will also, obviously, wipe your Chromebook, so make sure you don't have anything important stored on it. (You shouldn't, as Chrome OS usually syncs your data with Google.)
If your Chromebook ever appears to freeze or become stuck during this process, bear in mind that you can force the Chromebook to shut down by pressing the Power button and holding it down for ten seconds or so.
Will This Work With Your Chromebook?
You should only try installing Windows on a Chromebook if you know your model is supported. You should also follow instructions for your specific model of Chromebook, as the steps for different models will be a bit different.
Here are some helpful resources:
- Windows on Chromebooks Hardware Support List: This website lists Chromebook models you can install Windows on, complete with information about which built-in hardware components will and won't work afterwards.
- Windows for Chromebooks Installation Helper: This website allows you to select your model of Chromebook and get installation instructions for Windows, complete with links to drivers that will enable hardware on your specific model of Chromebook.
- Chrultrabook Subreddit: A community devoted to installing Windows on Chromebooks. If you want to find more information about whether a Chromebook or specific hardware component can be made to support Windows, this is a good place to search.
If your Chromebook can be made to support Windows, congratulations. We recommend following an installation guide like the ones on the Coolstar Installation Helper site to ensure you're setting things up properly for your specific model of hardware. However, that website's instructions could be more detailed, so you'll probably find some information in this guide that isn't present elsewhere.
We'll provide help by walking you through the process of installing Windows on an Acer C910 Chromebook, codename YUNA. The process will be similar on other models of Chromebook, but some things---like the location of the write protect screw on the motherboard---will be different.
Step One: Remove the Write Protect Screw
Chromebooks have a special hardware feature that prevents you from modifying the BIOS. To disable the write protection feature so you can replace the BIOS on most Chromebooks, you'll need to open up the Chromebook, locate the write protection screw on the motherboard, and remove it. On some Chromebooks, you may find a write protection switch instead.
First, turn off your Chromebook. Don't just put it to sleep---perform a full shutdown. Flip the Chromebook over and unscrew the bottom to gain access to the motherboard. On our Chromebook, this required unscrewing 18 screws before we could remove the plastic panel. Be sure not to lose them! (A magnetic parts tray is a wonderful thing.)

Locate the write protect screw (or write protect switch, depending on what the installation guide for your Chromebook specifies).You may find more documentation about the specific location of the screw by searching the web for the model name and number of your Chromebook as well as "write protect screw". For our Acer Chromebook C910, this SuperUser discussion pointed us at the location of the screw.

There were some other giveaways, too. The write protect screw should look visibly different from the other screws on the motherboard. This particular screw appears a dark gray color on our Chromebook, while the other screws on the motherboard are brighter silver. You can see a bright silver underneath the screw, while the other screws on the motherboard have a bronze color under them.

Remove the screw and reattach the bottom onto your Chromebook. You can now write to and modify the Chromebook's BIOS. Keep the screw in case you want to write protect your BIOS again later.
Step Two: Enable Developer Mode
You'll now need to enable Developer Mode so you can modify the Chromebook's software. To do this on modern Chromebooks, press Esc+Refresh+Power while the Chromebook is powered off. (The "Refresh" button is in the place where the "F3" key would be on a normal keyboard.)
Your Chromebook will boot up and display a message that "Chrome OS is missing or damaged".

Press Ctrl+D and then press Enter to "turn OS verification OFF" and enable developer mode.
Your Chromebook will wipe all your personal data files, resetting itself to the default settings after you do this. You'll have to sign in with your Google account once again. However, all your important data should be synced with online services rather than stored on the Chromebook itself.

When you boot into Chrome OS, you'll see an "OS verification is OFF" message. You'll need to press Ctrl+D to bypass this screen every time you boot. Don't worry---after you flash a new BIOS, this message will go away and your Chromebook will boot straight into Windows when you're done.

Step Three: Flash the New BIOS
From within ChromeOS, you can now flash your Chromebook's new BIOS. Press Ctrl+Alt+T to open a terminal window.
Type "shell" into the terminal and press "Enter" to access a more powerful Linux shell environment.

Download and run the script that will replace your Chromebook's BIOS by copy-pasting the below command into the terminal window and then pressing "Enter":
cd ~; curl -L -O http://mrchromebox.tech/firmware-util.sh; sudo bash firmware-util.sh
This command changes to your home directory, downloads the http://mrchromebox.tech/firmware-util.sh script file, and runs it with root privileges.
Consult the developer's website if you want more detailed documentation about how this script works.

The script presents a helpful interface that will walk you through the process. Choose the "Custom coreboot Firmware (Full ROM)" option in the list by typing "3" and pressing "Enter".

Agree to flash your firmware by typing "y" and then type "U" to install a UEFI firmware. Do not select the "Legacy" option if you want to run Windows.

The script will offer to create a backup copy of your Chromebook's stock firmware and place it on a USB drive for you. Be sure to create this backup copy and store it somewhere safe. This will make it easier to restore the Chromebook's original BIOS in the future.
You don't have to leave the BIOS backup on the USB drive. You'll get a .rom file you can copy off the USB drive and store somewhere safe after the process is done.

After the backup process is complete, the script will download the replacement Coreboot firmware and flash it onto your Chromebook. Power the Chromebook off when it's finished.

At this point, you can re-install the write protect screw, if you want.
Step Four: Create a Windows Installation Drive
You can now install Windows onto your Chromebook, but you'll need to make the Windows installation media first. You can't, however, do it using Microsoft's official method--instead, you'll need to download an ISO and burn it to a USB drive using a tool called Rufus. You'll need to perform this part of the process on a Windows PC.
Download a Windows 10 ISO from Microsoft. Click "Download tool now", select "Create installation media for another PC", and tell it to download an ISO file for you. Windows 8.1 and 7 may or may not work with your Chromebook and its drivers.

You'll also need to download and run the Rufus utility, which you'll use to create your Windows installer USB drive.
Plug a USB drive into the PC. You'll use this USB drive for the Windows installer, and any files on it will be erased. (So make sure you copy anything important before continuing!)
Launch Rufus, select your USB drive, and select "GPT partition scheme for UEFI" and "NTFS". Click the button to the right of "Create a bootable disk using" and select the Windows 10 ISO image you downloaded.
Double check that Rufus actually says "GPT partition scheme for UEFI" before you continue. It may automatically change to the default setting when you select the ISO file. Once you've double-checked all the settings are correct, click the "Start" button to create a Windows installer USB drive.

Step Five: Install Windows
You're now ready to install Windows on the Chromebook. Plug the USB drive into your Chromebook and power on your Chromebook. It should automatically boot from the USB drive, showing you the Windows installer. If it doesn't automatically boot from the USB drive, press any key when "Select Boot Option" appears on your screen. You can then select "Boot Manager" and select your USB devices.

Connect a USB mouse, a USB keyboard, or both to your Chromebook. You'll need to use these while installing Windows. You can get by with just a USB keyboard or USB mouse---but you'll need at least one of them to interact with the Windows installer.
With a USB keyboard, you can use the Tab, arrow, and Enter keys to navigate the interface. With a mouse, you can pull up the on-screen keyboard and use it to type.

Go through the Windows installation process normally, installing Windows on your Chromebook in place of Chrome OS. Feel free to partition the internal drive however you like. We deleted all the internal partitions and told Windows to install itself using the allocated space.
Bear in mind that you don't need a product key to install and use Windows 10. You can always add a product key or purchase a product key from Microsoft from within Windows 10 later.
Don't worry about Chrome OS---if you ever want to replace Windows with Chrome OS, you can easily create a Chrome OS recovery drive on any computer running Chrome and use it to restore the original Chrome OS operating system.

The Windows installer will restart partway through. Be sure to remove your USB drive when it does so, or it will restart back to the start of the installer. If you see the start of the installer screen again, remove your USB drive, long-press the Power button until your Chromebook shuts down, and then press the Power button to boot it back up. It should boot Windows from the Chromebook's internal drive and finish the setup process
Step Six: Install Third-Party Drivers for Your Hardware
You should now have Windows installed, and your Chromebook should boot into Windows when you turn it on. You're almost done! You just need to install third-party drivers to make as much of your hardware work as possible. You'll still need your USB keyboard and mouse for this step.

As these are third-party drivers, they aren't properly signed and Windows won't normally allow them to be installed. You'll need to enable "test signing" to install them. This is a setting designed for driver testing.
To do so, open a Command Prompt as Administrator---right-click the Start button or press Windows+X and select "Command Prompt (Administrator)". Run the following command:
bcdedit -set testsigning on
Restart your Chromebook afterwards.

You can now install the third-party drivers the Chromebook installation guide recommends for your model of Chromebook. For example, on our Acer C910 Chromebook, we had to install drivers for the Chromebook's chipset, Intel HD graphics, rapid storage technology, keyboard, trackpad, and Realtek HD audio.
Windows will show you a security warning when you install the drivers. That's because these are unofficial, third-party drivers that weren't created by the manufacturer and aren't signed by Microsoft. Agree to install the drivers anyway. If you wanted to use only manufacturer-provided drivers, you wouldn't be doing this in the first place!
Afterwards, everything seemed to work properly on this model of Chromebook. We were able to disconnect the USB keyboard and mouse and use the Chromebook normally. The "Search" button on the Chromebook's keyboard even becomes a Windows key.

And there you have it! Your Chromebook is now a very inexpensive, (hopefully) fully-functioning Windows computer. If something ever breaks, be sure to check back with coolstar.org to see if you need to install new drivers or otherwise fix something that a Windows Update broke. Enjoy!