Quick Links
The Curves adjustment layer is one of the most important tools in Photoshop. It's the best way to adjust the brightness and contrast of your images. If you want to get good with Photoshop, you'll need to master Curves.
If you aren't familiar with adjustment layers, you'll want to learn about them before reading this article. So check out our guides to layers and adjustment layers before continuing--and if you're new to Photoshop, you should also check out our 8-part beginner's guide before continuing.
It All Starts with the Histogram
A histogram is a graph of all the tones in your image. Every pixel in a digital photograph has a Luminosity value (that's how bright it is) of somewhere between 0 (pure black) and 255 (pure white).
The histogram graphs how many pixels of each luminosity there are in the image. In the histogram in the image below, you can see there are a lot more pixels with low luminosities (darker colors) than pixels with high luminosities (brighter colors). A quick glance at the actual image confirms it.
Histograms are really useful tools for photographers, and anyone else working in Photoshop, because they show you information that's hard to see directly with your eyes. From a printer's perspective, there's a big difference between something that's almost black and something that's actually black, but it's really difficult to tell the difference just by eyeballing it.
For a more detailed take on histograms and how you can make them better, check out our guide on the subject.
The Curves Adjustment Layer
The Curves adjustment layer is a tool for directly manipulating the histogram. Rather than let Photoshop's algorithms determine how different areas of your image get brightened, you can go in and do everything yourself. Curves are a little trickier to use than a simple slider, but the extra control is worth the complexity.
Let's take a close look at a Curves adjustment layer. You've got the histogram, but on top of that you've got a line sloped at 45 degrees. This is another kind of graph: an Input/Output chart.
The line in a Curves adjustment shows the relationship between the Input and Output for every luminosity value. Input is on the X-axis and Output is on the Y-axis.
While the line is at 45 degrees, every Input value is mapped to the exact same Output value. All the pixels with a luminosity of 100 stay at 100 after you've applied the Curves layer.
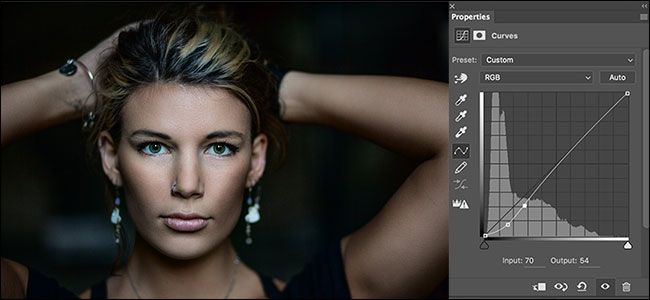
When you change the slope of the line, you change the relationship between the Input and Output values. If you add a point at an Input of 100 and drag it down to an Output of 80, all the pixels that had a luminosity of 100 will now have a luminosity of 80. If you compare the image below to the one above, you'll see it's darker.
Photoshop's Curves aren't a blunt tool, though. If you just changed the luminosity of all the pixels with a value of 100 while ignoring the pixels with a value of 99 or 101, your image would look ridiculous. Instead, the Curves tool changes the Input/Output ratio of all the nearby pixels changes as well. Pixels with a value of 99 will probably be mapped to 79, while pixels with a value of 101 will get mapped to 81. Pixels with a value of 110, will get mapped to around 87 and so on until the curve of the slope smooths out. That's why the image still looks natural.
Using a Curves Layer
Now that you have some idea of how Curves work in theory, let's look at it in action. We'll take the same image, and apply eight different curves to show you how it affects the photo.
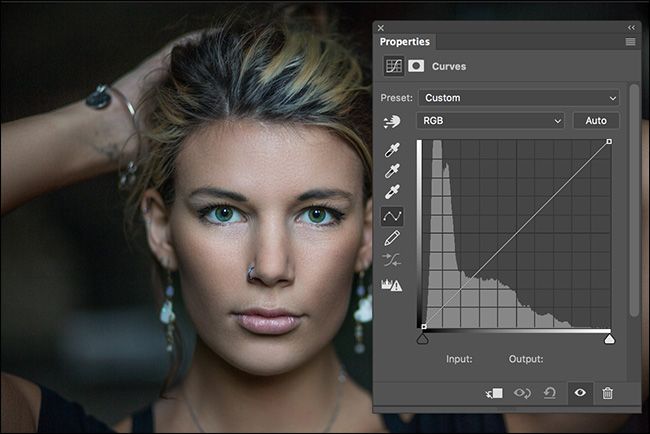
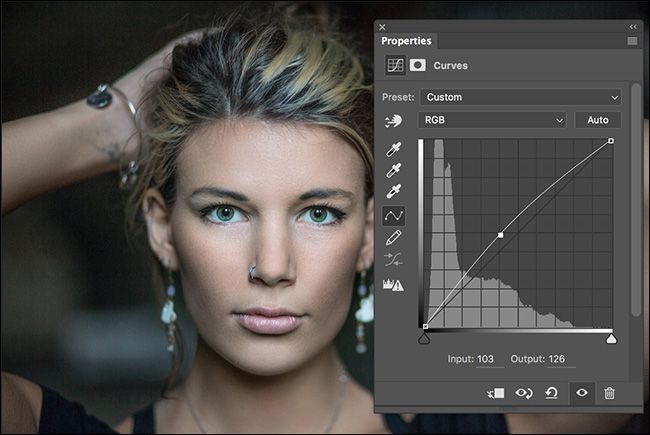
This Curve brightens the pixels with middle luminosity values.
This Curve darkens the pixels with middle luminosity values.
This Curve brightens the pixels with dark luminosity values.
This Curve darkens the pixels with dark luminosity values.
This Curve brightens the pixels with bright luminosity values.
This Curve darkens the pixels with bright luminosity values.
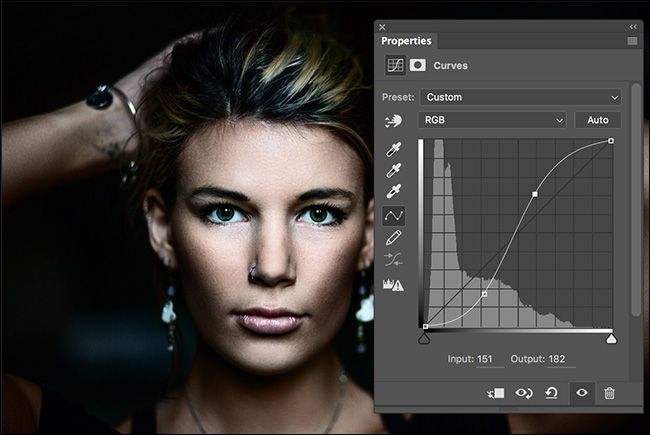
This Curve darkens the dark pixels and brightens the light pixels to add contrast.
This Curve adds contrast, just a lot more of it.
As you can see with all the examples above, Curves layers give you a huge amount of flexibility in how you adjust the brightness of all the different pixels in your image.
Colors and Curves
As well as a luminosity value, every pixel in a color image has a Red, a Blue, and a Green value that lies somewhere between 0 and 255. These values determine its color.
Each color has its own histogram that represents the number of pixels with that specific color value. Like with the luminosity histogram, a Curves layer can be used to manipulate it.
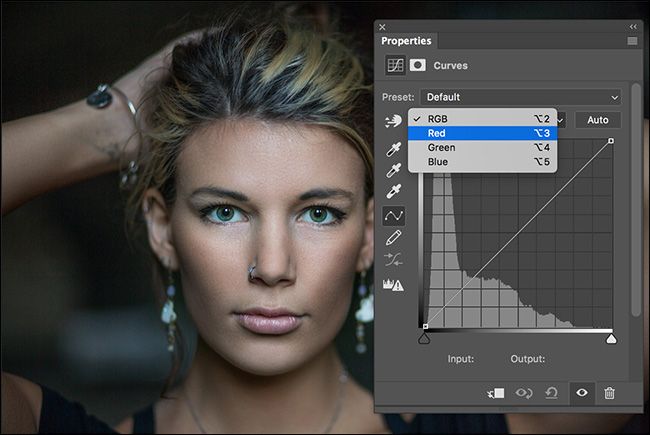
To use a Curves layer to modify the color in an image, add one and click on the dropdown where it says RGB.
Select the color you want to edit and you'll see the relevant histogram.
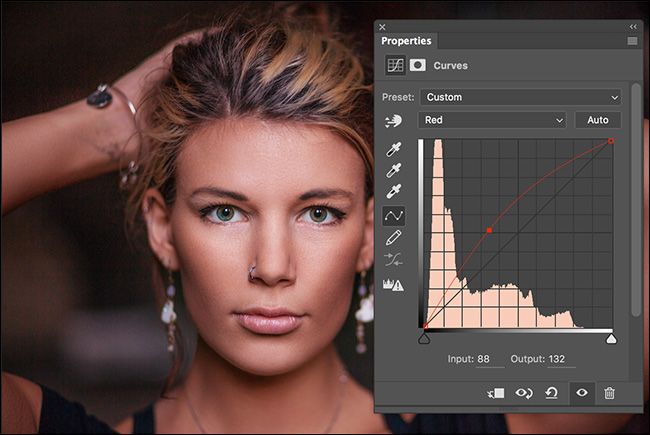
When you edit a color using a Curves layer, you affect every pixel with that color in it. Dragging up on the Red Curve increases the intensity of the reds in the image.
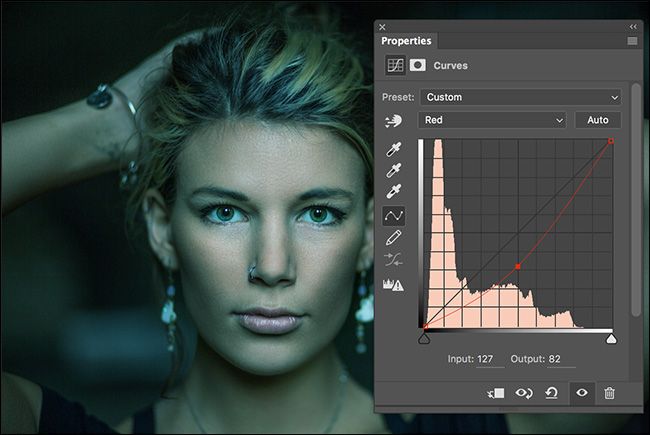
Dragging down on the Red Curve decreases the intensity of the reds and thus increases the apparent intensity of its complimentary color, cyan.
(Green's complimentary color is magenta, and blue's is yellow.)
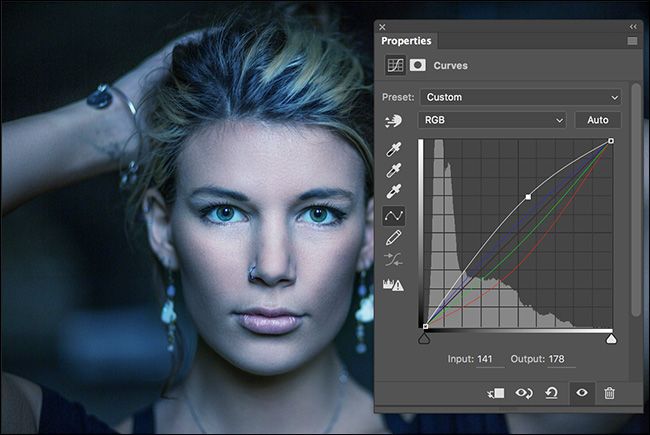
You can combine all four Curves in a single adjustment layer to create different effects. Below you can see an image where I've increased the Blue Curve, decreased the Green and Red Curves, and brightened everything with the RGB Curve.
Color curves are an advanced technique and probably not something you need to focus on when you're just starting out. As you get more skilled with Photoshop, you'll start to encounter situations where being able to manipulate each color histogram individually becomes important. They can be used to do everything from fix color problems to creatively color tone your images.
The Curves adjustment layer is the most powerful way to adjust the brightness and contrast of your images. It gives you total control over how every tone is rendered. Knowing how to use Curves is crucial for anyone who wants to use get the most out of Photoshop.

