Time Machine, macOS’s built-in back up utility, is one of the simplest backup programs around. Here's a tip that a lot of people don't know, though: even if your Time Machine drive isn’t connected to your Mac, it can still protect your files.
If you have a laptop, you probably don't have it connected to an external drive at all hours of the day. So what happens when you accidentally delete a file, but don't have your backup drive plugged in? Time Machine's local snapshots come to the rescue.
Time Machine’s Local Snapshots
Time Machine keeps a collection of hourly, daily, and weekly backups. Hourly backups are kept for 24 hours, daily backups are kept for a month, and weekly backups are kept indefinitely, as long as there is space on your Time Machine drive.

When your backup disk isn’t connected, Time Machine can’t save any information, so it stores the backup data on your startup disk as a Local Snapshot. When you connect your Time Machine drive, the backups are copied across to it.
Since OS X Lion, MacBooks will keep Local Snapshots while there is enough free space on the startup disk. As long as the hard drive is less than 80% full, Time Machine will keep as many Snapshots as it can. If the hard drive gets more than 80% full, Time Machine will start deleting the oldest backups. The fuller the startup disk, the more aggressively Time Machine deletes older backups.
Local Snapshots aren’t a true backup, of course, since the information is all stored on the same disk. If your hard drive gets damaged, they’ll vanish along with every other bit of data.
But, Local Snapshots can still be useful for restoring corrupted or accidentally deleted files. If a Word document goes bad while you’re working on it—which is the data disaster that inspired this article—you can jump into Time Machine and restore a version that is, at most, an hour old.
How to Recover Files from Local Snapshots
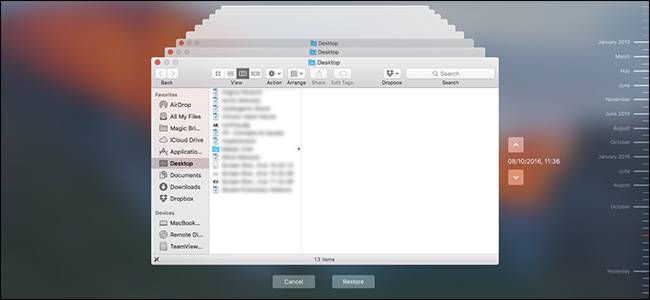
To recover a file from a Local Snapshot, click the Time Machine menubar icon and select Enter Time Machine.

A Finder window will appear that you can use to browse your Mac’s file system. You can go back to previous backups by clicking on the arrows or on a specific date in the sidebar.

Without your Time Machine drive connected, you’ll only be able to browse backups that exist as a Local Snapshot. If you keep a relatively empty hard drive, these could go back for months.

To restore a file or folder from an older version, select it and click the Restore button, just like you would in any other Time Machine session.
Local Snapshots are a nice extra fallback, but they’re not something that should be relied on. It's just another safety net behind your regular backups. My Mac is almost maxed out on storage space, so I only had a couple of Local Snapshots to work from. (And if you'd rather have that free space, you can always delete the Local Snapshots too.) If you need to go back an hour or two, you should be fine; just don’t count on a file you deleted last month still being around.