Quick Links
A good set of fans can keep your computer from overheating, but they can also make your computer sound like a wind tunnel. Here's how to control your PC's fans for superior cooling when it's working hard, and silence when it isn't.
Sure, you could connect a manual fan controller to your PC, with knobs that set fans to different speeds. But there's nothing quite like automatic fan control, where your PC ramps up the fans when things get hot, and turn them down when it's business as usual.
How you control your fans depends a lot on your computer, your fans, and how everything is put together, so let's start with some basics.
Do I Really Need This?
Let's start with a really simple question: Do you really need to customize your fan control?
If you are using a laptop or other off-the-shelf computer (like a Dell), chances are your computer automatically controls its fans to some extent already. If your computer is getting hotter than you'd like, or your fans are louder than you'd like, you should do a couple of other things first:
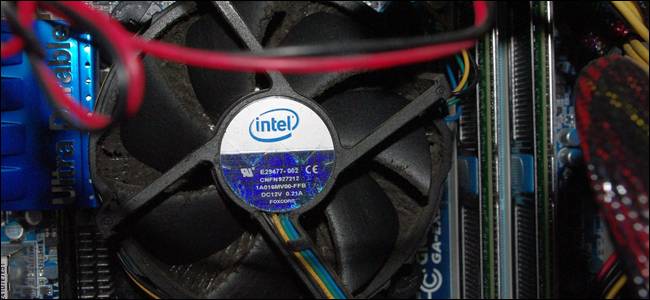
- Open your computer and check for dust buildup. If it's dusty, clean it out (especially the fans) with some compressed air. We have entire guides on cleaning out desktops and laptops.
- Make sure your computer is well ventilated. If you're using a desktop, make sure there's some space around the case, not pushed up against a wall or in a closed cupboard. If you're using a laptop, try to keep it on a flat surface where the rubber feet can allow air to pass under it, rather than using it on top of a blanket or mattress.
- Check your running programs. Open up Windows' Task Manager and see if there are any programs working hard that shouldn't be. If your computer is constantly working hard due to a runaway program, its fans are going to run much more often.
But let's say you're still not satisfied. Depending on your computer, you may be able to change how hard and how often the fans run to cool down your PC. This is especially common (and necessary!) with home-built computers, but can sometimes work on pre-built desktops and laptops as well---though your mileage may vary.
The Different Ways Fans Connect to Your PC
The fans in your computer can get power in one of two ways: From the motherboard, or directly from your computer's power supply. If they're connected to the power supply (usually through a Molex connector), there's no way to control them through software---you'd have to hook them up to a hardware fan controller.

If you can connect them to your motherboard, however, you may have options.
Motherboard-connected fans come in two varieties: those with 3-pin cables, and those with 4-pin cables. In addition, your motherboard can either have 3-pin sockets or 4-pin sockets (or both!). Having a 4-pin fan connected to a 4-pin socket is ideal, since 4-pin connections allow your fans to be controlled through pulse-width modulation, or PWM.
If your motherboard only has 3-pin connections, though, you can sometimes control the fans by changing the voltage supplied to the fan. Not all motherboards support this, so you'll probably have to check your motherboard's manual or search the web for answers. In addition, voltage control isn't quite as smooth as PWM---but it'll get the job done.
And, to make matters even more confusing, you can connect 3-pin fans to 4-pin sockets and vice-versa, as shown above---you just won't be able to use PWM control.
Having trouble understanding all that? Here it is in flowchart form:

Got it? Alright, with that, let's talk about the different ways you can control those fans.
For Simple, Built-In Controls: Check Your BIOS
A lot of modern computers have fan controls built right in---you just need to dig into the BIOS. To access the BIOS, you'll need to reboot your computer, and then press a certain key as it boots---usually Delete or F12. Your boot screen will let you know which, with a line like "Press DEL to enter setup".
Once in the BIOS, you may have to hunt around to find your fan controls. I found them under Settings > Hardware Monitor on my MSI motherboard, but the location of yours may vary. (If you don't find them, it's possible they aren't available on your PC.)
Every motherboard's fan controls are different, but most will follow a somewhat similar pattern. You'll get the choice to enable automatic fan control for your CPU fan (which is attached to your processor) and SYS fans (or system fans, which are usually spread around your case).

Your CPU fan will likely have an option for a target temperature, in degrees Celsius, and a minimum speed, either in percentage or RPM. Basically, this allows you to say "Keep my fan at X speed until the CPU reaches Y degrees---then intelligently ramp up the fan to cool it down." The hotter your CPU gets, the faster your fan will spin. Not every motherboard will have all these options---some simplify it more than others---but most will follow this general pattern.
NOTE: If either of these values is too low, you'll run into a bit of an annoyance. Your fan will ramp up to cool the PC, and slow down when it reaches your target temperature. But then your temperature will increase, because the fan has slowed down, creating a situation in which the fan is constantly ramping up, slowing down, then ramping up again every minute or two. If you find that happening, you'll want to raise your target temperature and/or raise your minimum fan speed. You may have to play with these values a bit to get them just right.
Your SYS fans may have similar options, or you may only be able to set them to certain constant speeds. Dig through your BIOS settings and your motherboard's manual for more information on your specific PC.
For example, in my computer's BIOS, I can only automatically control fans based on the CPU temperature. If you want to control your fans based on other values, like your hard drive temperatures, you'll want to take a look at the next section in this article, "Get More Advanced Control with SpeedFan".
Some motherboards may also come with their own applications to control the fans, in addition to the built-in BIOS options. We won't go over these today, since they're dependent on your motherboard and will be different for everyone---and the BIOS options are usually a better choice.
Get More Advanced Control with SpeedFan
If your computer's BIOS doesn't have enough options for you, you can get more control with a Windows program called SpeedFan. It's a little more complex, and somewhat old at this point, but it allows you to control fans based on the temperature of any component (not just your CPU), and allows you to monitor everything from one window. Due to its complexity, though, we only recommend you download this application if you're an advanced user. You're messing with your computer's cooling system, and if you aren't careful, you could damage your hardware.
Also, keep in mind that SpeedFan will not support every computer, so not everyone will be able to control their fans with this program. But, when it works, it's pretty useful. You can check SpeedFan's list of supported chipsets here, or just give it a try for yourself. Even though my motherboard wasn't listed, it still worked well on my home-built PC. If at any point you find these instructions aren't working for you, it may just be because your motherboard or fan setup is incompatible with SpeedFan. Don't feel bad---you aren't the only one.
NOTE: Turn off any fan settings in your BIOS before using SpeedFan, as the two can conflict. If you altered any settings using the above instructions, head back to your BIOS and set any smart fan functions to "Disabled", and all your fans to 100% before continuing.
Step One: Download SpeedFan and Get Acquainted
Download SpeedFan from its home page and install it (watch out for the ads on the download page---the real download link is much smaller, where it says "the latest version is ___"). Start it up, and---after giving it a few seconds to scan your machine---you'll see the main window.
On the left, you'll see a column that shows how fast your fans are running in rotations per minute (RPM). On the right, you'll see a list of temperatures for your graphics card, motherboard chipset, hard drives, processor, and more.

SpeedFan, unfortunately, doesn't always label thing super descriptively. For example, in my screenshot, you'll notice that some sensors are just called "Temp1", "Temp2", and "Temp3"---in my case, these are motherboard and system temperatures. HD applies to my hard drives, and "Core" 0-5 apply to the six cores on my CPU. (Note: Some AMD machines may have a "CPU Temp" and a "Core Temp"---Core is the one you want to monitor.)
In addition, not all of your sensors may be visible in SpeedFan's main window, depending on how many you have. If you click the "Configure" button and go to the "Temperatures" tab, you'll see a full list. If you aren't sure what any of these sensors are, you might try downloading a tool like HWMonitor and matching its values up with SpeedFan's so you know what's what.
You can rename any sensor from this window, which is useful if something doesn't match up with what you see in HWMonitor. You can also drag them around to reorder them, and those changes will appear in SpeedFan's main window after you click OK.

You may also note that some values are absurd---like my Temp2, Remote 1, and Remote 2 temperatures, which show as -111 degrees Celsius. That obviously isn't accurate, and usually means there is no sensor for that entry. From the Temperatures tab, you can uncheck these sensors to hide them from SpeedFan's main window. You can also uncheck other items you don't need to see---for example, I've chosen to only show my CPU's hottest core, rather than all six. This helps declutter the main window.
In general, GPU, HD, and CPU (or "Core") temperatures are the ones you'll want to watch most closely.

Lastly, you can also put an icon in your system tray that will monitor your system's temperatures, which is useful as you configure SpeedFan. You can customize this icon in SpeedFan's configuration under the Options tab.

Now that you've gotten acquainted, it's time to actually make use of this program.
Step Two: Test Your Fan Controls
Let's start playing with some fan controls. Click the Configure button and head to the Advanced tab. Click the "Chip" dropdown and choose your motherboard chipset from the list. Click the "PWM Mode" options and make sure they're all set to "MANUAL" using the dropdown at the bottom of the window.
NOTE: You may have multiple "Chips" in the topmost menu, so check them all---I had two items that started with "F" that I had to tweak.
Before you adjust anything else, go to the Options tab and check the "Set fans to 100% on program exit" box. This ensures that if you accidentally exit SpeedFan---which would then cease to automatically adjust your fans---your fans will ramp up to 100%, ensuring they don't get stuck at a low fan speed and overheat your computer.
Now, click OK to go back to the main SpeedFan window. Use the arrow buttons to raise or lower the speed of your first fan---in my case, Pwm1. As I changed its speed, I could see the RPM values change for Fan1---so I deduced that Pwm1 controls Fan1. Since I can also hear and see the inside of my computer case (you may need to open yours up), I know that this is the fan connected to my CPU.

So, in the "Fans" tab of the configuration window, I've renamed Fan1 to "CPU Fan". I've also gone to the "Speeds" tab and renamed "Pwm1" to "CPU Fan". To rename an item, just highlight it and press F2. When you press OK, the changes will propagate to the main SpeedFan interface, as shown below.

That makes things a little clearer, doesn't it?
You can repeat this process with your other fans. In my case, my CPU fan is the only 4-pin fan in my computer, and my motherboard doesn't support voltage control for my 3-pin fans. So I'm basically done. But I'm going to rename the other fans anyway, and remove sensors that aren't attached to a fan---just so I can keep track of which ones are which.
Step Three: Customize Your Automatic Fan Controls
Alright, now that we've organized all our sensors and fans and given them proper names, it's time to set up automatic fan control.
Click the Configure button to head back into the configuration menu. Most of what we want is in the "Temperatures" tab. We're going to set certain fans to speed up or slow down based on the temperatures of certain sensors. So, for example, we can set our CPU fan to speed up when our CPU gets hot, thus helping it cool down. You could also, for example, set your front chassis fans, which are next to the hard drive, to speed up when the hard drives get hot. You get the idea.
From the "Temperatures" tab, click on the plus sign next to a sensor to see all the fans it can control. Check the fans you want it to control. In my case, I want "Core 5" (my hottest CPU sensor) to control my CPU fan---so I'll check that.

Then, select the sensor itself---in my case, I clicked on "Core 5"---and you'll see a few more options at the bottom of the window: "Desired" and "Warning". "Desired" is the temperature at which the fans will start reacting. "Warning" determines at what temperature SpeedFan warns you that a component is getting hot (with a little flame icon next to the temperature), and starts running the fans at 100%.

In my case, my CPU is overclocked, which means it runs a little bit hotter---and I'm going for silence whenever possible. So I'll set my "Desired" temperature to 55, and my "Warning" temperature to 80. Your values may vary for your particular CPU, fan, and preferences.
Click OK when you're done, and repeat this process for any other sensor you want to affect your fans.
Lastly, head to the "Speeds" tab, and select a fan. You'll get two options: "Minimum Value" and "Maximum Value". These do exactly what they sound like---the minimum value is the speed the fan will run when your temperatures are below the Desired you just set, and maximum is the maximum speed when it's between Desired and Maximum. (Once your temperature reaches maximum, the fan in question will always run at 100%.) You may be able to set some fans to a minimum of 0 if they're not directly connected to a component (like your CPU), keeping your PC extra quiet---but note that some PWM fans may not work at 0% in SpeedFan.
Check the "Automatically Variated" box, and repeat this process for all your fans that are affected by a sensor. Click OK when you're done.

Again, these are just my values---I have a particularly large heatsink, so 15% is a pretty safe number. If you have a smaller heatsink, as most computers do, you may want to set your minimum higher than 15% to start.
Lastly, back at the main SpeedFan window, check the "Automatic Fan Speed" box. Keep an eye on your fan RPMs and temperatures---you should find that they react just as you set out in the Temperatures and Speeds tab.

NOTE: If your "Desired" or "Minimum Speed" is too low, you'll run into a bit of an annoyance. Your fan will ramp up to cool the PC, and slow down when it reaches your desired temperature. But then your temperature will increase, because the fan has slowed down, creating a situation in which the fan is constantly ramping up, slowing down, then ramping up again every minute or two. If you find that happening, you'll want to raise your "Desired" temperature and/or raise the "Minimum Speed" level for that fan. You may have to play with these values a bit to get them just right.
Step Four: Set SpeedFan to Start Automatically
Now that your fan configurations are all set, you'll want to ensure SpeedFan is always running, keeping your machine cool and quiet.
First, we'll set SpeedFan to start with Windows. Strangely, SpeedFan doesn't have a built-in option for this, so we'll do it manually with Windows' Startup folder. Open the Start menu, navigate to SpeedFan's programs entry, and right-click on the SpeedFan icon. Go to More > Open File Location.

Right-click on the SpeedFan shortcut and select "Copy."

Then, in File Explorer, type
shell:startup
into the address bar, and press Enter. This should bring you to the Startup folder. Right-click on an empty area to Paste a shortcut to SpeedFan in this folder.

This will ensure SpeedFan starts whenever Windows does.
Lastly, from SpeedFan's main window, click Configure and go to the Options tab. Check the "Minimize on Close" option. This ensures you won't quit SpeedFan accidentally. You can also choose to check "Start Minimized" if you don't want to see the SpeedFan window every time you start your PC.

As you use your computer, keep an eye on those speeds and temperatures for a few days to make sure everything is working as intended. The last thing you want to do is fry your CPU because of a typo. If anything ever doesn't seem right, go back into SpeedFan's settings and adjust your configuration.
But, provided everything works properly, you're all done! SpeedFan has even more options (you can even create your own response curves with "Advanced Fan Control" in the "Fan Control" tab), but this basic setup should be more than enough for most people. A little configuration is all it takes to keep your computer cool when it's working hard, and quiet when it isn't.
Image Credit: Kal Hendry/Flickr