Quick Links
Are you sick of Kodi's YouTube plugin constantly crashing, and giving you cryptic error messages like "Exception in ContentProvider" and "Quota Exceeded"? Here's how to fix that problem with just a few minutes of work.
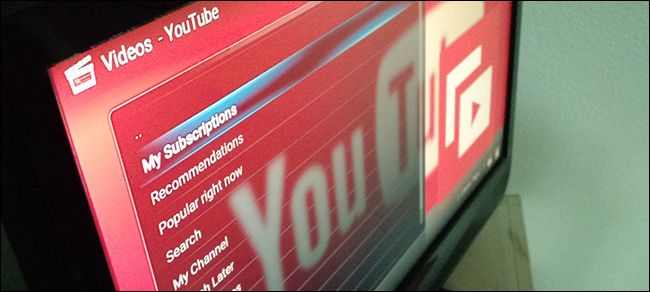
We've shown you how to watch live TV on Kodi, but to be honest I don't do that very often. YouTube is better than television, and Kodi puts YouTube right on my TV. The remote-driven interface makes it easy to browse my subscriptions, and to check out any channel's complete archives and playlists. Binging YouTube channels is bliss.
But lately, YouTube on Kodi is buggy, with error messages popping up when I try to do basic things. The problem, it seems, is related to the API keys used by add-on developers. Google (which owns YouTube) caps API usage, and Kodi's rapidly growing user base means the YouTube plugin hits that cap every day, typically long before I start watching videos in the evening on the west coast.
I was able to write these instructions thanks to steps outlined on the official Kodi forum, by forum member jmh2002. That outline is great, and I'm thankful for it, but I thought users might like easy-to-follow instructions with screenshots.
Hopefully Google and the Kodi team can work out a long-term solution. In the meantime, however, you can fix YouTube yourself, by creating your own API keys. Here's how.
Step One: Set up a Project In Google Cloud Console
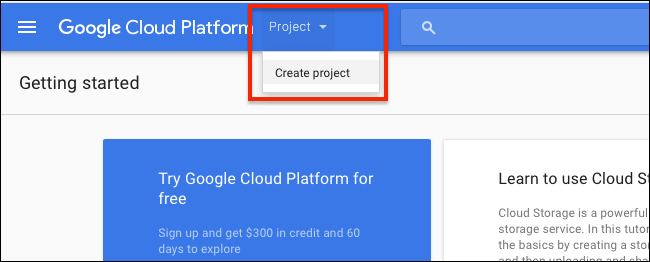
First, head to Google Cloud Platform. Once there click "Project", then "Create project."
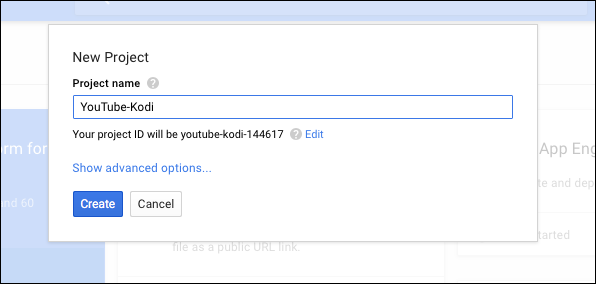
Name your project whatever you like; I went with "YouTube-Kodi".
While you're doing this, feel free to ignore any calls to pay for Google's service. That's for serious developers, and you're just some person trying to get YouTube to work.
Step Two: Enable YouTube Data API
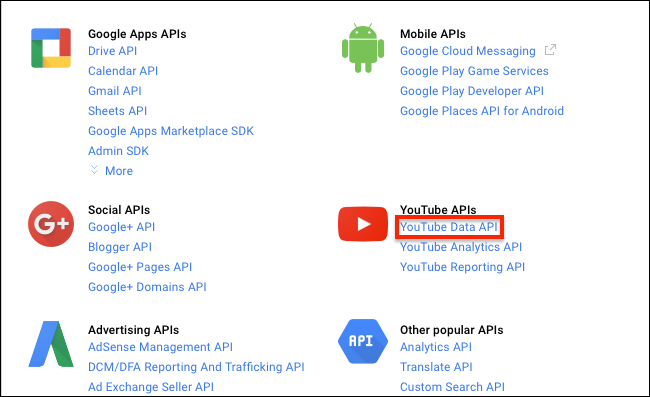
Next, head to the Libraries section on Google Cloud Console. Click "YouTube Data API".
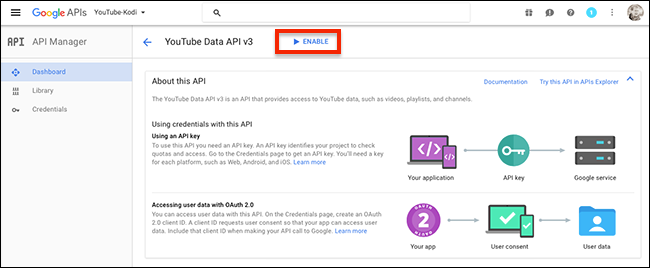
On the next page, click "Enable."
There is a chance you'll be told to create a project first, even though you just created one. If that happens, you're going too fast, apparently. Wait a few minutes and try again, you speed demon you. You may also need to click "Create Project" and select your new YouTube-Kodi project from the list.
Step Three: Create an API Key
Next, head to the credentials page. Click "Create Credentials", then "API Key".
A window will pop up with your shiny new API key, a 39-character string of numbers and letters. Copy the entire key, and save it in a document on your computer. Label it "API Key" for your own reference.
Step Four: Create Some More Credentials
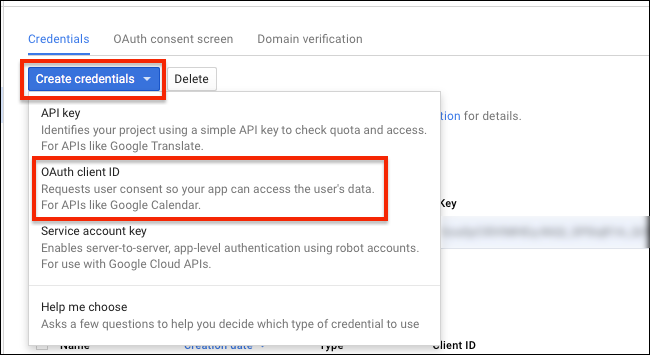
Staying on the Credentials page, click "Create Credentials" followed by "OAuth client ID".
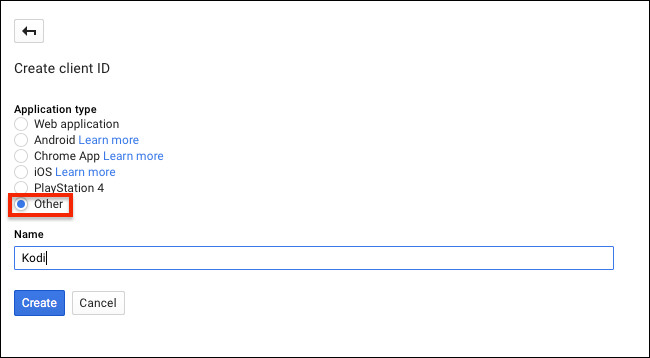
On the next page, click "Other", then choose whatever name you'd like. (I went with "Kodi".)
Click "Create" and you'll be given two new keys: a "client ID", a 45-character string of numbers and letters followed by "apps.googleusercontent.com". Copy this to your reference document, removing "apps.googleusercontent.com" and labeling the key "Client ID" for reference.
You'll also get a "Client Secret", which is a 24-character string of letters and numbers. Copy this to you document, labeling it "Client Secret" for reference.
Step Five: Paste Your Keys Into YouTube
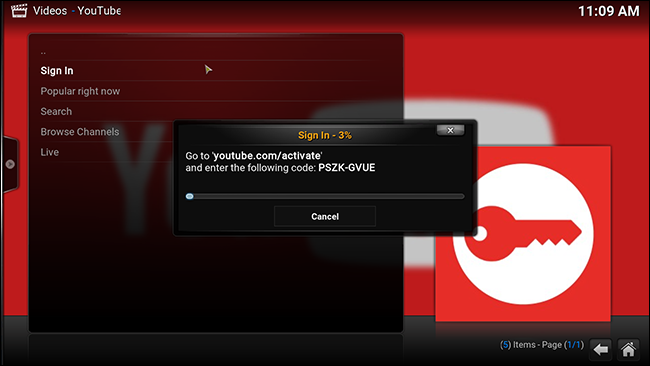
Now we're ready to fire up Kodi and finally fix this thing. If you haven't already, sign into your YouTube account inside the Kodi YouTube plugin. You'll be asked to head to youtube.com/activate and enter an 8-digit code. You can do this on any device, not just the device Kodi is running on.
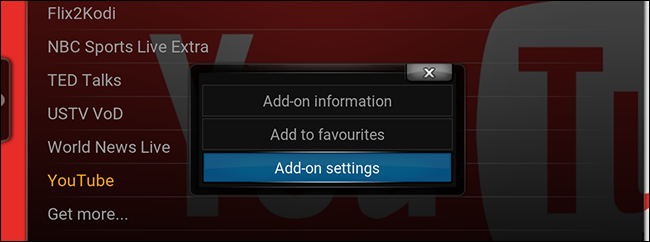
Do this twice, as instructed. Next, pull up the sub-menu for the YouTube plugin. You can do this by selecting the plugin, then pressing the letter C on your keyboard.
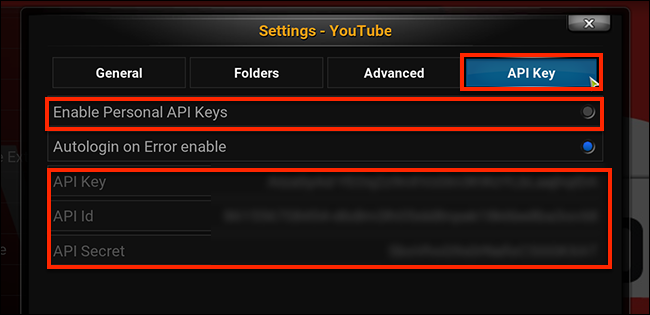
Open "Add-on settings", then head to the "API Key" tab.
Ensure "Enable Personal API Keys" is turned on, then paste the keys you gathered earlier in the appropriate places. (My keys are blurred out in the image above so you don't steal them. Get your own keys, guys.)
A Few Features Are Still Broken
After setting up my own API keys, YouTube basically works for me again. Browsing my subscriptions and popular videos is fast, as is browsing YouTube channels. Error messages are a thing of the past.
Having said that, two features still don't work for me: my Watch Later List, and my History. These features have problems outside the API, and hopefully will be patched in future releases of the add-on. Beyond that, I couldn't be happier. I have YouTube back in Kodi, and all is right with the world. I hope this tutorial helps you too.

![create-credentials]](https://static1.howtogeekimages.com/wordpress/wp-content/uploads/2016/09/create-credentials-1.png)
