Quick Links
When you press and hold the power button on your Android device, the power menu appears. Unfortunately, on a lot of devices, it only has one option: Power Off.
It'd be a lot more useful to have some other options there--like reboot, reboot into recovery, or even an option to take a screenshot. And thanks to a little tweak called NeoPowerMenu, it's totally possible. NeoPowerMenu is an Xposed module that allows you to both customize the power menu's visual appearance and add a lot more options. Here's how to set it up.
Step One: Install the Xposed Framework
Let's start with the obvious: you will need to be rooted for this. While there are some tweaks you can make to your device while unrooted, this one is unavoidable. Go check out our in-depth explanation on how to install Xposed (perhaps using the new systemless method for Marshmallow), and then come back here for the rest of the instructions.
Also, remember to back up your device before getting started. You don't want to tinker with system files unless you have a backup in case something goes wrong.
Step Two: Install the NeoPowerMenu Module
With the Xposed Framework installed, find the Xposed Installer app in your app drawer and open it. Then, Click on Download.

Click on the magnifying glass icon at the top.

Then search for NeoPowerMenu.

Tap on that and you'll be taken to the Description page. Swipe to the left to go over to the Versions page.

Then tap Download for the most recent version.

Once it's downloaded, tap Install in the lower right corner.

After that, you should get a notification that says "Activate and Reboot"--press that. If you don't see the notification, you can always manually activate it under the Modules section of Xposed and then reboot.

Step Three: Customize the Menu to Your Liking
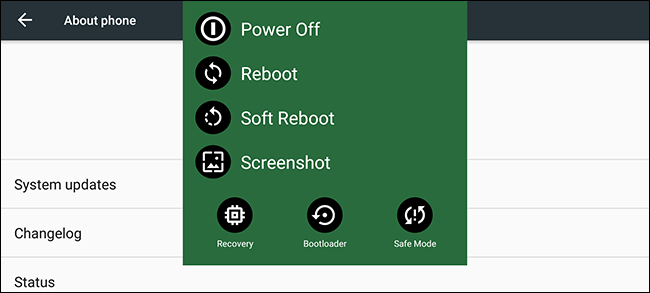
When you first look at your power menu after rebooting, it might look a little something like this:

If you don't like this look, don't worry! It's super customizable. Just look for the NeoPowerMenu app in your app drawer and open it.

You'll first be presented with a list of permissions that the app needs. It offers a little explanation for each permission, but if you don't plan on using a particular feature (like Torch) you don't need to approve its corresponding permission (in this instance, Camera).

Because permissions were revamped in Marshmallow, you'll have to approve each of these individually.

After that, you'll finally be at the app's main screen. There's currently only one Style, and that's Material. Most of the visual changes are made under Theme, where you can adjust the colors for everything.

The "Reveal colors" are the colors that make up the animation as the power menu pop-up appears and the background color behind it. If you'd rather it not have a background, you can just make the colors transparent.
"Dialog colors" affects the actual look of the pop-up, and all the options below that are for the colors of the different dialogs you'll see after activating something. For instance, your "Powering off..." screen could be a different color than your "Rebooting..." screen.
You can preview any of your changes at any time by tapping the Preview button in the upper right (or by holding the power button).
In the Graphics section, you can set custom icons or images for the circles that appear next to each option in the power menu. By default, it's set to display the first letter of the option (like T for Torch), but you can change it to use graphics instead under Advanced Settings.

In the Visibility and Order section, you can add the real functionality by customizing how your options appear and which options are there. Just grab the three-line icon on the left to rearrange them, or add options with the buttons along the top. Swipe options to the side to delete them.

If you head into Advanced Settings, you can change where the dialog box appears--in case you have a large screen and want it to appear on the right side so you can tap it with your thumb more easily.

Another really convenient feature in Advanced Settings is the ability to set a screenshot delay, so you can capture your screen at just the right moment.
After you've gone ahead and tweaked all the settings to your liking, feel free to leave the app and hold down the power button to test it out.

Other Methods of Changing the Power Menu
Now this certainly isn't the only method for getting a customizable power menu -- it's just a good dedicated way. The GravityBox Xposed module also includes some of these options, among many, many others that let you customize your device--like the Quick Settings menu.

If that doesn't accomplish everything you need, you could go a step further and flash a custom ROM. This basically replaces your current software with a new, highly customized version -- and many custom ROMs sport a really nice power menu (as evidenced by the Darkobas ROM for the OnePlus One, shown above).
One of these methods should allow you to have a new and much-improved power menu. You can access all kinds of settings just by holding the power button and adjusting them to your liking -- and that's exactly the kind of customization that Android was made for. It's just one of many tweaks you can make with the Xposed Framework, though, so don't hesitate to go searching for even more modules.