Quick Links
Whole-house audio solutions are expensive, and often difficult to set up. Today we're going to take you from a no-house audio system to a whole-house audio system in matter of minutes with the Google Chromecast Audio.
Speaker setups that play the same music throughout your house typically range from sort-of-expensive to really expensive. On the sort of expensive side you can buy multiple $99 Apple Airport Express relay stations to connect your speakers via AirPlay. On the really expensive side of things you'll find the Sonos system, which will run you in the thousands of dollars to outfit a whole home as each speaker adapter costs $349.
That's great if you can afford it and the solution offers something you want. Apple's AirPort has other features, like network extension, for example. Sonos has its own line of high quality wireless speakers. But for people who are a little more cost conscious, don't need the extra features, and have plenty of speakers on hand they can use for the task, there's a much cheaper and easier solution: the Google Chromecast Audio. For $35 a pop (and often on sale for $30), you can quickly outfit your home, top to bottom, with a system that's as dead simple to use as Google's popular Chromecast streaming video solution.
Let's take a look at exactly what you need and then we'll turn our attention to setting up the actual Chromecast Audio and creating a whole-house network.
What You'll Need: Preparation Is Key
When writing this tutorial, we timed how long it took us to go from no-house audio to whole-house audio. Even pausing to take screenshots along the way, the total time was under five minutes.
Putting aside how easy the Chromecast system is to use, the reason we could so easily set up the system was because we knew exactly what we needed and we could easily plug the Chromecast Audio in and get rolling in a matter of seconds at each speaker location.
If you go into the experience with the same level of knowledge and preparation, you too can roll out your audio system in a matter of minutes. Let's look at what you need.
Amplified Speakers
This guide may be about the Chromecast, but without proper speakers hooked up to it, you've got nothing. This guide generally assumes you already have some speakers lying around (since speaker recommendations would be a whole article unto itself), but there are a few things to keep in mind as you prepare them for the Chromecast.
What makes a speaker proper for our purposes? Speakers can be broadly classified into two categories, active and passive, based on a simple distinction. If your speakers have their own power source (be it from wall current or batteries), they are active speakers. If your speakers only have speaker wire terminals on the back, they are likely passive, which means they don't have an internal power source. Instead, they require a receiver or amplifier to pull electricity from your wall and power them.
Active speakers can plug directly into the Chromecast (or any other sound source, like your iPhone or a CD player) and they will amplify the sound.
If you have an old pair of great sounding passive Hi-Fi speakers, however, you'll need to plug the Chromecast into a receiver or amplifier, then plug the speakers into that same receiver or amplifier.
While speaker amps are an article (and hobby) unto themselves, you can get by with a simple amplifier intended for use with passive stereo speakers for around $14. Beyond that minor recommendation, however, selecting an amplifier or speakers is beyond the scope of this tutorial--thankfully the internet is packed with audio equipment sites, forums, and reviews so you're sure to find information on any combination of speakers and amplifiers you can think of.
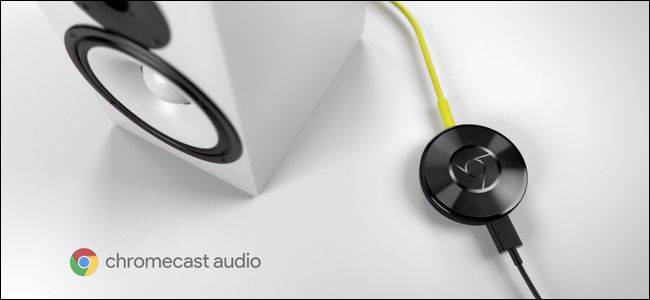
The Chromecast Audio

You will need one Chromecast Audio unit for every speaker set you wish to add to your whole-house audio system. Sadly, even if you already own a regular video Chromecast, you can't use the regular model for this tutorial as the tutorial hinges on the ability of the Chromecast Audio units to be sorted into groups.
This feature is reserved, at the moment, exclusively for the Chromecast Audio. This means even if you already have a regular Chromecast hooked up to your media center receiver unit, you will need an additional Chromecast Audio unit to integrate those speakers into your whole-house solution. We can't tell you how sad we were to find that you couldn't group the regular Chromecasts like you can the Chromecast Audio and we really hope Google fixes this oversight in the future.
Proper Cables

The Chromecast Audio ships with a power adapter and one short 3.5mm stereo cable (aka a headphone style cable, seen in the photo below). Additionally, the Chromecast Audio supports 3.5mm to RCA (the red/white stereo jacks common one everything from speakers to TV sets), and 3.5mm to TOSLINK optical cable for digital audio.
Now is the time to refer to the speaker setup in each location in your house to determine what kind of cable you need for each.
While Google will be happy to sell you a 3.5mm to RCA adapter or optical adapter for $15 each, that's a pretty insane markup for two very cheap cables. You can pick up a male 3.5mm to male RCA cable for around $5. Even though the optical cable on the Google Chromecast shop looks really exotic, it's actually just a TOSLINK mini to TOSLINK adapter cable, and you can skip paying $15 for it and instead pick one up for $6.
The Google Cast App and Companion Streaming Apps
Finally, in addition to all the physical requirements we outline above, you'll need two simple things: the Google Cast app on your smartphone (available for Android and iOS) as well as Chromecast compatible applications for your smartphone or computer.
You need the Google cast app to set up the Chromecasts and configure them, and you need the Chromecast compatible applications to stream the music to the devices. Popular music streaming apps like Spotify, Pandora, and iHeartRadio all work with the Chromecast, and you can even stream music from your personal media collection using Chromecast compatible media management solutions like Plex Media Center.
With all that in mind, let's take a look at how to set up the actual units and get the music playing.
Set Up Your Chromecast Audio Units
We promise you that you've already done all the hard stuff (checking your speakers, potentially ordering adapter cables, and so on). Once you've figured out the lay of the speaker land in your house and got your hands on the actual Chromecast Audio units, the rest of the process takes mere minutes.
Plug in your Chromecast Audio's power cable, plug in the adapter, and hook the unit up to your speakers. We suggest doing the units one at a time (applying power to each unit only after the previous unit has been configured) to avoid confusing them, as they all have generic default names like ChromecastAudio2058.
Turn your smartphone's Bluetooth on from its settings app. Then, launch the Google Cast app. Select the "Devices" tab at the top of the screen, as seen below.

If you have Bluetooth on and are near the Chromecast, it will display the default name of the Chromecast Audio along with the above dialog indicating it needs to be setup. Select "Set Up". After a very brief moment where it indicates the setup process is underway, it will prompt you to play a test sound. Press the button to confirm that the app can send sound to the Chromecast Audio.

Confirm that you heard the sound by selecting "I heard it", or, if you did not, select "I didn't hear it" for troubleshooting help.
Next, you'll be prompted to name your Chromecast Audio and opt to enable guest mode or not (if you're unfamiliar with the Chromecast guest mode, you can read up on it here). Although the app prompts you to use a name like "Living Room", because we already have several regular Chromecast units with names like that we opted to call our Chromecast Audio "Downstairs Speakers". Give your Chromecast an easily identifiable name that distinguishes it from other units (and remember that each time someone gives a network device a nonsensical name, an angel loses their wings).

Next, select your Wi-Fi network and input the password.

As soon as the Chromecast Audio connects to your network, it will search for updates. During that process, it will show you a little video about how to use the device. Wait for the update process to end and then repeat this entire section of the tutorial for each Chromecast Audio unit you have.
Do not move on to the next section of the tutorial until each Chromecast Audio unit is hooked up to its companion speakers, with a unique name, and on your home network.
The Finishing Touch: Group the Chromecasts
This last step is the magic that brings it all together. If you open up a Chromecast compatible streaming app, say Pandora for iOS, at this point, you will see your Chromecast Audio units but you will only be able to stream audio to one of them, as seen below.

That's not really whole-house audio, is it? That's really no better than sending a single stream to a single Chromecast. We need to create a group, so all the grouped Chromecast Audio units will tune to the same stream. To do so, open up the Google Cast app again and select the "Devices" tab just like we did when we set the units up.
Scroll down until you see your Chromecast Audio units. Tap on the little three dot icon located in the upper right corner of the entry for one of the speakers you wish to group together.

From the resulting pop up menu, select "Create group".

Give your group a name and select the Chromecast units that will make up the group. In our example, we have two Chromecast Audio units and we named the group "Whole House". If you've purchased more units, you can easily subdivide things into groups like "Whole House", "Upstairs", "Downstairs", or even "Outside". As long as any given group has two Chromecasts in it, it will work. Click "Save" when you're done naming your group and selecting the devices.

After you create group, it will be listed along with your individual Chromecast devices, as seen below in the "Devices" tab of the Google Cast app.

If you fire up an app with casting abilities, like the aforementioned Pandora app, you'll see that "Whole House" (or whatever you named your speaker group), as seen below.

Now you can select the "Google Cast Group" instead of individual Chromecast Audio units, and whatever stream you've selected will be sent to every Chromecast Audio in that cast group.
Individual apps can offer additional support for the Chromecast Audio (the Pandora app, for example, allows you to control the master volume by tapping the casting icon while the cast is in process, as seen below).

If you want more granular control, however, your best bet is to fire up the Google Cast app and check out the entry for the speaker group, as seen below. While the "Stop Casting" entry is obvious enough, you can tap on the speaker icon to control the speakers.

Using the sliders you can tweak the volume of the different speaker pairs.

This is particularly handy if you left the physical volume of a distant set of speakers turned up and want to quickly rectify the situation without running up a flight of stairs.
Overall, the Google Chromecast Audio experience is super smooth. The only complaint we have about the entire process actually has nothing to do with the process--we just really want the ability to group our regular Chromecasts into audio and video streaming groups! If you're looking for a super cheap way to set up a whole audio streaming solution, however, the Chromecast Audio really can't be beat in terms of price and ease of use.