Rumors abound that Apple will be adding Siri to OS X in the near future, but what you may not realize is you can already control your Mac quite a bit with the built-in Enhanced Dictation feature.
Enhanced Dictation isn't meant to work like Siri. It won't for example, check sport scores or your e-mail, but it does provide quite a few commands you can utilize to control your computer. Today we'll show you how to enable, configure, and use Enhanced Dictation so as to control your Mac using only your voice.

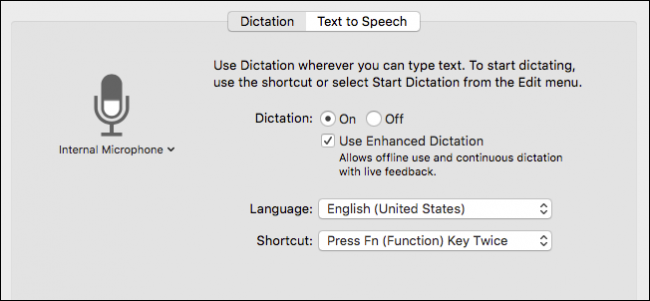
In order for this to work, it must first be enabled. To do this, open the System Preferences and click "Dictation & Speech".

Make sure that Dictation and Use Enhanced Dictation are both enabled. You can also pick a different shortcut to start the dictation tool.

To start the dictation feature, press the "Fn" button twice (unless you picked a new shortcut), which will open a small microphone prompt in the bottom-right corner to let you know that dictation is on and awaiting your commands.

On the whole, dictation works rather well. In fact, we managed to dictate this entire sentence without any error. That said, you probably still want to use the keyboard for most of your heavy writing.
As far as commands go, you may want to adhere to the following guidelines:
- When you use a command, it is best to pause a few seconds before saying the command or it will be interpreted as spoken text.
- If you want to see a list of commands, say "Show Commands" and to hide them, say "Hide Commands".
- If you want to know how to perform a specific action, say, "How do I ..." for example, "How do I quit an application?"

If you want to have greater control over which commands you can use or even create new ones, go to the Accessibility -> Dictation panel and click "Dictation Commands...".

If you want to disable a command, uncheck the box next to it, if you want to remove a command, click the "-" sign.

To add a custom command, click the "+" and then you'll be able to add a phrase, pick an application and an action to perform.

To achieve good results when creating commands, use the following guidelines:
- Use at least two words or more; avoid using names consisting of one word.
- Don't use proper nouns or words that sound similar to other words.
- Don't use words that are used by other commands, otherwise a warning icon will appear next to the duplicate in the list of commands.
When you're finished, click the "Done" button and your custom commands will appear at the top the "User" section.
If Siri makes its way onto OS X, you will probably be able to trigger it using your voice. You can trigger the dictation feature using your voice too, though it's a little flaky.
To do this, you must first open the Accessibility options found in the System Preferences.

With the Accessibility preference open, use the left-hand navigation panel to scroll down to the bottom where you will find the Dictation tools.

Now, enable and supply a dictation keyword phrase, which simply means that once it's listening, we can prompt the dictation features to start by using the required keyword phrase. To configure the computer to listen for this phrase, click the microphone icon in the menubar and then choose "Listen With Required Keyword Phrase".

Our computer is ready to accept our command once we use the required keyword phrase "Computer".
The unfortunate things about using a keyword phrase is that you can't train dictation to your voice. We didn't have very good luck getting the computer to respond when we used this method, and found the keypress method worked a lot more reliably.
Aside from using the dictation tools to actually dictate text, it's also a pretty cool way to perform quite a few powerful commands. Once you have it enabled, it will save you time and effort, plus it's kind of fun.