Quick Links
So you got a shiny new Android phone. You changed the wallpaper, bought a case that you like, arranged your home screens…you know, made it yours. Then someone calls. Why on earth are you still using a stock ringtone? Get that out of here—it’s time to not only make it look like yours, but sound like it too.
Making ringtones for your Android phone is actually pretty easy, and there are a few different ways to do it: on the desktop, on the web, and directly from the phone. And once you have the perfect tone, all you have to do is drop it into the correct folder (or, in the case of Android Oreo, just add it to the list).
Before we get started, it’s worth noting that you can only do this with files you actually have—streaming music won’t work. Even music downloaded for offline playback from Google Play Music (or similar) can’t be edited, so you must have access to a tried and true MP3 file for this.
Got one? Alright, let's continue.
The Easiest Method: Using MP3 Cut on the Web
Doing things that require software downloads, encoders, and all that other stuff sin’t your flavor? Fret not, dear friend, because like with virtually everything else, there’s a way to do this on the web. It’s arguably easier, so if you’re not a total glutton for punishment, this may be the way to go for you.
While there are undoubtedly several different ways to do this on the web, we’re going to be using mp3cut.net’s online audio cutter for the job, because it lets you open files from your computer, but also sync with Drive, Dropbox, or use a custom URL. Basically, it’s stupid-versatile. Let’s get to it.
Once you’ve opened mp3cut.net, click the “Open File” link. It’s a huge blue box that’s kind of hard to miss. Select the file you want to cut. It’ll upload with a nice pretty animation, and you’ll be ready to go.

The first thing you’ll notice is that MP3 Cut only uses sliders for the selection area—there’s no way to fine-tune it like with Audacity. This can make the process a bit more tedious, but it probably won’t be too bad if you’re not a perfectionist. You’ll also notice that it has options for “Fade in” and “Fade out.” That’s nice if you want the tone to be a bit more subtle.

Go ahead and start moving the sliders till you get your exact selection. If you want, slide the “Fade in” and “Fade out” toggles accordingly.
If, for some reason, you’d rather save this file as something other than an MP3, you can do that at the bottom. Keep in mind, though, MP3s work best for Android ringtones.

When you’ve finalized both the selection and file type, go ahead and click the “Cut” button. It’ll quickly process the file, then give you the download link. It’s all pretty simple.

And that's pretty much it. Your new tone is now ready for transfer—you can check the last section of this guide on how to transfer it over USB or in the cloud.
For the Perfectionist: Use Audacity on Your Computer
Since we want to keep this as cheap as possible, we’ll be using Audacity—a free, open source, cross-platform audio editor—to edit the MP3 file. If you already have some sort of audio editor that you’re comfortable with, you can use that—the instructions probably won’t be exactly the same, but it should at least give you the idea.
Once you have Audacity installed on your computer, you'll need to install the LAME encoder, which will allow you to export MP3 files in Audacity. Grab the one from here and install it. Audacity will automatically find it when it comes time to export your finished ringtone. Make sure you have your MP3 ready to go as well, because you can’t very well create a ringtone without a file to create a tone from, right? Right.
Now that you have all that out of the way, launch Audacity and go to File > Open, then navigate to where your MP3 is saved.

Once opened, Audacity will scan the file and open it in the editor. If you’re not sure which part of the song you want to use as your tone, go ahead and give it a listen. Make sure to pay attention to the “Audio Position” bar at the bottom, which will tell you exactly where you are in the song you are. That way you’ll know just where you want the tone to start.

If you’re having a hard time pinning the exact time down, you can use the “Zoom In” tool in the toolbar. This is invaluable when trying to make the exact selection.
Once you’ve got the perfect starting point, just repeat the process for the end. I find that it’s much easier to just manually type in the “Selection Start” and “End” times than it is to click the perfect spot. Thirty seconds is generally a good amount of time for a ringtone, but you can make it as short or long as you want. If it’s shorter than the average ring time, it’ll just loop. If it’s longer, it won’t play the entire thing.

When you think you’ve got it just right, go ahead and give it a listen. Tweak as needed here to get it exactly right. Be as precise as you can be for the best tone possible.
Now that you have your selection highlighted, it’s time to export it. Head up to File, then choose the “Export Selection” option. Name the file something other than the original, that way you don’t accidentally overwrite the full song with your ringtone, then select “MP3” as the file type. Click “Save.”

If for some reason you want to edit the track’s metadata, you can do that here. I generally just leave it alone though. Click “OK” when you’re finished.

The track will save, and you’re finished. You can close Audacity now—it will probably ask if you want to save changes before closing, but since you’ve already exported your ringtone as a new file, you don’t have to do this. Just click “No.”
Your ringtone is finished—you can jump down to the "Where to Save Ringtone Files" section at the bottom of this guide.
For Convenience: Using Ringtone Creator on Your Phone
Look at you, mobile warrior. You’re not the type to go running towards a computer for every little thing you need, are you? “Nah, I can do this from my phone” you tell yourself. I like your style.
And fortunately for you, creating ringtones on your phone is something that’s super easy to do, thanks to an app called Ringtone Maker. While uniquely named or well designed it is not, it’s functional and easy to use, which is really what we want here.
When you open the app, it should detect all MP3 files on your phone. Opening the file for editing is a little bit counter-intuitive in Ringtone Maker—tapping the song name will simply play it. In order to open it for editing, you’ll need to tap the down arrow on the right side of the file name, then select “Edit.”


Once the editor is open, you can start selecting the section you’d like to save as a ringtone. This is a lot like the above methods, though Ringtone Maker is a bit more like Audacity than MP3 Cut since it allows you to not only use the sliders, but also key in exact beginning and end times.


With the perfect section highlighted, hit the icon that looks like an old-school floppy disc at the top.

That will open the “Save as” dialog, where you can name your tone and specify whether you want it to be saved as a ringtone, alarm, notification, or music. Since we’re doing ringtones here, just use that.

After the file is saved, you can choose to make it the default ringtone, assign it to a contact, or share it right from within the app. Ringtone Maker will automatically save the file in the correct location so you’ll see it in Android’s Settings > Sounds menu, which will make it easy to access later if you decide not to assign it as the tone right now.

That’s it, you’re finished. Wasn’t that easy?

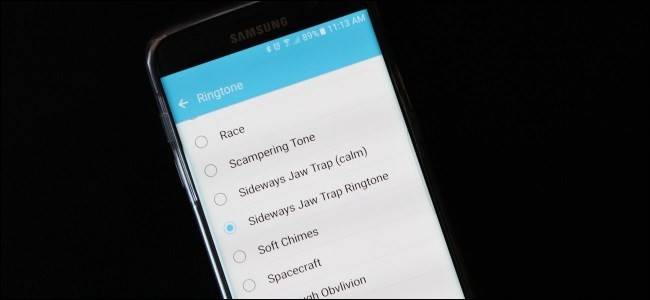
How to Add Ringtones in Android Oreo
In Oreo, you can add your newly-created ringtone directly from the Sounds menu. Thanks for that, Google.
First, pull down the notification shade and tap the gear icon. From there, scroll down to "Sound" and tap it.


Tap on the "Phone Ringtone" entry.

Scroll all the way to the bottom of the list, then choose the "Add ringtone" option. This will open the file picker, where you can navigate to a newly transferred or downloaded tone.


The new ringtone will then show up in the list---keep in mind that it's alphebetized, so it won't be added directly to the bottom. So easy.
Where to Save Ringtones in Android Nougat and Older
If you didn’t use Ringtone Maker, there's one final step in older versions of Android. Android doesn’t scan the whole system for usable ringtones—instead, it just checks one or two locations. So you have to put your MP3 in the right place on your phone.
There are a few ways you can transfer the file to your phone: you can do it from the computer over USB, or just save it to a cloud storage service like Google Drive or Dropbox. It really doesn’t matter which one you choose, though it’s probably a little quicker to just do it over USB.
If transferring over USB, just create a new folder on the root of your device’s storage partition (this is the default location when you open the phone with a file explorer) called “Ringtones,” then copy/paste the file there. No, really, it’s that easy. That’s it.


If you decide to transfer the file using a cloud storage service, just save the file to the Ringtones folder on the root of the storage partition. If that folder doesn’t already exist, just create it.


Android should instantly see your new ringtone in Settings > Sounds > Phone ringtone, but in some cases it may require the phone to reboot before it shows up. You can also assign your custom ringtones to specific contacts, so you always know who's calling.

While creating the perfect ringtone may seem like a slightly tedious process, it’s actually quite simple and gets easier every time you do it. A couple of snips here and there, save the file, and viola! you’ve got yourself a shiny new sound file so you can easily tell your phone apart from everyone else’s. Good for you and your free-thinking self.