Quick Links
Sometimes, all you need out of your Philips Hue lights is for them to just turn on and off when you want them to, but if you're hosting a party or just want to entertain your kids, animating your lights is a great way to kick things up a notch.
While the official Philips Hue app is okay for most users, it's not as feature-packed as some other third-party Hue apps, and iConnectHue is one of our favorites. It's iOS-only and is one of the more expensive options in the iTunes App Store--the iPhone version and iPad version each cost $4.99, and its in-app purchases can have you spending an extra $11 in all. But it's well worth it if you want to add more functionality to your Philips Hue lights.
One feature that stands out in iConnectHue is the ability to create animations, which can bring your Philips Hue lights to life in a way by changing to different colors automatically. The latest version of iConnectHue makes animations even better, sending all animations directly to your Hue Bridge instead of processing it all on your iPhone or iPad, which can save battery life, since you can close the app after triggering an animation.
If this sounds like something you're interested in, here's how to get started creating animations for your Philips Hue lights.
Step One: Download and Set Up iConnectHue
To get started, download and install iConnectHue if you don't have it already. You can type in "iConnectHue" in the search bar and it will be the first result that shows up.

Once it's downloaded and installed, open it up and you'll be prompted to connect your Hue Bridge to the app by pressing the Push-Link button on the Hue Bridge, and then tapping "I'm Done" in the app.

Now you'll be able to access the app and get started with setting everything up. iConnectHue has a ton of features, and there can be a bit of a learning curve, but once you have the basics figured out, it's pretty easy to navigate and control everything.
Step Two: Group Your Lights
You can only create animations for groups of lights, so you'll need to create a group before you can create and use an animation.
Start off by tapping the menu button in the top-left corner.

Select "Controller".

This is where your groups will be displayed, so if you have more than one Hue bulb in a room, you can group them together and control them simultaneously. Go ahead and tap on the "Add group" button.

A list of your Hue bulbs will pop up. Select the ones that you want to put in a group--a checkmark will be placed next to each bulb you select. Hit "Done" when you're finished.

Your new group will appear as "Room".

Go ahead and select it to open up the group and see more options.

Tapping and holding down on the name at the bottom will allow you to rename the group to whatever you want.

Tapping on a bulb in the group will bring up that bulb's color selector, as well as brightness controls.

Double-tapping on a bulb from the Room screen will toggle it on and off, and holding down and dragging a bulb to another one in the group will copy over all of its brightness and color settings.
Step Three: Create an Animation
Within a group, select the small animations button toward the bottom. It's a circle with a play button inside of it.

You'll have access to a small handful of animations for free, as well as the ability to create one of your own. You'll need to spend $2.99 to get the animation editor in order to create and save unlimited animations.

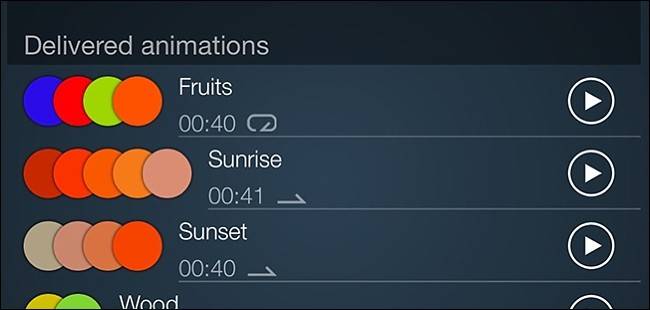
Start by trying out some of the pre-installed animations by tapping on the play button next to the animation you want to see. To stop the animation, just hit the stop button in the same location.

To make your own animation, tap on "Create new animation".

To begin creating your animation, you can either add a "Preset", a "Favorite", or a "Color". You can mix these up, so it doesn't have to be all presets or all favorites. If you just started using the app, it's likely you don't have any presets or favorites saved, so go ahead and tap "+ Color".

Tap and drag on the small circle inside the color selector and move it to a specific color. You can also tap on the "Favorites" button to save that color to your favorites. When you've selected a color, hit "Use color" at the bottom.

This color will appear in the animation diagram at the top.

However, you'll need to add at least one more color to create a full animation, so tap on "+ Color" again and select another color to use. You can add as many colors as you want.
Once you've finished the animation sequence, tap on the red "X" if you don't want the animation to loop and start again when it's done. This will change it to a green checkmark. Leave it as a red "X" if you want the animation to loop over and over again. This can be a little confusing, as the green checkmark makes you think that the animation will loop, but it actually means that it won't loop.

Next, tap in the text box where it says "New animation" and give the animation a custom name if you want.

The next two settings are what give your animation its meat and bones, so to speak. "Fade duration per step (seconds)" is the amount of time it takes for the lights to fade and change to the next color. "Wait after step (seconds)" is the amount of time each color is displayed before the next color is switched to. Adjust these to how you see fit.

After that, tap on "Start" at the bottom and watch your animation come to life!

If you're satisfied, hit "Done" and your new animation will appear in the list of animations at the top.

Again, most of the time you'll likely just want the ability to simply turn on and off your lights, but if there's ever an occasion when you could add a little bit of life to the party, animating your Philips Hue lights is a great way to go.